
Last Updated on October 4, 2022 by Dev Support
At some point or another, every game developer has to create a loading screen. Often, you’ll see a loading screen at the start of a game, or when entering a new area of the game. A loading bar or a spinning icon will pop up, and you’ll have to wait for a few moments. In this post, you’ll learn how to create a loading screen with flashing “Loading…” text that looks like this.

Contents
When to Use a Loading Screen
Loading screens are used when moving models, textures, sounds, and other game assets from a larger storage medium (such as a hard disk drive, optical drive, or the web) into memory on either the motherboard (RAM) or the graphics card (video memory). This is a necessary step because games generally render graphics at 60 frames per second or higher, and the memory on the motherboard and graphics card provides much faster access to the data that’s necessary to render each frame and run the logic of the game.
Unfortunately, computers have limited memory capacity and there’s also a limit to how fast data can be loaded and unloaded; not everything can be read from the hard drive or streamed from the web in real-time. For this reason, sometimes games need to show a screen to the player that indicates the game needs some time to catch up to the action.
There are many ways to load assets into a game, but in Unity, one of the most common techniques is to change from one scene to another.
In some instances, the game itself might take place in a single scene, but a secondary “main menu scene” can be used to allow the player to configure options and choose when to start the game. When the player chooses to start the game, the “game scene” is loaded. This is helpful because it allows the game to start extremely rapidly, because the assets for a main menu scene can be loaded almost instantaneously.
In other instances, a game might be so large that different scenes are required to break up the game. For example, a role-playing game might have a large outdoor area for the player to explore, but once they enter a cave or a building, a loading screen can switch from the outdoor scene to the interior scene.
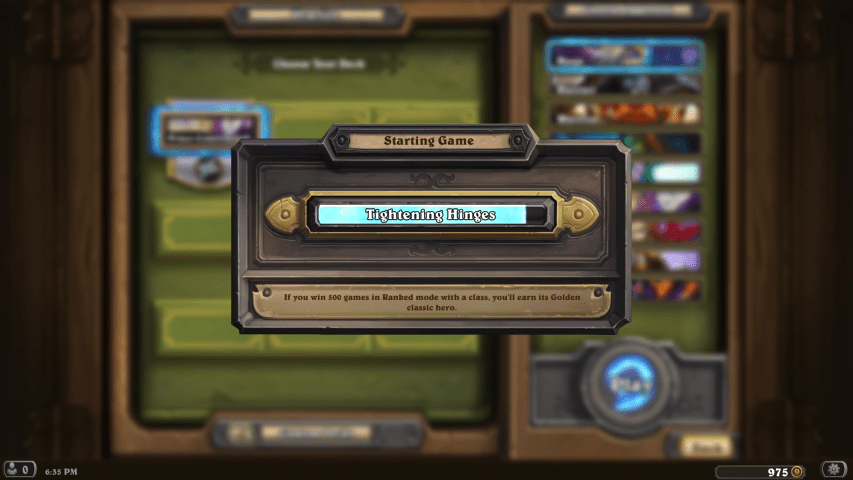
Many games use loading screens as an opportunity to give hints on how to play the game well or build the lore of the game. For example, one of my favorite Unity games, Hearthstone: Heroes of Warcraft has loading screens that give a randomly chosen game tip and also contain amusing flavor text. These types of things make the wait feel shorter because they give the player something to do while the computer is working.
Scene Setup
Connecting two scenes together in Unity is fairly straightforward. The basic setup is simple, and then you can embellish your loading screen with additional animations or funny messages however you’d like.
At a high level, one scene simply needs to load the other. When the loading of the new scene begins, UI text or a loading bar can be presented within the current scene to let the player know that the computer is working. It’s a good idea to add a small amount of animation to the loading UI so that the player knows the computer is still working (and that it’s not frozen).
To create a loading screen similar to the one in this post, you’ll need to create a scene with a UI text game object along with an empty game object to attach the loading script. I’ve called my empty game object “Scene Loader”, but it could be called anything. Here’s what my scene looks like before attaching any scripts (click the image to view the full resolution screenshot).
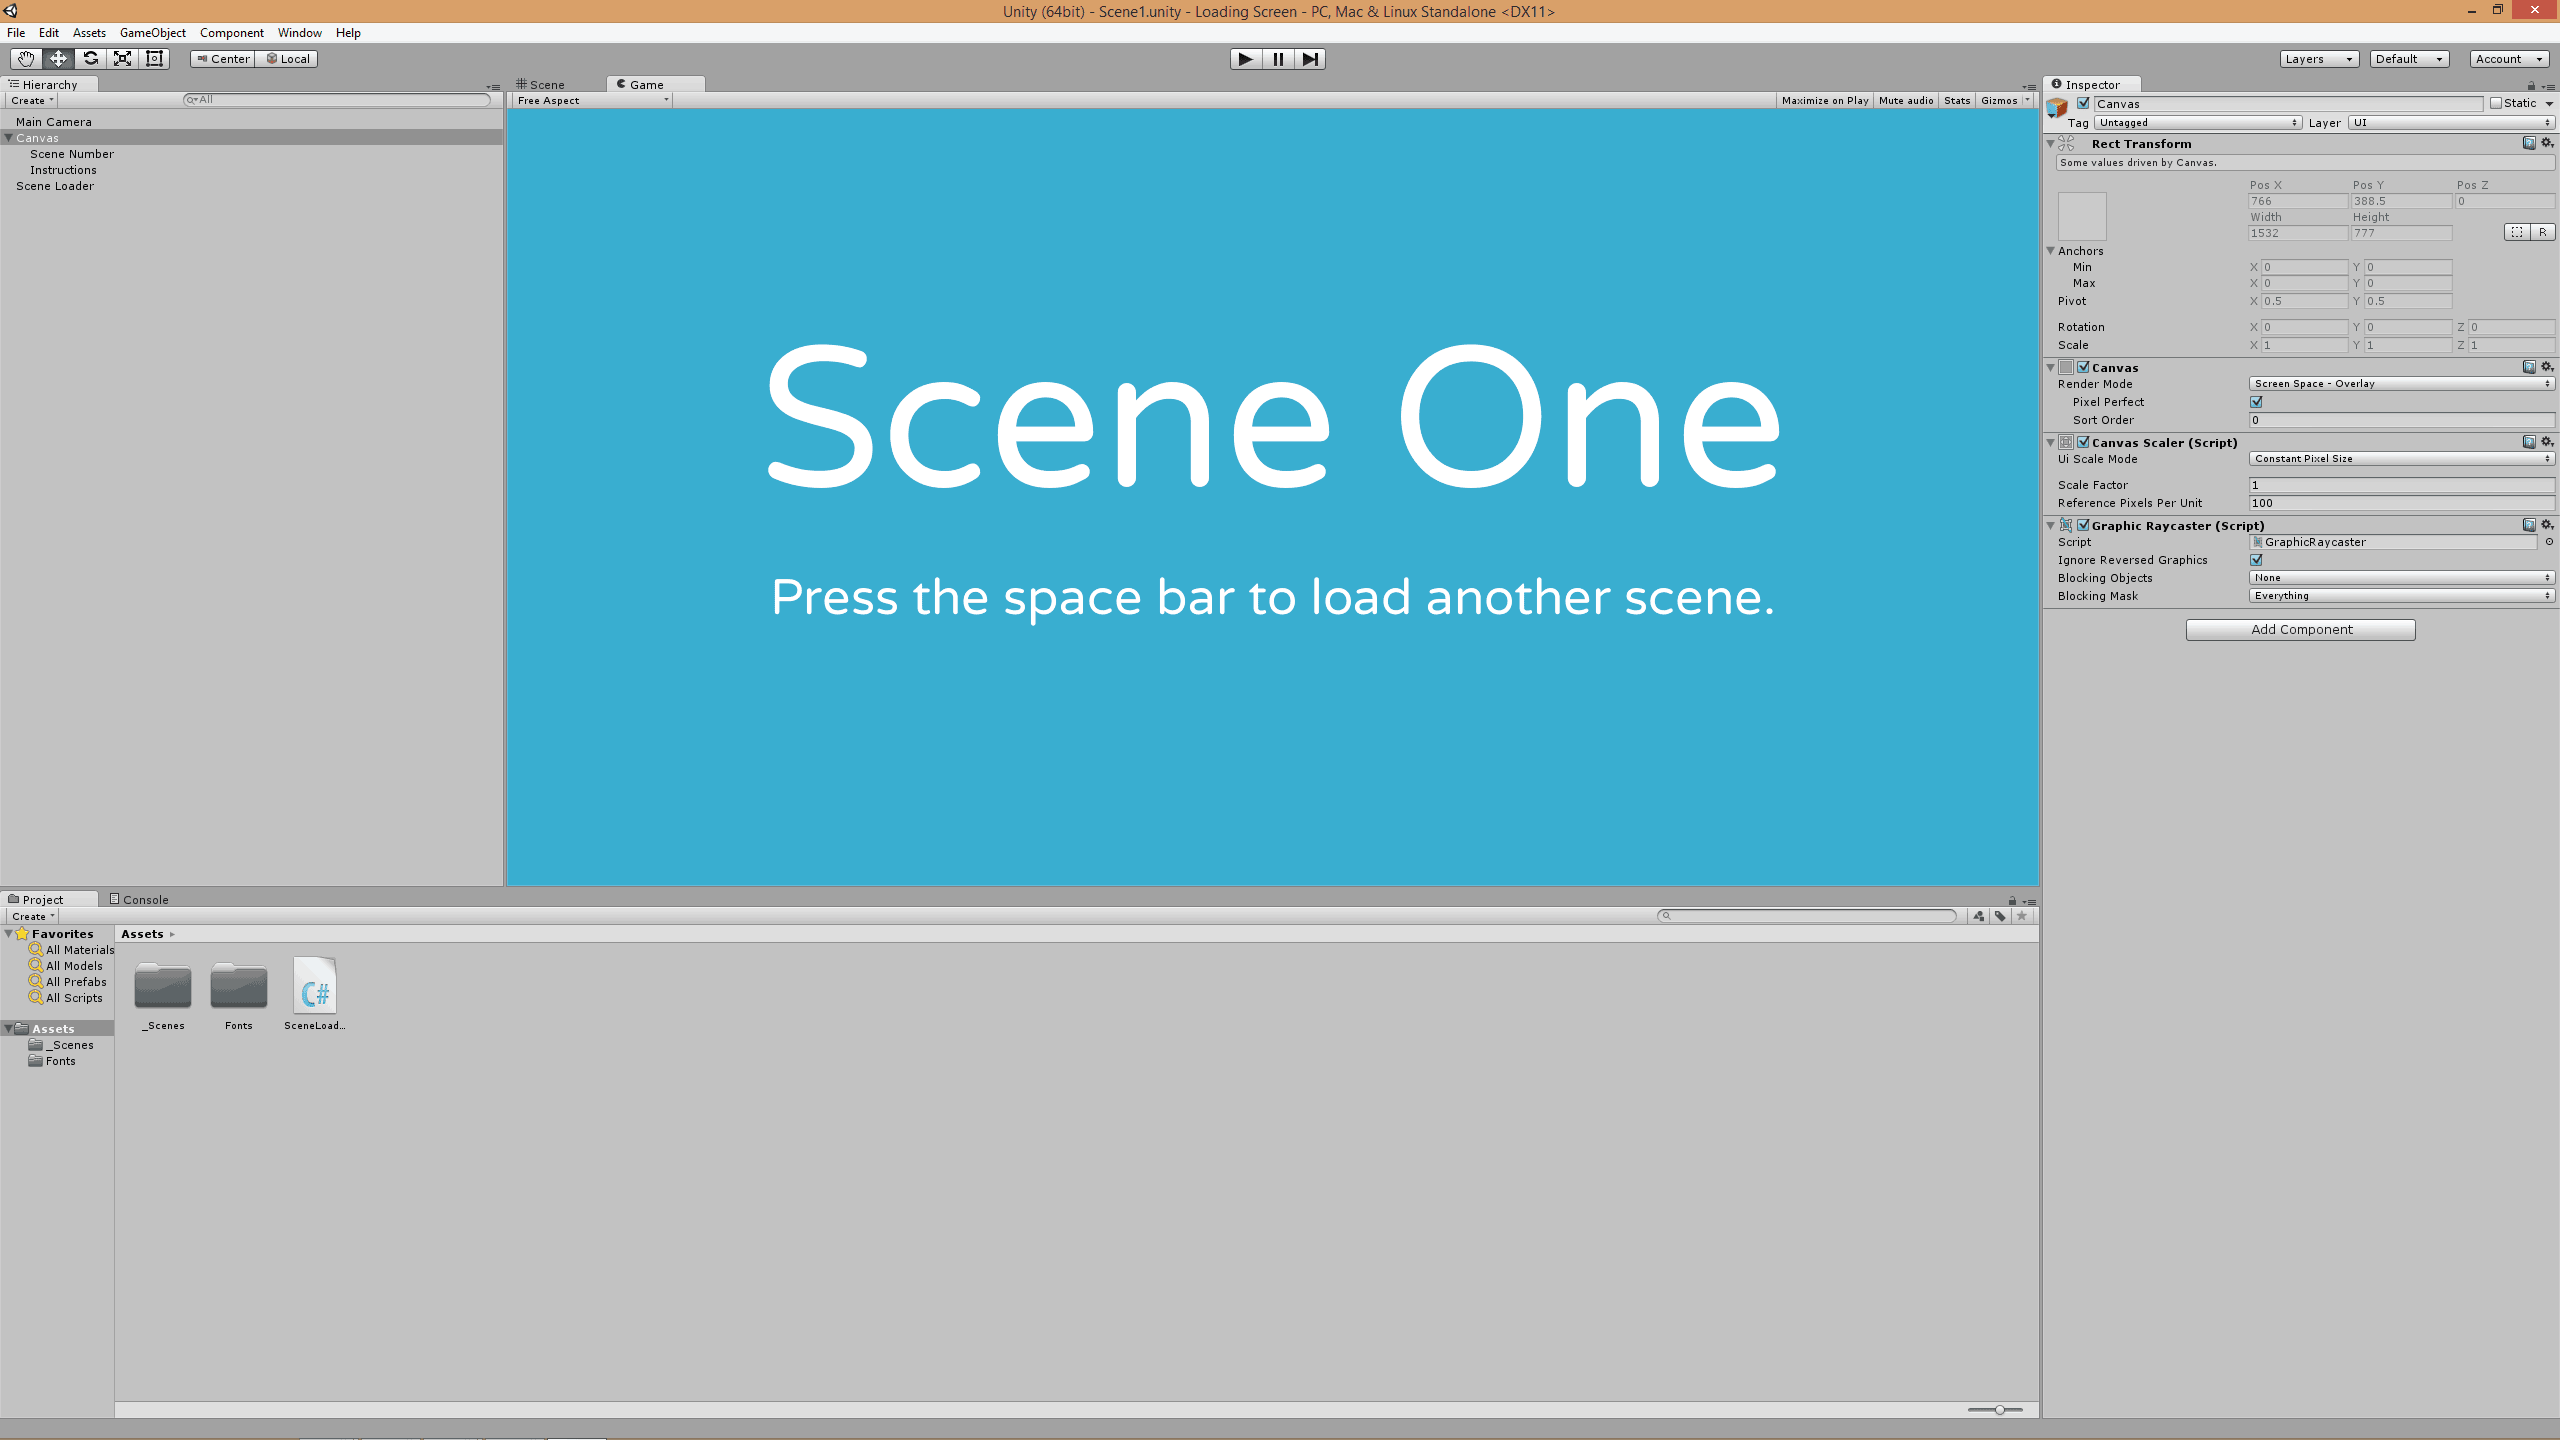
In the Hierarchy window, the “Scene Number” and “Instructions” game objects are both game objects with UI text components attached to display the “Scene One” text and the instructional text below it.
Next, on the “Scene Loader” game object, I’ve attached a script component called SceneLoader.cs – it looks like this in the Inspector window:

The Scene field is an integer that stores which scene number should be loaded. In Unity, every Scene in a build is numbered. By default, the first scene starts numbering at zero, then one, and so forth. The Loading Text field stores a Text component so that the Instructional text can be swapped with the flashing “Loading…” text.
This SceneLoader.cs script contains the following code (explanation below):
The code is heavily commented, but let’s walk through the major blocks.
Variables
At the top of the class, three variables are declared.
private bool loadScene– This boolean is used to check whether or not the current scene should be loading a new scene. By default, it is set to false because the scene is waiting for player input.private int scene– This integer is exposed in the Inspector window via the[SerializeField]attribute, and it stores the desired scene number that should be loaded.private Text loadingText– This variable is of type Text, and it’s also exposed in the Inspector window via the[SerializeField]attribute. This variable stores a reference to the Text component on the “Instructional Text” game object.
Update()
Any code inside of the Update() method runs once per frame. In this script, Update() is defined by two if statements.
The first if statement is checking whether or not the player has pressed the space bar key and whether or not the loadScene boolean is true. If the player has pressed the space bar, then the loadScene boolean is set to true. Setting this boolean to true and also checking it in the if statement means that this block will only run once. This is important, because otherwise, the new scene would just load over and over again. In addition, the text inside of the loadingText variable is set to “Loading…” to give the player some feedback based on their input. Finally, the if block starts a coroutine method named LoadNewScene() that, once called, will run outside of the normal Update() loop.
The next if statement inside of Update() flashes the “Loading…” text by bouncing the alpha channel of the text’s color from zero to one and then back again. This statement executes every frame (and thus, flashes the color) if the loadScene boolean has been set to true. You could change the functionality inside of this if statement to do any number of things, such as display a spinning icon or wobble the rotation of the text.
LoadNewScene()
The block towards the bottom of the script is what’s called a coroutine, and it can return anything that implements the C# interface IEnumerator. This is slightly beyond the scope of this post, but in general, a coroutine is a special type of method in Unity that can continue its own execution in parallel with the Update() method. As the Update() method continues to run, the coroutine also runs at the same time. It’s important to note that there’s no guarantee of whether a coroutine will run before or after the Update() method in any particular frame. It runs on its own timeline, so it needs to be designed carefully so that it’s not depending on other variables being set in any particular order.
Inside the LoadNewScene() method, the first line yield return new WaitForSeconds(3); simply waits for 3 seconds while the loading text flashes. These two scenes are so simple that they load instantly, so if this line were removed, the “Loading…” text would never be visible because the scene would switch immediately. When you implement a loading screen in your game, this line should be removed completely because it will just slow down the loading process; it’s only meant for the purposes of this example.
Next is the line AsyncOperation async = Application.LoadLevelAsync(scene); This line is the most important, because it’s the line that actually loads the new scene. It uses the Application class in Unity to call the method LoadLevelAsync(), which takes a scene number (and in this case, it’s the one from the Inspector). You can read more about LoadLevelAsync() in the Unity documentation, but essentially, it loads a new scene in the background and returns a type called AsyncOperation. This is stored in the async variable.
AsyncOperation has a boolean variable called isDone, which is handy, because it can be used to check whether or not the new scene is done loading. Further down in the LoadNewScene() method, isDone is used to enter a loop, which essentially allows the coroutine to keep running until the new scene has been loaded.
Connecting Two Scenes
Once this script has been attached, fill in the Inspector field “Loading Text” by dragging the “Instructions” game object from the Hierarchy window to the Inspector field. Then duplicate the current scene and give it a different name. You can do this by going to the File menu and choosing “Save Scene as…”; the name of the scene isn’t important, as long as it means something to you.
Next, go to the File menu and choose “Build Settings…” to open the Build Settings window. Then drag the two duplicate scenes from the Project window to the Build Settings window. This will add the scenes to the build. To the right of each build name inside the Scenes In Build section, you should also see a small number. Scene zero will always load first, so if your first scene isn’t numbered zero, you can drag the scenes to reorder them.
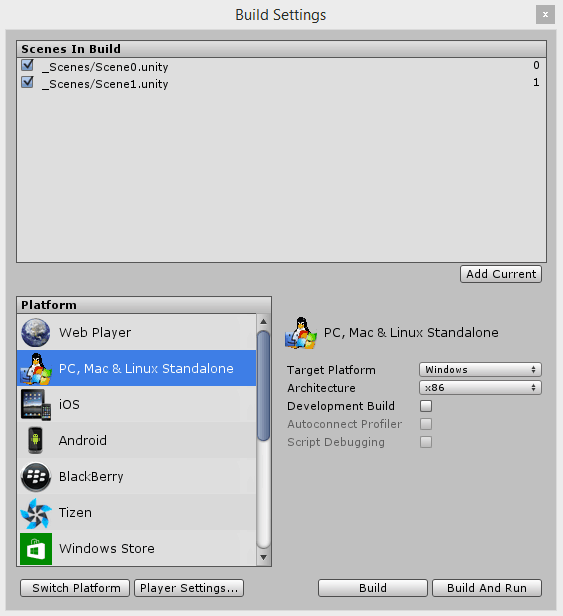
This scene number is the number that should go in the Inspector field “Scene” on the Scene Loader script component. Scene number 0 should load scene number 1, and vice versa. You may need to reopen the previous scene to set its “Scene” field appropriately.
Finally, run the game in play mode. You should be able to press the space bar to go from scene zero to scene one, and then press the space bar again to load scene zero once more.
Loading Screen Ideas
Here’s the link to download my full Unity project that contains both of the scenes and the SceneLoader.cs script that connects them together. If you have any loading screen ideas that you want to try, feel free to modify this project and then show your work in the comments. And of course, if you have any questions, feel free to let me know in the comments as well!
Related Reading:


This is very useful to me as I’m going to take a test to remake an existing game of the company I’m going to get a job from. Thanks a lot.
thanks for this
very good and complete 🙂
Thank u so much!!!!!!
This was very helpful for me and it was so perfectly explained!
Now i can add a bit interesting stuff to my game
Nice tutorial. Thank you!
Great tutorial!
The pulsing doesn’t seem to work on the device, though it works in the editor.
Unity 5.6.0f3
`UnityEngine.Application.LoadLevelAsync(int)’ is obsolete: `Use SceneManager.LoadSceneAsync’
Hello and thank you very mush for the script and explanation.
Just to make it work better, in line number 51 there is this:
AsyncOperation async = Application.LoadLevelAsync(scene);
Notice that we use SceneManager in all the script except in here. A better way would be, instead of “Application.LoadLevelAsync(scene)”, “SceneManager.LoadSceneAsync(scene)”. The first form is now obsolete. In that way the code will work as recomended currently. 😀
Thanks again! 😀
Can I use this tutorial for Unity 4.7.x?
hi, it’s so useful to me,.
and also I just want to know how to create a loading bar with a float value describing how much percentage of the file had been loaded till.
sorry for my poor english…
I’d recommend asking your question in the Treehouse Community where students and teachers are always happy to help answer questions.
Hi. Thanks to this 🙂 just wonder if you can play this scene for like infinitive times? I mean example i have 30 levels. Do i have to make the same number of loading scenes too? Or is it that i shoul prefab the stuffs and put it on each scene? Sorry if i’m not well-rounded. Still learning 🙂 TIA 😀
Hello, thank you for this topic. It really helped me. But is there a way to make the scene loading automatically? Without having to press the spacebar?
Thanks again
Hi Nicolas,
Absolutely. In the context of the script in the article, you just need to execute these three lines:
// …set the loadScene boolean to true to prevent loading a new scene more than once…
loadScene = true;
// …change the instruction text to read “Loading…”
loadingText.text = “Loading…”;
// …and start a coroutine that will load the desired scene.
StartCoroutine(LoadNewScene());
How you trigger them is up to you. In the script, the Update() method has an “if” statement that’s waiting for the space bar to be pressed. However, you could instead change that same “if” statement to look for something like an event in the game (such as the player winning) or a menu item being selected.
I know there’s no such thing as perfection when it comes to programming, but this is the best solution I ever saw. I tried so hard so many times the loading screen function like this, but all I could do was show the next scene while it were not full loaded. Instead, your code just makes the scene shows when full loaded.
Thank you so much for this.
Hello, just wanted to tell you, I liked this post. It was inspiring.
Keep on posting!