Last Updated on August 1, 2018 by Laura Coronel
Image effects in the Unity game engine can have a big impact on the look of your game. A bloom effect can turn harsh lighting into a warm sunny day, or an effect like color correction can make a landscape look toxic and irradiated. I use image effects to create an early morning sunrise look.
Image effects were once only available in the Professional Edition of Unity, but with the release of Unity 5, image effects are now available in the (free) Personal Edition as well. This is great, because often times image effects are the difference between a mediocre looking game and the enigmatic “AAA-look.” If you’re still learning Unity or if you’re a programmer in need of some artistic assistance, you’re in the right place.

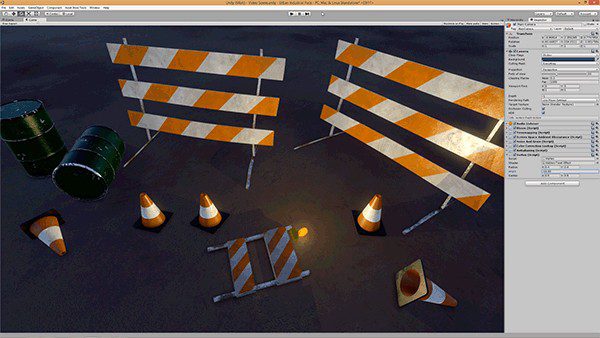
These are before and after screenshots of a scene with no image effects, and then the same scene with several image effects added. Click the image to see the before and after at full size.
Contents
Setup a Camera
Before any image effects are applied, it’s important that the camera is setup correctly. Unity 5 introduced the Standard shader, which is now the default shader used for materials and 3D objects. When you import a 3D model or when you create one of the built in primitives (like a cube or a sphere) Unity will apply a material that uses the Standard shader. This shader uses a rendering technique called Physically Based Rendering (PBR), and while PBR is beyond the scope of this post, PBR does have a big impact on the way you should set up your cameras in Unity and you’ll need to change two things.
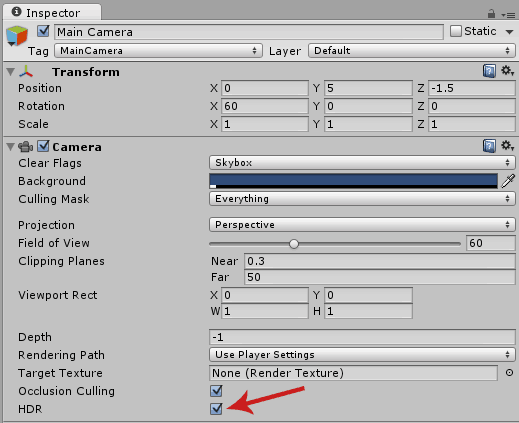
First, you should check the HDR checkbox on any camera that’s meant to view a 3D object with the Standard shader. HDR stands for high dynamic range, which means that your camera in Unity will be capable of capturing luminance values that are beyond the range of your computer screen. Objects that use a PBR shader can have much higher luminance values in some instances, and many image effects will take advantage of the extra data if the camera is capturing it.
Second, you must be using the Linear color space for the PBR lighting model to behave correctly. You can change this by going to Edit > Project Settings > Player.
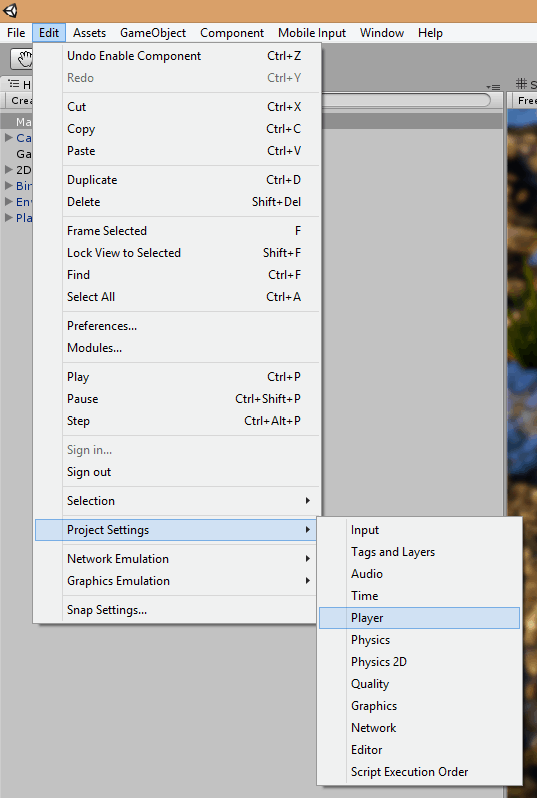
Then in the Inspector window choose Other Settings and change the Color Space field to Linear. In the example screenshots in this post, the Deferred Rendering Path is used, although it’s not required. Rendering paths are beyond the scope of this post, but the Unity documentation provides some good explanations.

Import Image Effects
Image effects can be imported into any Unity project by going to the menu at the top and choosing Assets > Import Package > Effects.
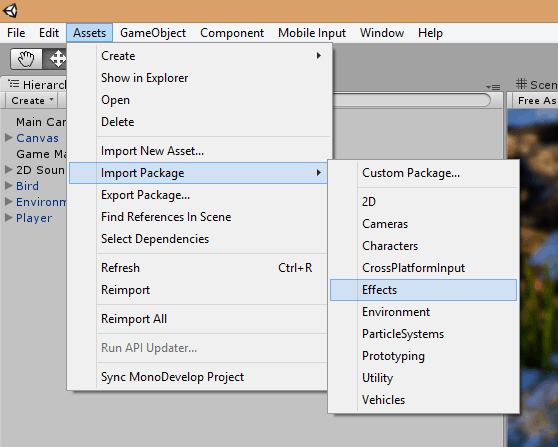
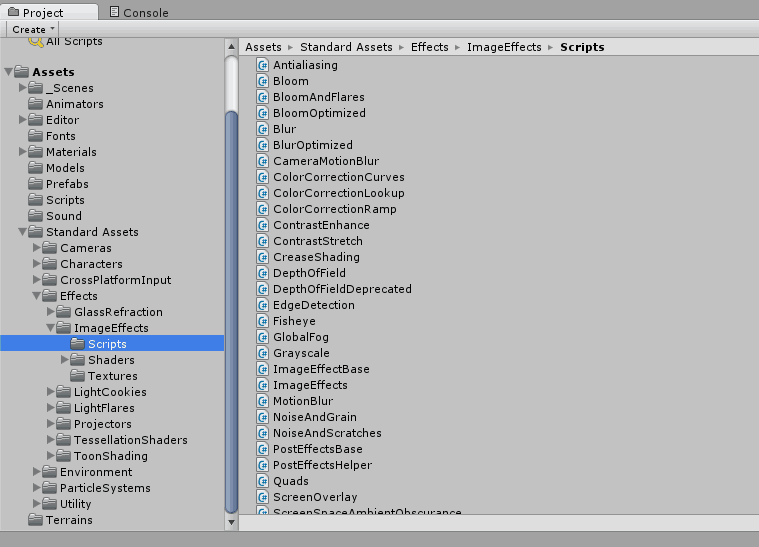
This will bring up the Import dialog box, and you can simply click the Import button. Unity will take a few moments to load them in, but once they’re added to the project, you can find them in the Project window under Standard Assets > Effects > ImageEffects > Scripts.
Apply Image Effects
Image effects are scripts that can be added to a camera object in Unity (from the Scripts folder mentioned in the previous paragraph). When the game runs, the camera renders the scene, and then each image effect manipulates the rendered 2D image in some way. Many of the effects that can be applied are the same types of 2D manipulations that could be done in an image editing program like Photoshop.
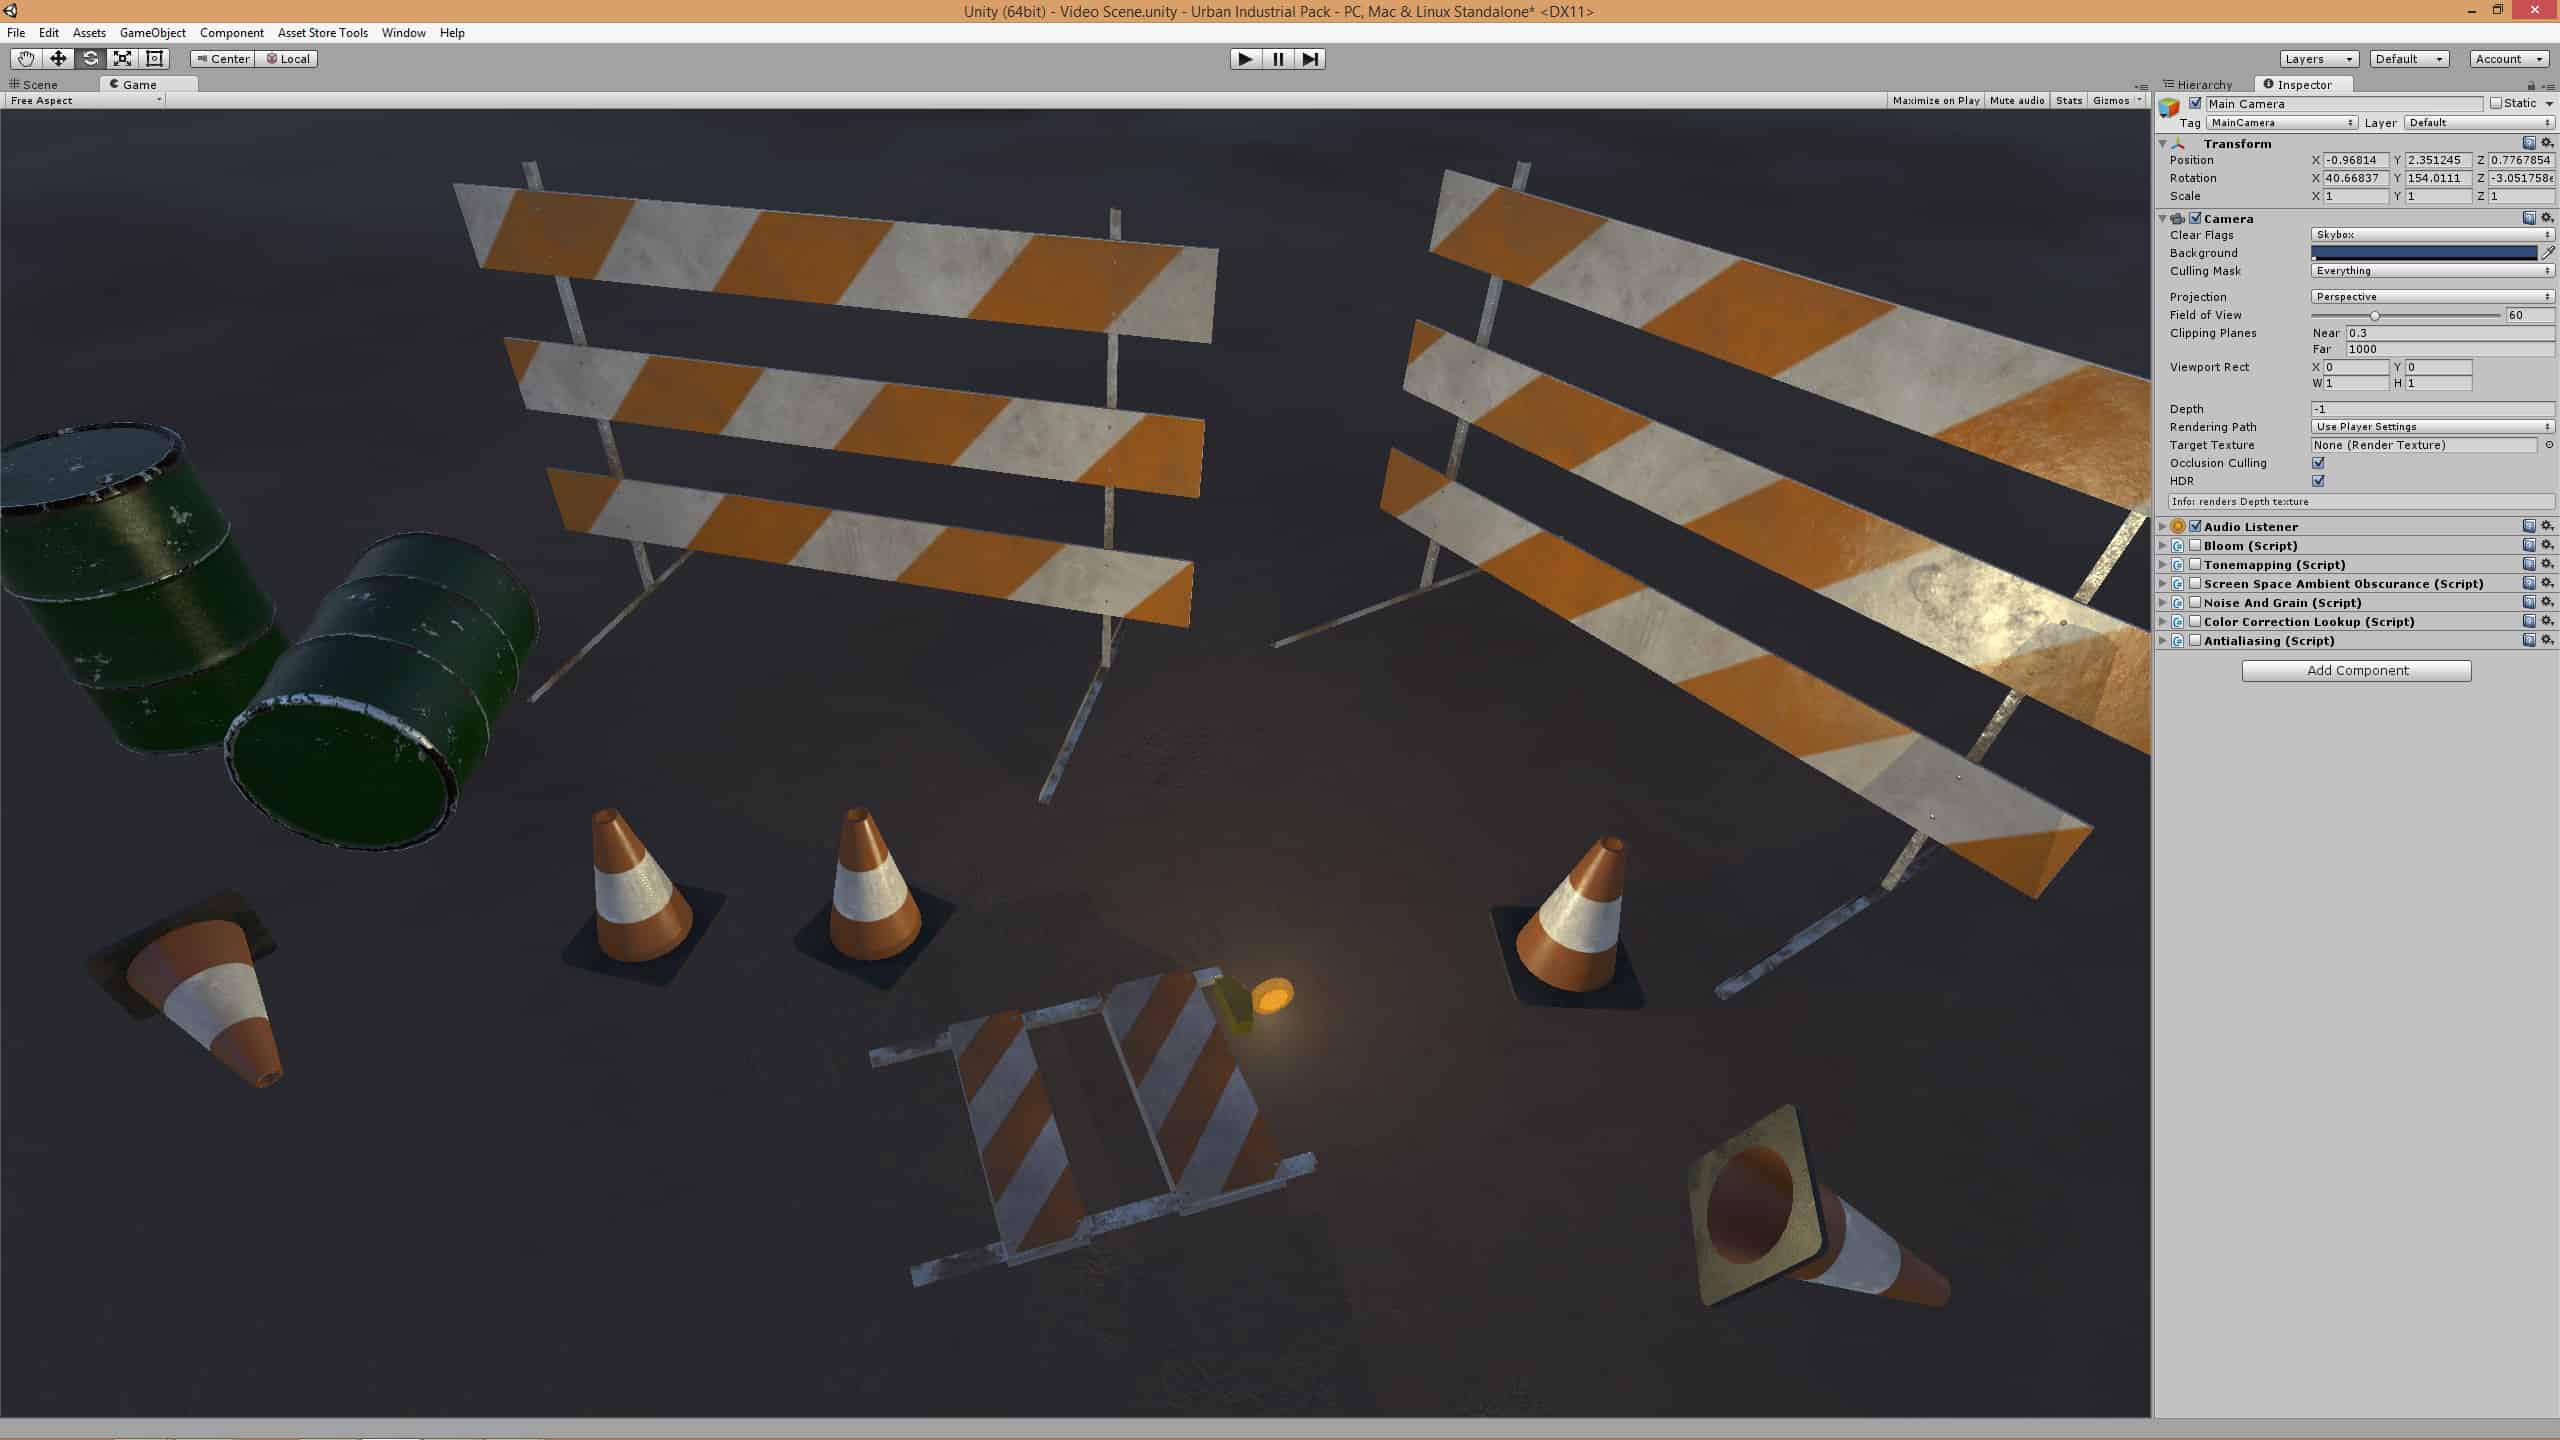
To add an image effect, simply select the Camera in the Hierarchy window, and then drag one of the scripts over to the Inspector window. Alternatively, you can select the camera and then click the “Add Component” button in the Inspector window. Then when the context menu pops up, go down to the bottom of the list where it says “Image Effects” to find all of the available effects.
One fun effect you can try is the Vortex effect. This will twirl and warp the image, and the Inspector has several adjustments that allow you to change the parameters of the effect. I’ve never actually used the Vortex image effect in a game before, but I certainly would like to find a use for it someday.
Changing the “angle” parameter on the Vortex image effect adjusts the degree to which the image is warped, as seen in the animation above.
Achieve a AAA-Look with Image Effects
This scene looks decent, but we can make it (and just about any scene) look better by carefully applying some image effects. We’ll apply one effect at a time in sequence, because the order of image effects is important. On a camera in Unity, each image effect will be applied in sequence from top to bottom. Sometimes the visual difference between one order or another isn’t readily apparent, but many image effects must be performed in a specific order. For example, since we’re using an HDR camera, we need to apply bloom effects before applying tonemapping. That’s because bloom relies on the high luminance pixels in the HDR data, while tonemapping takes the HDR data and remaps it to the colors your computer screen can display.
Click each image below to see a larger and more detailed version that includes the Inspector settings for this particular scene.
Bloom
The default Bloom image effect will take the high luminance pixels from the HDR camera and effectively blur them outwards. Computer screens have a limited range of brightness values, so this helps create the illusion of overly bright parts of the image without clipping the values and blowing out the colors.
The default Bloom in Unity is decent, but in production games I prefer to use Sonic Ether’s Natural Bloom & Dirty Lens from the Unity Asset Store. I’m not affiliated with this asset in any way, I just think it looks better than Unity’s default bloom.
Tonemapping
The tonemapping image effect doesn’t always have an obvious effect on the image, but it’s more of a utility than an aesthetic choice. After you’ve bloomed the brighter HDR values, it’s important to remap the HDR camera to the colors that the screen can actually display properly. Tonemapping does this automagically and allows you to safely and predictably apply more effects.
Screen Space Ambient Obscurance
Screen space ambient obscurance (SSAO) is an image effect that will apply small shadows in the crevices of geometry and underneath objects. If you look at this image full-size, you can see that there are now subtle shadows around the objects and below them to help visually fix them to the ground plane. Ambient occlusion is a naturally occurring phenomena (you can see it best in a sunlit room where two walls meet at 90 degrees), and screen space ambient obscurance is the fastest way to create this effect.
Once again, the built-in SSAO is decent, but I prefer to use Sonic Ether’s Screen-Space Ambient Obscurance from the Unity Asset Store, particularly because of the added color bleed feature that’s offered.
Noise and Grain
This is another subtle effect that you’ll need to view full-size to see clearly. The Noise and Grain image effect adds a small amount of animated random static to the image. You can exaggerate this effect to achieve a film-stock look, but that’s not its purpose here. Rather, adding some noise and grain to the image will help smooth out any color-banding that may appear in subtle gradations from one color to another. For instance, in darker scenes (like this one) you’ll often see some color artifacts because the color gamut is not wide enough to express all the colors needed in a smooth gradient. Noise and grain helps to fill in some of the gaps in color. In addition, it adds some much needed texture to overly-perfect computer graphics.
Color Correction Lookup
In film and video, it’s very common to perform color correction on images to properly set the black point and bring out more saturated colors. In a game, you can choose to go for more realistic colors, or you can push your image to chromatic extremes; in other words, color correction can dramatically effect the look of your game.
The color correction lookup image effect allows you to do this by providing what’s called a LUT image (which stands for Look Up Table). To create a LUT image, start out by taking a screenshot of your game. Then, load the screenshot into an image editing program like Photoshop and perform non-destructive edits to set levels and reach proper color saturation. Next, you’ll need to open an image inside the image editing program called Neutral3D16.png that’s located in your Unity project under Assets > Standard Assets > Effects > ImageEffects > Textures.
Once you’ve opened Neutral3D16.png, apply the same image adjustments as you did to your screenshot and then save the resulting file as a new PNG image. When you bring this new LUT image into Unity, you’ll be able to drag it into the texture slot of the Color Correction Lookup image effect. When you do this, be sure to click the button that appears to convert the image to the proper format.
Antialiasing
Aliasing is an undesirable phenomena in computer graphics that occurs when a vector object (such as 3D models in a game) is projected onto the pixels of a bitmap display, causing jagged pixels along the edge of an object. If you click on any of the previous images and look at the edges of the objects, you’ll notice they’re fairly rough. The antialiasing screen effect (used in the screenshot above) smooths out the rough edges. If you’re using the Forward Rendering Path, you should use its built-in antialiasing instead of this screen effect.
Performance
Every image effect you add comes with a slight performance cost, because each script is another instance where the image must be processed by the GPU. Each one alone doesn’t cost much, but if you’re trying to hit 60fps or higher with a dozen or more image effects, you might start running into trouble (60 x 12 = 720 image effects per second).
That said, you shouldn’t be afraid to use several effects on your camera. As demonstrated in the before and after shot at the beginning of this post, image effects can be the difference between a decent looking game and a great looking game.


Nice intro to Image Effects in Unity. I was just looking for Antialiasing on 3D Models, but now I’m tempted to try out some more image effects in our project.
Do you know which Image Effects are feasible for VR applications? I read that not all of them can be used due to the stereoscopic rendering.
Beautify works very well on VR (also with Single Pass Stereo) and it’s faster than default Unity stack.
Really well written and informative guide. Many thanks.
Great guide! if you are looking for some tips about creating a game I highly recommend this blog: blog.theknightsofunity.com
awesome man, helped a lot. thanks