Last Updated on February 23, 2016 by Faye Bridge
Creating sketches of a user interface, called wireframes, is often the first step in the design phase of a software or web project. Wireframing your software or website project may seem simple at first because of how easy they are to create, but it’s actually a more nuanced (and important) step than it appears. If you’re new to wireframing, or are looking to level up your wireframe game, these steps should help you get the most out of the wireframing stage.

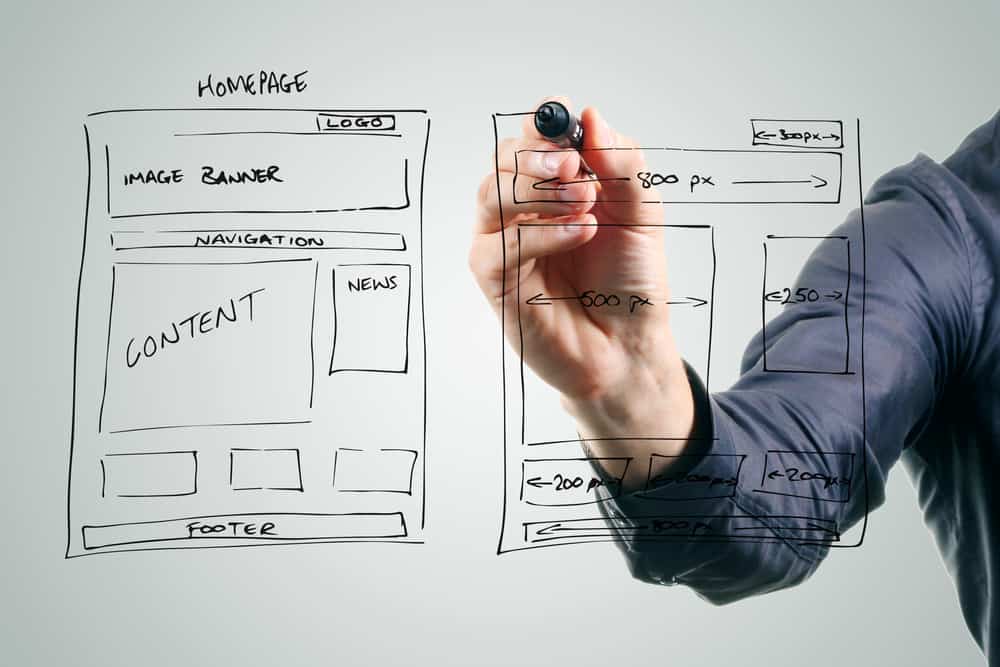
An example of a wireframe created with Balsamiq Mockups.
Contents
Step 1: Get into the Wireframing Mindset
Wireframing is to User Interface design as sketching is to drawing. The goal is not to come up with something that’s “finished” or polished. It can be something that you do just for yourself to help clear up your ideas about what you want to build, or it can be something you create for others in order to better communicate your idea or reflect your interpretation of a client’s idea back to them. In all cases you should approach the process with a specific way of thinking that is different from other phases in the project.
What you want to strive for, and to let guide you, is the 80/20 rule. The reason wireframing is so powerful is that, when done well, you can convey 80% of the information about what you want to build with 20% of the effort. If you find yourself thinking about fonts and colors in the wireframe stage, you’re probably not thinking at the right level or in the right way.
Leave out details that don’t matter right away. This could include fonts, colors, text content, or even some features. While wireframing think about the minimum amount of information required to get other people to understand and approve the idea or design.
The crudeness of a prototype shouldn’t be confused with its value. Sometimes the crudest prototypes are the most valuable.
— Dan Saffer (@odannyboy) September 1, 2015
For a wireframe to be successful:
- Business people should be able to verify that the proposed design meets customer needs.
- Developers should be able to get an idea of the technical feasibility and maybe even provide some rough timeline estimates.
- Designers should be able to assess the experience and catch usability issues before development starts.
This is why wireframing is so powerful when successful – you can address all these concerns early on. They’re much harder to fix later.
Step 2: Take Your Time
Time spent wireframing has a really high return on investment because the deliverables and any changes to them are cheap. But the goal is not to just create a sketch of your idea so you can hand it off. Wireframing can be used to get feedback, flesh out your own ideas, get inspired, improve upon your own idea, or simplify the design. The wireframe stage is also a good time to collaborate and involve others in design decisions.
Good wireframing practice is to create several variations of each major idea or screen, even if you don’t know where it’ll take you or think it won’t be very good. You can think of the wireframing phase as the time to get your bad ideas out of the way. Ask yourself “what if…?” and see what happens. Seeing a lot of different concepts in front of you can help you pick and choose the good parts of each to create a new design that’s better.
Building a wireframe is not a checklist item. Don’t rush it. It’s a distinct and important phase in the design process. Give it the time it deserves.
Step 3: Build a Bridge from MVP to 3.0 (or the Other Way Around)
The impulse when diving into the wireframing process is to create your ultimate vision for the product. Adding features and other really cool stuff is basically free at this point, since you don’t have to actually build it here.
But there’s a bit of a conflict here with the Lean Startup approach of building a Minimum Viable Product (“MVP”) in order to get something out to the customer quickly and iterate sooner. If you only wireframe the bare minimum, you risk losing your great ideas and grand vision.
With wireframing you can leverage the ease of sketching out multiple ideas to address this dilemma.
One option is to create two versions of your app – the MVP version and the feature-complete version. But this might be difficult because you might not know what belongs in the MVP version from the outset.
Another option is to build your ideal version of the product and progressively de-scope it by creating a series of less fully-featured versions it until you reach an MVP. This is the idea behind “The first wireframes are ‘version 3′”.
In this scenario you can end up with several in-between concepts between the ideal version and the MVP. This turns out to be a really useful thing to have. It can be used as a roadmap for your next releases, working from MVP on up. It simultaneously helps you scope the work for each release while keeping future work in mind so that you don’t have to re-write or re-engineer your product to add new features. De-scope features, not ideas!
Regardless of how you do it or what tools you use, wireframing is one of the best opportunities to save time in a software project. Rather than trying to force developers to code faster at the end, to account for poor communication and setbacks along the way, take the time to make sure you flesh out what you’re building and get everyone on the same page before coding even starts. It’ll be time well spent.
Leon Barnard is a writer and designer at Balsamiq. He contributes to the Balsamiq UX blog and curates the Balsamiq Champions blog about how and why people use Balsamiq Mockups.


