Treehouse
writes on September 22, 2015
In this post, I’ll outline the asset workflow that I use to model game props, like the old radio in the image below. If you’re new to making games, you will gain an understanding of some of the major concepts involved in modeling art assets. And if you have some experience already, you might pick up a few tips and tricks.
This is the first post in a two part series; the next post will cover texture mapping and describe my workflow for importing an asset into a game engine.
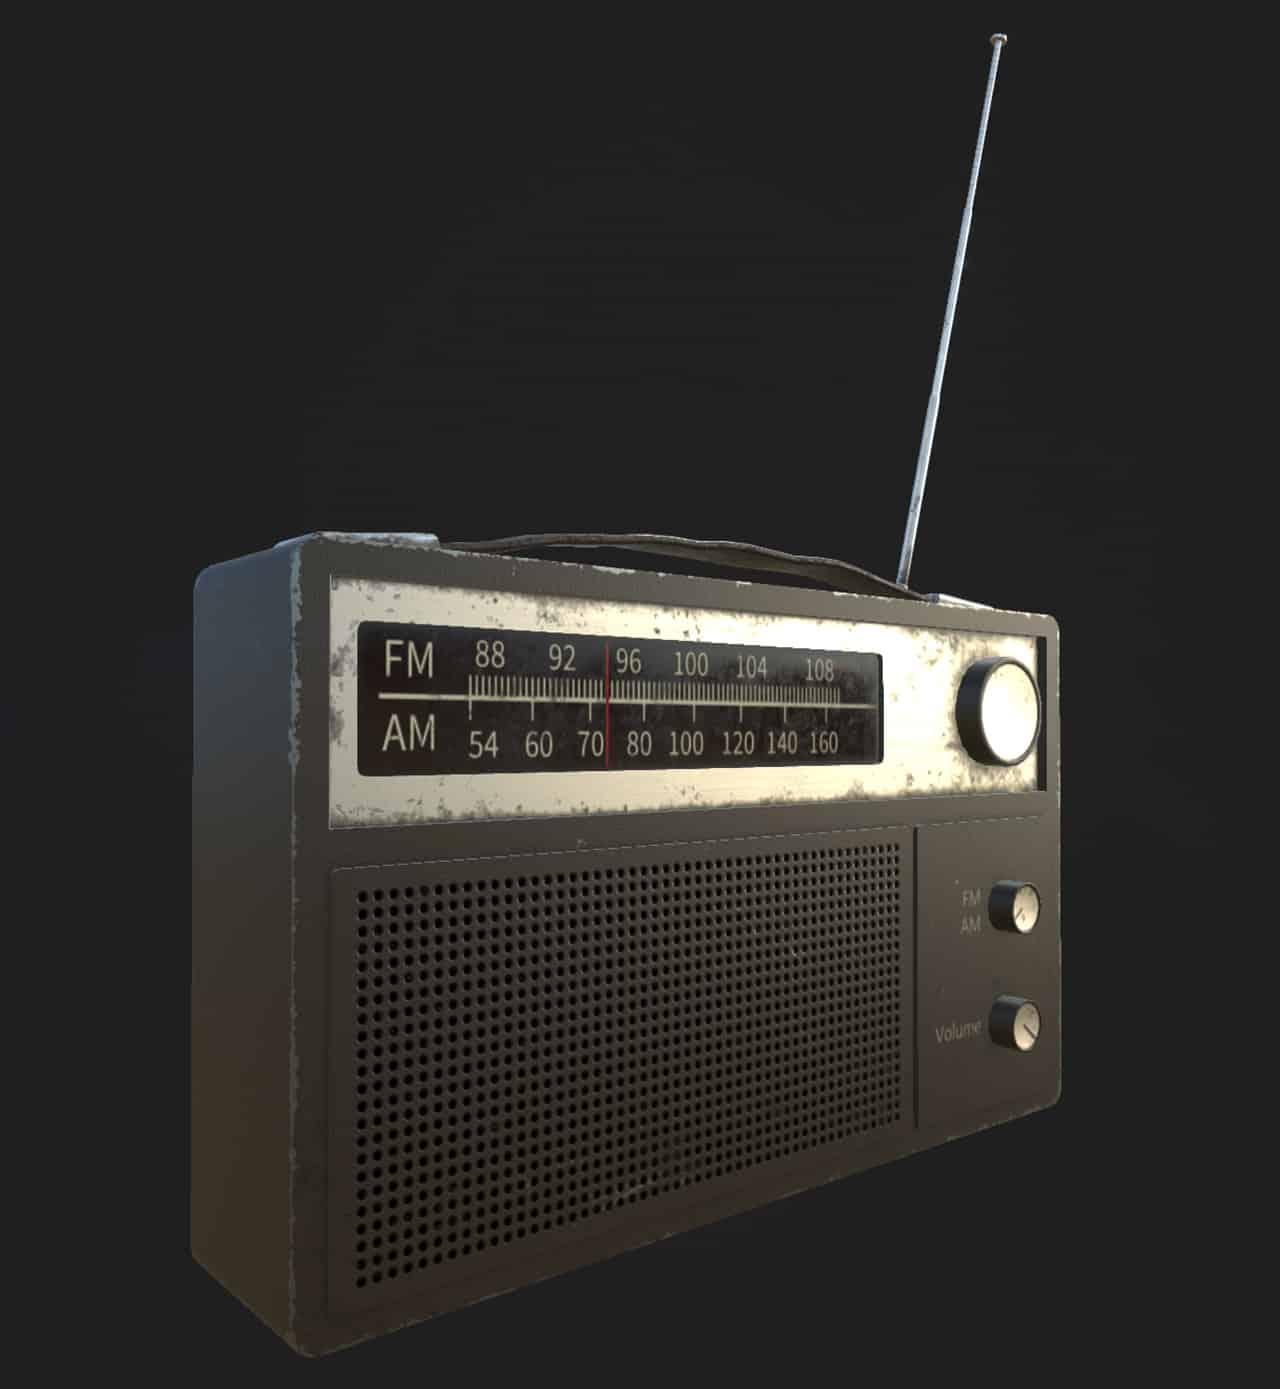
This old radio game asset was modeled in Maya LT and textured in Substance Designer.
In some game engines (like Unity or Unreal) the word “asset” has a technical definition, but when discussing game art or games in general, a game asset is a character or an object that’s meant to appear in a video game. Most game assets are just humble props meant to fill in the background of a scene: A medieval wooden barrel, a sci-fi doorway, or a pirate treasure chest. These props might not seem that complex, but the steps between coming up with an idea for an asset and then placing it in the final game can be bewildering. There’s a lot of different ways to make game assets and none of them are necessarily more correct than others – if something works well for a particular team or a particular game, then that’s great – but in this post, I’ll show you my typical asset workflow.
Please note that this post is not meant to be a step-by-step tutorial (if it were, this post would be a much longer of a read). Rather, what follows is a high level overview of my 3D modeling process along with a few specific tips.
Contents
Conceptualizing Assets
The motivation for creating a new game asset can come from a variety of sources. It might be that the game needs a specific quest item, or perhaps the game world needs more art direction. Sometimes, I just make assets for fun without any specific purpose at the time, knowing that I might use them in a game later.
The factors involved at this stage of asset creation can vary, depending on why the asset is being made. Here are some examples of the questions I’m thinking about:
- How important is this asset to the game? Should I even spend time making this when I could be making something else with more of an impact? Sometimes an object might just be too small to be seen or noticed, or it’s just not as important as polishing another “hero” asset the player will see a lot.
- How big is this object compared to other objects in the game? Will the player spend time examining it close-up? The answer to these questions greatly influence the level of detail.
- Does the player need to interact with this asset? If so, is it something the player will hold? Does it have moving buttons and switches they can activate? The answers here can help determine how the 3D model should be segmented into separate parts.
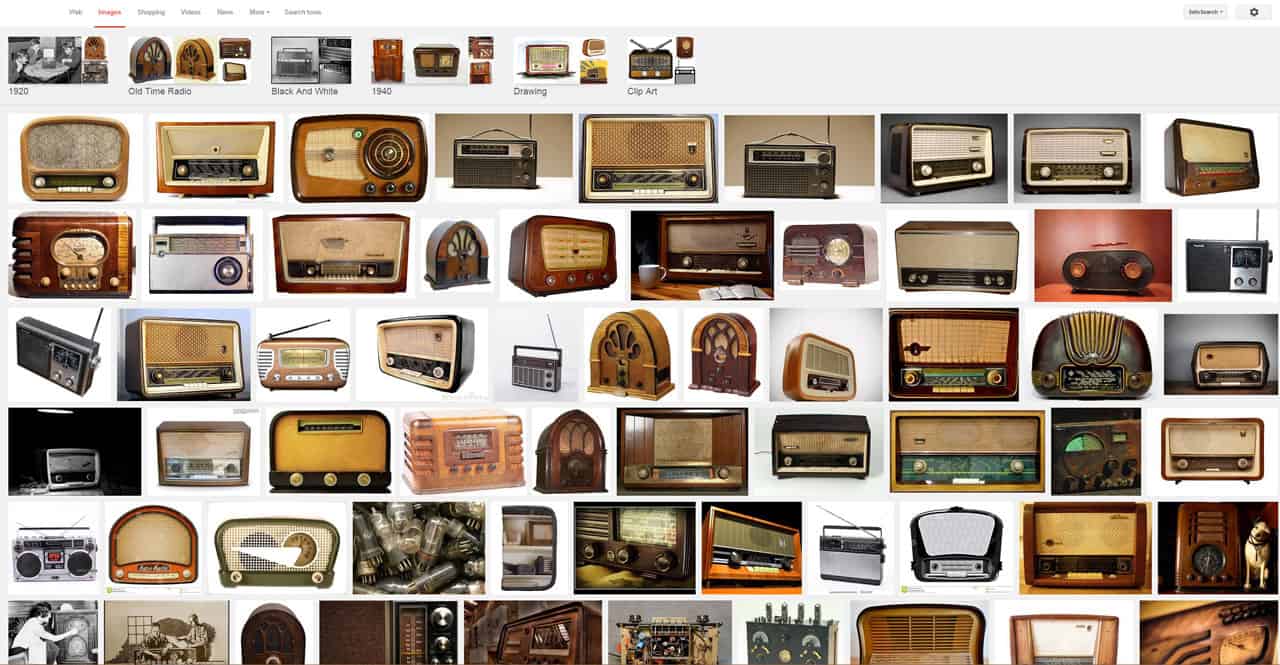
Before I jump into any software, I like to start by researching the idea that I have in mind. Typically I’ll search Google Images and I may even do a few sketches of my own; although from the image above, you can probably pick out the one that I liked the most. I like to think about the different levels of abstract that could work in the game, which is usually somewhere between a cartoonish representation and a photo realistic rendering. This radio asset was just-for-fun, so I just found one that looked unique and tried to make it myself.
3D Modeling
Once I settle on the look and feel of an asset, I spend some time breaking it down into its basic 3D shapes using Maya LT. I like Maya LT because it suits many of my personal preferences, but alternatively, you could use any other 3D modeling app like Blender, 3Ds max, or zBrush.
The body of the radio is basically a box with a few extrusions and beveled corners. Because of this, I used a modeling technique called box modeling, which starts with a simple cube (or a box). From there, I added a few edge loops to define where the different insets and extrusions should be made. After I made the extrusions for large flat areas like the speaker, I beveled the edges to round out some of these boxy areas.
I thought it would be nice to be able to turn the knobs and adjust the antenna, so I modeled those as separate objects. The knobs are cylinders, and the antenna is also composed of long and thin cylinders stacked on top of each other. Modeling these items as separate 3D objects opens the possibility of a player character adjusting these items in the game. On the back there are some screws, but I don’t anticipate a player looking there much, so they’re just low-detail spheres cut in half.
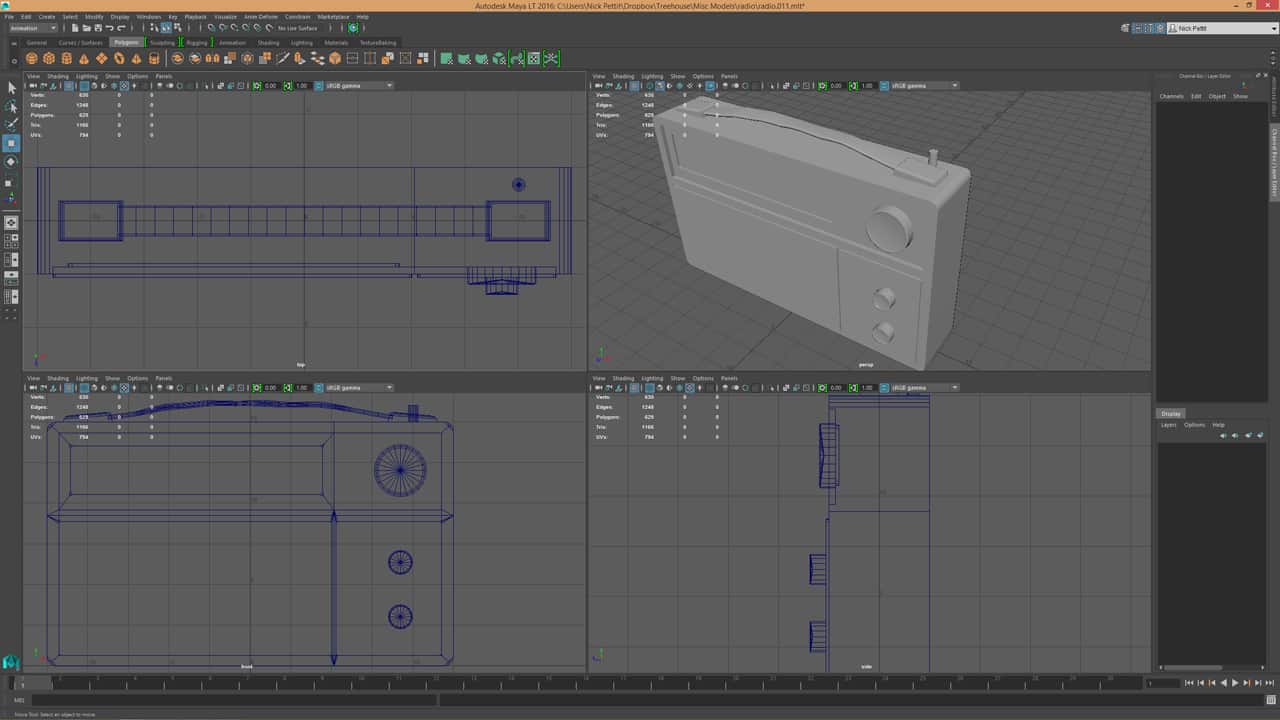
The polycount for the radio is a little over 1500 triangles. The polycount for a 3D model can affect game performance depending on how many other assets are in the scene, how detailed they might be, and so forth. In this model, I could have removed a few of the beveled edges and perhaps done more detail in texture maps (rather than in geometry), but for a PC or console game where this object is examined up close, this polycount looks about right. On the other hand, this would not be appropriate for a mobile game where the total polycount budget in a scene is much more strict. If this radio were to appear in a mobile game, I would probably model it as a simple 6 sided box with a texture and stop there.
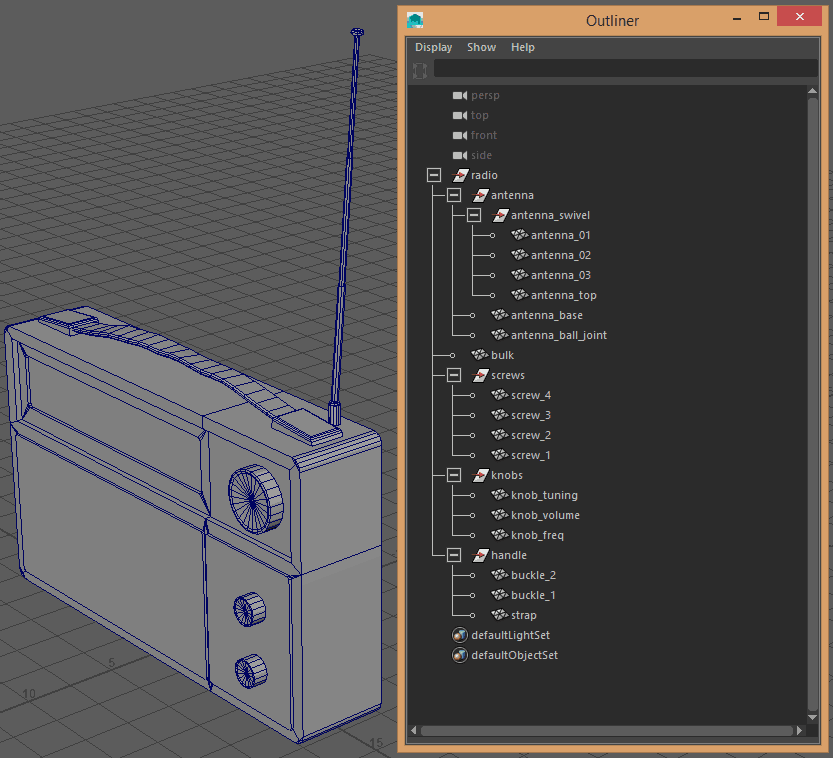
Scene Organization
Once I have more than a few objects in the scene, I open the Outliner window in Maya to assign each object a name and organize them. Then I group objects together in the Outliner based on two criteria:
- If objects categorically belong together, like the knobs, I’ll put them into one group.
- If objects need to move together, like the antenna, I’ll put them into one group and then adjust the pivot for the group.
In the case of the antenna group, I moved the pivot point for the group to the base of the antenna. That way, when I rotate the antenna, it moves along the ball-and-socket joint at the base in the way that you would naturally expect. This makes “posing” the object easier, especially if it needs to be interactive in the game. Here’s what my Outliner looked like when I was done.
UV Mapping
Once I’m happy with the model and scene organization, I’ll move on to UV mapping, which is the process of flattening a 3D object into 2D space so that texture maps can be applied.
UV mapping isn’t as complex as it might sound. For example, if you’ve ever tried to peel the skin of an orange and flatten it into a rectangle, you know that rips in the peel are almost unavoidable. Another example is any rectangular map of the Earth; you can think of Earth as a 3D sphere, and the map as that sphere’s 2D texture. In the map, the distortion increases as you reach the north and south poles because of the planet’s spherical shape. Without UV mapping, the 3D object wouldn’t know how 2D textures should be applied.
Below is a screenshot of what my UV layout looked like when I was finished. When I design a single prop like this, I like to keep everything in a single material and in one UV map, even though the object might be comprised of multiple real-world materials (like wood, plastic, metal, and so forth). Using a single material makes things simpler to manage, reduces the storage required in the final game, and improves rendering performance (every material that gets applied has a performance cost).
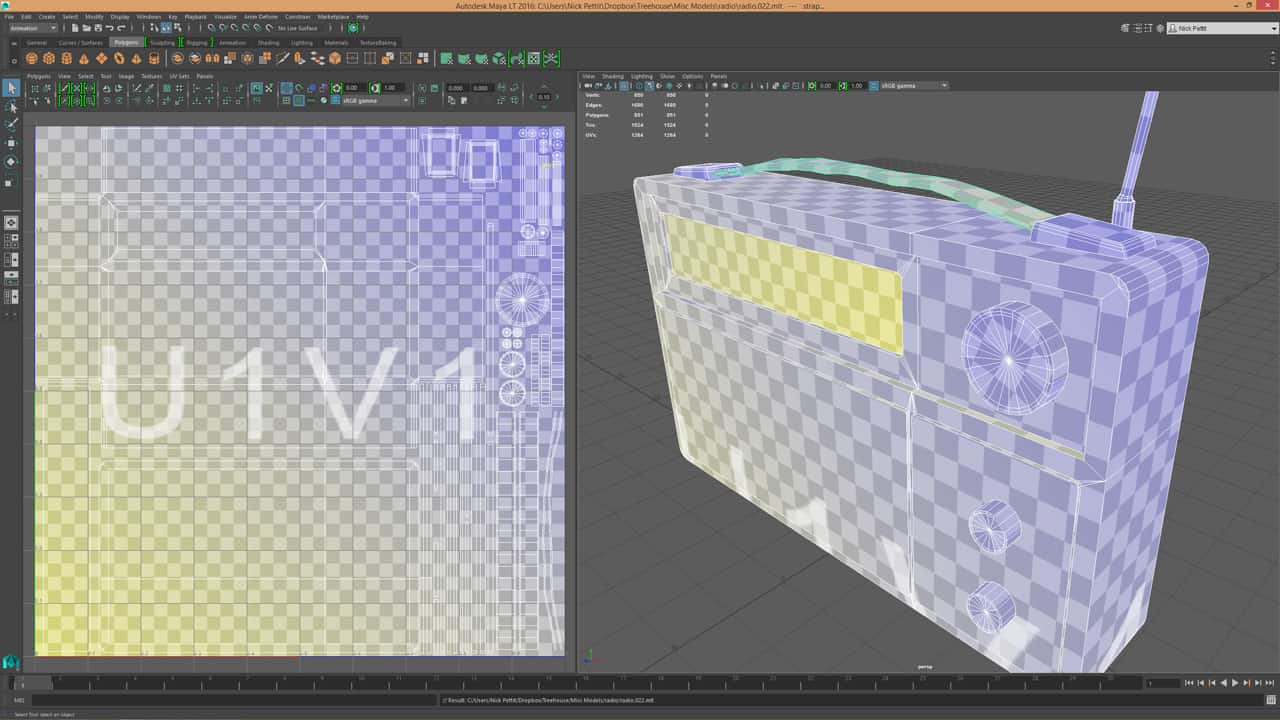
The rainbow checkerboard texture that’s built-in to Maya LT (and most 3D modeling applications) helps the artist figure out which parts of the texture are being applied to which polygons. When I’m looking at a model with a checkerboard pattern, I’m looking for two things:
- Stretching: Do all of the polygons have nice square checkers, or are they being squished and pulled in different directions? It’s important to avoid UV stretching or there will be distortion in the final texture.
- Texel resolution: Do all the objects in the scene have roughly the same texel resolution? In other words, when a texture map is applied, will one part of the model contain textures that are the same resolution as other parts? This is important, especially if a model is viewed up close.
There is one instance where I intentionally increased the texel resolution of the UVs, and that’s in the horizontal dial with the AM/FM numbers. I knew there would be fine text in that part of the model, so I allowed for it to have slightly more resolution than the rest of the mesh so that the text would be clear without pixelation.
Procedural Texturing and Game Engine Import
This post is the first part of a two part series. In the part two on texture mapping, I describe my texturing workflow and then show how I import an asset into a game engine like Unity.

Nick,
This is a great step by step example of the game art workflow for assets. Well explained with images to highlight crucial points of the process. Pleased you have shared this interpretation. Nice one!
wow, this is super nice. I just found it over google and ive been craving for a non-video easy workflow for some time now 😀
Hi, Nick
Great case study! I’ve got some interesting things.
How much time did you spend for current asset creation? Would it be faster using 3Ds Max?
Have a nice day!
Hi Victor,
For this asset I spent about 6 hours total. You can see a time lapse in part 2: https://blog.teamtreehouse.com/asset-workflow-game-art-texture-mapping
I prefer using Maya over 3Ds Max, but the tool is less important than the technique. If you’re faster at using 3Ds Max than Maya and you can achieve generally the same result, then you should use the tool that fits you best.