Last Updated on May 11, 2026 by Dev Support
I’d like to show you how we can create an easy-to-use emoji selector for any website or application. We’ll use the browser’s built-in fetch API to connect to the open-emoji API to display a list of all emojis. If you’d like to code along with me, be sure to download the repository for this project to your machine and follow along with this blog article. If videos are more your thing, check out our step-by-step video tutorial blow.
Getting Started
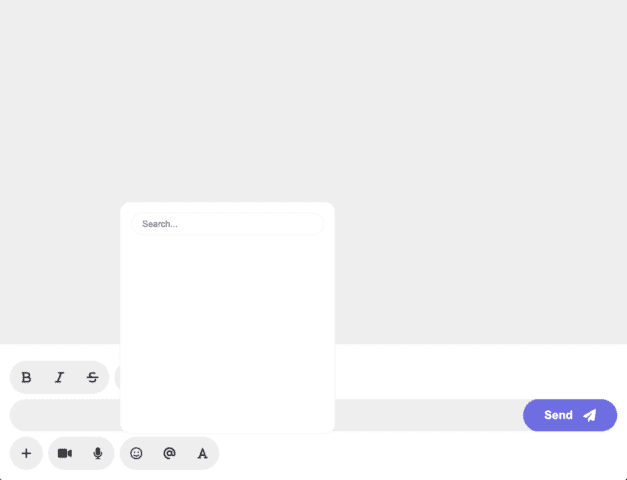
I have built out a simple chat-app application. The HTML markup as well as the styles for this project are already completed. We will only be going over the JavaScript functionality inside of the app.js file. So with that said, the only prerequisites would be to understand some basic JavaScript. Our JavaScripts Basics Course (linked below) can get you started with that if you need a refresher. I’ll also list below a course that goes into much more detail with fetch().
Let’s get started!
Treehouse Course: JavaScript Basics Course
Treehouse Course: Working with the Fetch API
The first step in building out this feature to our chat-app is to show and hide the emoji menu when the emoji icon is clicked. This is very easy to do, so let’s get started there.
If you take a look at the project in the browser and then inspect the page, you’ll see that the emoji icon is a list item with the id of emojiSelectorIcon. The list item directly above that is actually our menu. By default, it is hidden but if we give it a class of active, it will be visible. This list item for our menu has an id of emojiSelector. Let’s use both of these ids and create some variables.
In our app.js file:
const emojiSelectorIcon = document.getElementById('emojiSelectorIcon');
const emojiSelector = document.getElementById('emojiSelector');
Now that we have the variables set up for our emoji-icon and our emoji-selector, let’s toggle that active class on the menu when the icon is clicked.
In our app.js file:
emojiSelectorIcon.addEventListener('click', () => {
    emojiSelector.classList.toggle('active');
});
You should now see the menu open and close when clicking the emoji icon.
Related Reading: How to Load an Image with Async Javascript
How to use the fetch API
Next, we’ll need to add in our emojis. You’ll notice in the HTML that inside of our list-item for our menu, there is a ul with the id of emojiList. This is where we will append all of our emojis to the DOM.
Head on over to the Open Emoji API
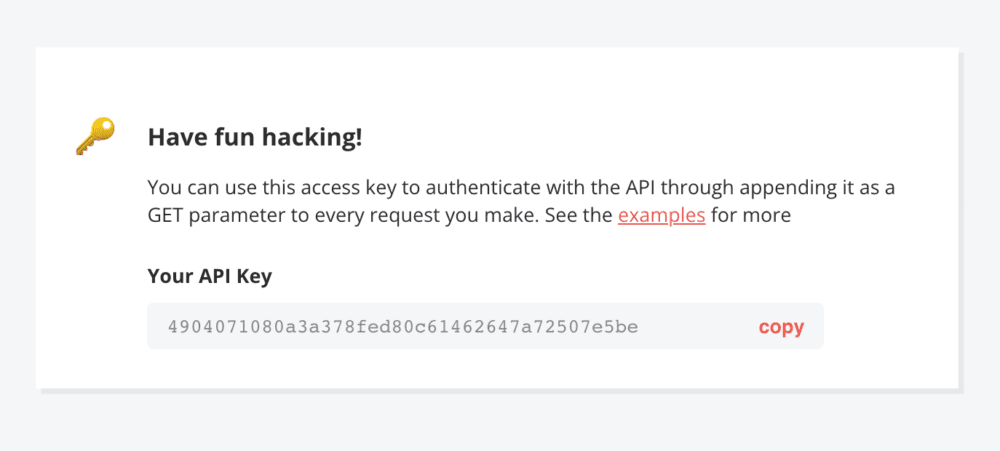
You should see a field for you to put in your email address with a button saying get a key. Go ahead and put in a valid email address. You’ll then receive your API key.
Check out: How Much JavaScript Do You Need to Know Before Learning React?
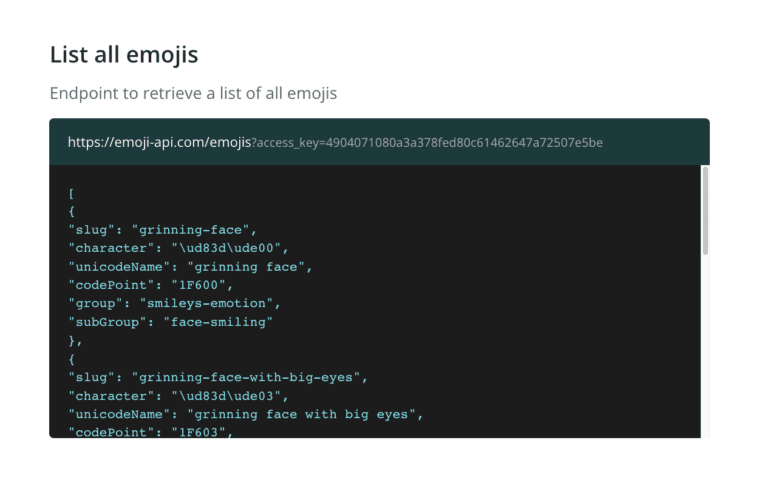
Do not copy my key. Be sure to create your own by providing your email address. Once you have your API key, scroll down to “Documentation” and you’ll notice all the different API endpoints. The only one we’ll be using for this project is the first one titled “List all emojis”. You should notice your API key at the end of the link for the API after “?access_key=”. If not, be sure to copy that link and then add in your API key.
https://emoji-api.com/emojis?access_key=<YOUR API KEY>
Once all of that is ready, it’s time to hop back into our `app.js` file and start connecting to this API. Many developers building applications that integrate multiple data sources find that managing API connections and data access at scale requires a robust backend solution. Platforms like DreamFactory can help provide governed API access to any data source, making it easier to connect your frontend to various backend systems securely.
In our app.js file:
fetch('https://emoji-api.com/emojis?access_key=<YOUR API KEY>')
.then(res => res.json())
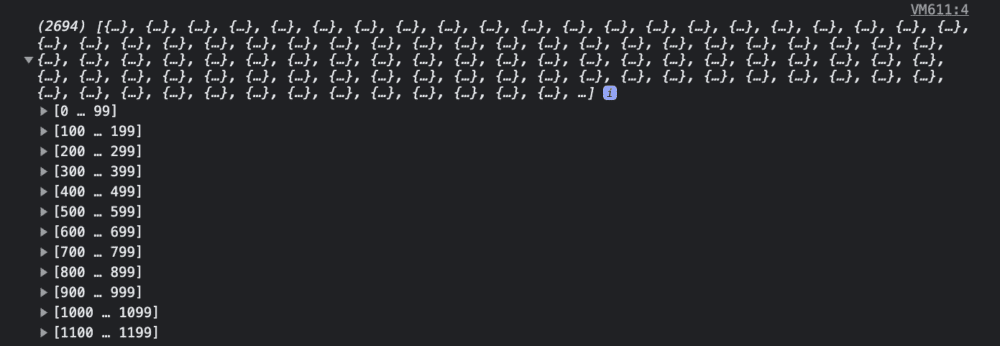
.then(data => console.log(data))Inside of the '' in our fetch method, paste in your API endpoint with your API key. Because fetch returns a promise, we can chain on a .then() method. If our response comes back okay (res.status === 200) we will convert it to json by writing .then(res => res.json()). We will get back some data. You’ll notice that I am taking this data and logging it to the console. I typically always do this when working with an API to make sure we are getting data back. If you hit save and checkout the console in your browser, you should see an array holding all of our emojis.
See Also: Build a JavaScript Tip Calculator
We will want to loop over every emoji and create a list-item for that emoji. Then append that list-item to our parent ul. This would be perfect for a function. We can pass the data holding our emojis from the API call as a parameter and run a forEach loop on that data. This is what that will look like:
function loadEmoji(data) {
    data.forEach(emoji => {
        let li = document.createElement('li');
        li.textContent = emoji.character;
        emojiList.appendChild(li);
    });
}
Above, I created a function named loadEmoji and passed in data as a parameter. Inside of this function, we’re running a loop on data, which will hold each item in our array that we’re getting back from our API call. Each array item in the array is an object with that specific emoji’s data. Here is one for example:
character: "👻",
codePoint: "1F47B",
group: "smileys-emotion",
slug: "ghost",
subGroup: "face-costume",
unicodeName: "ghost"
We are first creating a new li element and then setting the textContent of our li to the character of our object. Then, we’re appending that new li to our parent ul. That’s all we’ll need for our function. So now we need to call it. Lets replace our console.log(data) in our .then() method to loadEmoji(data). Now when we get back data from our API call, it’ll run that function, which loops over all the data and creates a li element with our emoji as the textContent.
🥳 🎉 Great work! You should now see all the emojis when clicking on the emoji icon!
Your finished code should look like this:
const emojiSelectorIcon = document.getElementById('emojiSelectorIcon');
const emojiSelector = document.getElementById('emojiSelector');

emojiSelectorIcon.addEventListener('click', () => {
   emojiSelector.classList.toggle('active');
});

fetch('https://emoji-api.com/emojis?access_key=<YOUR API KEY>')
   .then(res => res.json())
   .then(data => loadEmoji(data))

function loadEmoji(data) {
   data.forEach(emoji => {
       let li = document.createElement('li');
       li.textContent = emoji.character;
       emojiList.appendChild(li);
   });
}
Until next time, have fun and happy coding! 🙂