Last Updated on May 26, 2026 by Kari Brooks
Originally published September 27, 2012 by Jim Hoskins. Updated for 2026 to cover Mac, Windows, and Linux.
The command line can feel like a scary place the first time you see it. You read some instructions that tell you to “open a terminal and type these cryptic words,” and suddenly it looks like you’ve been sucked into The Matrix, expected to decrypt an endless stream of indecipherable characters.
Don’t worry — it really isn’t that hard to use. In fact, when you see an experienced developer staring at a terminal scrolling line after line of text faster than you can read it, they aren’t really reading it either. They’re scanning for a few key words and mostly waiting for it to stop.
This tutorial will get you comfortable with the command line in about 30 minutes. By the end you’ll know how to open your terminal, navigate your computer, create and modify files, chain commands together, and customize your shell — on Mac, Windows, or Linux.
If you want to keep learning after this, start a free 7-day trial of Treehouse and explore courses on web development, Python, JavaScript, and more.
Contents
What is the command line, and why use it?
The command line is a text-based way of telling your computer what to do. Instead of clicking icons in a graphical interface, you type a command, press Enter, and the computer responds with text.
You’ll hear a few different words used almost interchangeably:
- Terminal — the application you open. (On Mac it’s literally called Terminal. On Windows it might be PowerShell, Command Prompt, or Windows Terminal. On Linux it might be GNOME Terminal, Konsole, or others.)
- Shell — the program running inside the terminal that interprets your commands. The most common shells today are
zsh(the default on macOS since 2019),bash, andPowerShell. - Command line or CLI (command-line interface) — the general concept of typing commands to control a computer.
Why bother learning it when graphical apps exist? Three reasons:
- Many developer tools require it. Git, Node, Python, package managers like npm and Homebrew, and most cloud services are operated through the command line.
- It’s faster for many tasks. Renaming 200 files, finding every
.pnglarger than 1MB, or starting a development server is one command instead of dozens of clicks. - It’s how you talk to servers. When your code runs on a server somewhere in the cloud, there’s no mouse to click — you’ll connect via terminal and run commands.
How to open your terminal
On macOS
Open your Applications folder, then the Utilities folder. Double-click Terminal.
You can also press Cmd + Space to open Spotlight, type terminal, and hit Enter. If you’ll use it often, drag the icon to your Dock or pin it.
Note on shells: Since macOS Catalina (2019), the default shell is
zsh. Older articles you might find online assumebashinstead. The basics in this tutorial work identically in both.
On Windows
You have a few options, and which one to use depends on what you’re doing:
- Windows Terminal (recommended) — Microsoft’s modern terminal app. If you’re on Windows 11 it’s built in; on Windows 10 you can install it from the Microsoft Store. It can run PowerShell, Command Prompt, or a Linux shell (via WSL) in tabs.
- PowerShell — comes preinstalled on Windows 10 and 11. Search the Start menu for
PowerShell. Most modern Windows command line work happens here. - WSL (Windows Subsystem for Linux) — runs a real Linux environment inside Windows. Best choice for following along with Mac/Linux tutorials. Install with
wsl --installin PowerShell as administrator, then restart. - Git Bash — installed alongside Git for Windows. Provides a bash-style shell. A good lightweight option if you only need it occasionally.
For this tutorial, the commands work in PowerShell, WSL, and Git Bash. If something behaves differently in plain Command Prompt (cmd.exe), we’ll note it.
On Linux
Every desktop Linux distribution ships with a terminal. The exact name depends on your desktop environment:
- Ubuntu / GNOME: Press Ctrl + Alt + T, or search for “Terminal” in your applications.
- KDE: Look for Konsole.
- macOS-style desktops or others: Search the application menu for “terminal.”
The default shell on most Linux systems is bash, though some distributions ship with zsh. Everything in this tutorial works on either.
Anatomy of a command
Open your terminal and you’ll see something like this:
yourname@yourcomputer ~ %A few terms before we start typing:
- Console — the system as a whole: the command line plus everything that’s been printed back.
- Command line — the actual line where you type.
- Prompt — the part of the line before where you type. It usually shows useful info like your username and current folder. It ends in
$,%, or>depending on your shell. - Terminal — the actual app showing all of this.
Most commands have three parts: a program, options, and arguments. Let’s see one in action:
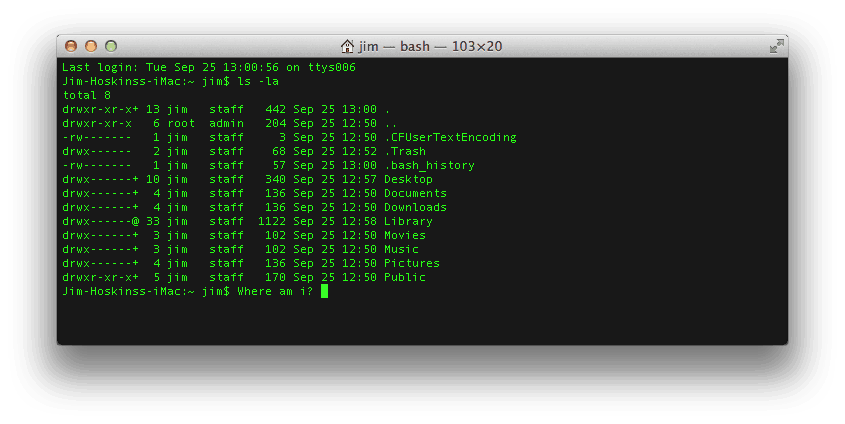
ls -l ~Type that into your terminal and press Enter. (You’ll often see commands written as $ ls -l ~ in tutorials — the $ represents the prompt and isn’t something you type.)
Breaking the command down:
- Program (
ls) — the verb. It says what to do.lsis short for “list” — show me what’s here. - Option (
-l) — modifies how the program runs.-lmeans “long format,” which adds file sizes, dates, and permissions. Options are optional — without them, programs use sensible defaults. - Argument (
~) — what to act on.~is shorthand for your home folder. So this command says: list, in long format, the contents of my home folder.
Run it. You’ll see a list of your folders and files. That’s your first command.
At any moment, your terminal is “in” a folder, called the working directory. Most commands you run will act on the current directory unless you say otherwise.
To see where you are, type:
pwdpwd stands for “print working directory.” It outputs your current location — something like /Users/yourname on Mac, /home/yourname on Linux, or C:\Users\yourname on Windows PowerShell.
To move into a different folder, use cd (“change directory”):
cd DocumentsThat’s a relative path — you’re saying “the Documents folder inside my current folder.”
You can also use an absolute path, which starts at the root of your filesystem:
cd /Users/yourname/Documents     # Mac
cd /home/yourname/Documents      # Linux
cd C:\Users\yourname\Documents   # Windows PowerShell
Or use ~ as a shortcut for your home folder, anywhere:
cd ~/DocumentsTo go up one folder (to the folder containing your current one), use the special name ..:
cd ..You can stack these:
cd ../../some-other-foldercd with no arguments takes you straight back to your home folder. Worth remembering when you get lost.
Working with files
Now that you can move around, here’s how to actually create, copy, move, and delete files.
mkdir — make a new folder
mkdir my-projectCreates a folder called my-project in your current directory. Add -p to create intermediate folders that don’t exist yet:
mkdir -p my-project/src/componentstouch — create an empty file
touch index.htmlCreates an empty file called index.html. If a file with that name already exists, touch just updates its last-modified timestamp (which is the original purpose — it was designed for build systems).
Windows PowerShell note: PowerShell doesn’t have
touch. UseNew-Item index.htmlinstead, or use WSL/Git Bash if you want to follow along with the Mac/Linux syntax.
cp — copy a file or folder
cp index.html backup.htmlCopies index.html to a new file called backup.html. To copy a whole folder, add -r (recursive):
cp -r my-project my-project-backupmv — move (or rename) a file
mv old-name.html new-name.htmlDespite the name, mv is how you rename files — moving a file to a new name in the same folder is just renaming. To actually move:
mv index.html ~/Documents/rm — delete a file
rm unwanted.html⚠️ There is no Trash, no undo. When you rm a file from the command line, it’s gone. Be deliberate.
To delete a folder and everything in it:
rm -r old-projectThe -r flag means “recursive.” Some people add -i (interactive) so the terminal asks before deleting each thing — useful while you’re getting comfortable:
rm -ri old-projectReading files: cat, less, head, tail
To dump a file’s contents to your terminal:
cat README.mdFor long files, less lets you scroll page by page — arrow keys to scroll, space bar for the next page, q to quit:
less long-log-file.txtTo peek at just the first or last few lines:
head -n 20 access.log    # first 20 lines
tail -n 20 access.log    # last 20 lines
tail -f is especially useful — it watches a file and prints new lines as they’re added. Great for following a server log live:
tail -f server.logGetting help: man and --help
You don’t need to memorize commands. Every command has a manual, accessible via man:
man lsThis opens the manual page (the “man page”) for ls. Scroll with arrow keys or space, q to quit. Want to read about man itself? man man.
Most commands also accept --help (or sometimes -h) as a quick reference without leaving the screen:
ls --helpWindows PowerShell note: PowerShell uses its own help system. Try
Get-Help Get-ChildItem(the PowerShell equivalent ofls). If you’re using WSL or Git Bash, regularmanworks.
Chaining commands with pipes
This is where the command line really earns its keep. The pipe character (|) takes the output of one command and feeds it as input to another. You can stack them as long as you want.
A small example. The command wc -l counts the number of lines in its input. If you pipe ls (which lists files) into wc -l, you get the number of files in the current folder:
ls | wc -lAnother example: grep filters lines that contain a pattern. To find every line in a log file that mentions “ERROR”:
cat server.log | grep ERRORCombine them — find lines mentioning “ERROR,” then count them:
cat server.log | grep ERROR | wc -lOr sort and de-duplicate output from any command:
ls /usr/bin | sort | uniq | head -n 20The mental model: each command does one small thing well, and pipes let you compose them. This is the single most powerful idea in the command line, and once it clicks you’ll find yourself reaching for it constantly.
Customizing your shell
After you’ve used the command line for a while, you’ll want to tweak it — change the look of your prompt, create shortcuts for commands you type often, or add tools.
The way you do this depends on your shell. Open your shell’s configuration file in any text editor:
| Shell | Config file |
|---|---|
zsh (modern Mac default) |
~/.zshrc |
bash (Linux default, older Mac, Git Bash) |
~/.bashrc (or ~/.bash_profile on Mac) |
PowerShell |
Path returned by $PROFILE |
The simplest customization is an alias — a shortcut for a longer command. Add this to your config file:
alias ll="ls -la"
alias gs="git status"
alias gp="git pull"
Save the file, then either restart your terminal or reload the config:
source ~/.zshrcNow typing ll runs ls -la, gs runs git status, and so on.
You can also customize your prompt — the text before where you type. Many developers install a framework like Oh My Zsh (for zsh) or Starship (cross-shell) that adds themes, plugins, and helpful info like current git branch directly into the prompt.
You don’t need any of this on day one. But knowing it’s possible — and that everyone’s terminal looks different because they’ve configured it — saves you from being intimidated by other people’s setups.
Where to go from here
You now know enough command line to:
- Open a terminal on any operating system
- Navigate your computer
- Create, copy, move, and delete files
- Read files and watch logs
- Chain commands with pipes
- Customize your shell
This is genuinely the bulk of what you’ll do day-to-day as a developer. Everything else is just more commands — and you know how to look them up.
To go further:
- Try our Front End Web Development track — you’ll use the command line constantly when working with Git, npm, and build tools.
- Or jump into the Full Stack JavaScript Techdegree, a structured program that takes you from beginner to job-ready.
Start your free 7-day trial of Treehouse →
No prior experience required. Cancel anytime.
Have questions or suggestions for this tutorial? Reach out on the Treehouse Community.


I am so happy to learn quick. Thank you.
Thanks for the humanity and clarity.
Mike Delia
Great article. I worked for 30 years with AT&T / Lucent Technologies / Bell Labs and retired in 1998. I just purchased my first Mac-Book Pro and discovered that I could run Unix commands. Having worked with Unix V and C Language most of my career, you have brought back fond memories. Could you recommend a C or C++ compiler?
WOW just what I was searching for. Came here by searching for Contractor
Thanks Jim gonna kick some pirates out with dose of there own medicine hopefully thanks, iwith this New to me understanding got my head pointed towards goal!
Hey, do we have documentation over Mac Terminal CLI, just like tldp.org for Linux? Otherwise for all the tools we gotta read the manuals.
5 years later, the article still makes sense. Thank you for great stuff!
‘man’ is very useful but gives too much information
the manual of a ‘ls’ is even much longer than this article
Hello, there! this is not my first time around terminal…. However, I have never really used. My line of work? Completely different!!!. Buuut! I just came a cross a big problem… I want to copy a whole bunch (thousands) of pictures from my old macbook to a new one. How can I do it using the terminal? Using Terminal… Can I transfer or import to an excel spreedsheet? if so… How?
Hi,
This is my very first experience with coding, so sorry if the question is stupid- what are ‘shells’?
Thanks 🙂
Shell is user interface for access to operating system services.
In others words, shell allows us to make use of built in operating services by calling them either by command line or a GUI Tool.
Hope it helps
Hi there! Please contact us at blog@teamtreehouse.com to discuss this further. Thanks!
how to run something on your mac’s terminal?
How can i use a give a filename with a special character “&” in the terminal ??
In case you didn’t discover the answer; I’m pretty certain that you put the symbol inside speech marks “&”
I loved your post, pretty solid list for a beginner. I also found this website online with a few other commands: http://applemacosx.com/2015/11/29/mac-os-x-terminal-tutorial/
Thank you, very helpful.
Knew a few of these command features a number of years back, but —-
Dang ageing, or rather lack of use.
I used the command line on my former Pro Mac, but forgot many features.
Frankly, was introduced to some of these back in my Wintel days over 30 years back in a govt. office by a pseudo techie, thus not totally forgotten.
Peace Happy Holidays!
Thanks Jim ! New in Mac terminal. Earlier used to with DOS comm. Easy to learn from ur blog.
Great page Jim! Very user friendly, well explained and interesting. I mostly knew everything but am reviewing to train some beginners on my project for how to use terminal and basic bash commands.
lbs-imac-04:~ LBSIMAC04$ ls
Desktop Movies Public
Documents Music Sites
Downloads NetBeansProjects Ten Thumbs Students
Library Pictures
lbs-imac-04:~ LBSIMAC04$
I want to go with my applications.
Anyone please.
Thanks
cd ~/Applications
Will take you to the Applications folder
Very helpful. Thank you Jim. Newish to the Mac world and have had 2 left feet in the terminal window! 🙂
There are a ton of different commands you can use, but only a couple dozen will get you pretty effective in the command line
Thanks so much for this article! I’m trying to learn how to program for video games but I don’t even know how to use a terminal haha.