
Last Updated on May 21, 2015 by Laura Coronel
If you are using animations in your web apps you’ll want to make sure that they run smoothly. The easiest way of doing this is to use requestAnimationFrame (sometimes referred to as rAF), a method that makes creating smooth animations effortless.
Using the requestAnimationFrame method allows the browser to handle some of the complicated animation tasks for you, such as managing the frame rate.
Developers have previously used setTimeout and setInterval to create animations. The problem here is that in order for the animations to be smooth the browser often has to paint frames quicker than the screen can display then (most computer screens have a refresh rate of 60 frames per second or FPS). This results in unnecessary computation. Another problem with using setInterval or setTimeout is that the animations will continue to run even if the page is not visible to the user.
Contents
Why use requestAnimationFrame?
So why is requestAnimationFrame so great? Lets take a look at some of the things that make requestAnimationFrame superior to using setInterval or setTimeout.
Browser Optimizations
Using requestAnimationFrame gives the browser the ability to optimize your animations to make them smoother and more resource efficient. I won’t go into too much detail on exactly how the browser makes these optimizations, just know that it eliminates the possibility of unnecessary draws and can bunch together multiple animations into a single reflow and repaint cycle.
Animations Only Run When Visible
When using requestAnimationFrame your animations will only run when the tab (or window) is visible to the user. This means less CPU, GPU and memory usage – which brings us on to our final point.
Battery Friendly
The optimizations mentioned in the previous two points all help to reduce the amount of ‘stuff’ that a device has to do to create your animations and therefore helps to conserve battery power. This is especially important for mobile devices that typically have a relatively short battery life.
Using requestAnimationFrame
The requestAnimationFrame method should be passed a callback function that is responsible for drawing a single frame of your animation. In order to create a full animation you will need to make this callback recursive.
A high resolution timestamp (DOMHighResTimeStamp) is passed to the callback function. You won’t always need to use this but it can come in handy for some animations.
The example below shows how to set up a recursive function that uses requestAnimationFrame.
// Animate.
function animate(highResTimestamp) {
  requestAnimationFrame(animate);
  // Animate something...
}

// Start the animation.
requestAnimationFrame(animate);
It’s worth noting that you only have 16.67ms to render each frame. This isn’t a great deal of time so you should be careful about what you decide to execute inside the callback function. If your frame takes longer than 16.67ms to render, the animation may not appear as smooth.
The requestAnimationFrame method will return a requestID that can be used for cancelling the scheduled animation frame.
var requestID = requestAnimationFrame(animate);
Cancelling Animation Frames
To cancel a scheduled animation frame you can use the cancelAnimationFrame method. This method should be passed the requestID for the frame you wish to cancel.
cancelAnimationFrame(requestID);
You’ll see how to keep track of the current requestID later.
Polyfill
There’s a great polyfill for requestAnimationFrame that was developed by Erik Möller of Opera (and later worked on by Paul Irish and Tino Zijdel).
You can find the code in this gist.
Creating a Simple requestAnimationFrame Demo
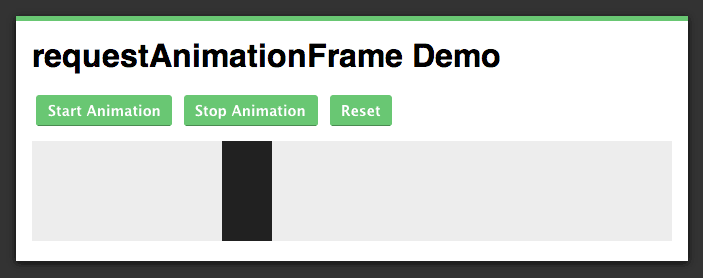
Now that you understand the theory behind using requestAnimationFrame lets create a simple demo.
See the Demo Download the Code View on CodePen
Setting up the HTML and CSS
Open up your favorite text editor and create a file called index.html. Once you’re done, add the following code to the new file.
<!DOCTYPE html>
<html lang="en">
<head>
  <meta charset="UTF-8">
  <title>requestAnimationFrame Demo</title>

  <link rel="stylesheet" href="style.css">
</head>
<body>
  <div id="page-wrapper">
    <h1>requestAnimationFrame Demo</h1>

    <div class="controls">
      <button type="button" id="startBtn">Start Animation</button>
      <button type="button" id="stopBtn">Stop Animation</button>
      <button type="button" id="resetBtn">Reset</button>
    </div>

    <canvas id="stage" width="640" height="100"></canvas>
  </div>

  <script src="raf-polyfill.js"></script>
  <script src="script.js"></script>
</body>
</html>
In this markup you define a number of buttons that will be used for starting, stopping, and resetting the animation. You also define the canvas where the animation will take place.
You may notice that there are two files referenced in <script> elements towards the end of this markup. The raf-polyfill.js file contains the polyfill that we looked at in the previous section. Make sure that you download this file and save it in the same folder as your index.html file. You will also need to copy the style.css file from the code download into your project folder.
Setting up the JavaScript
Now that you have your HTML and CSS sorted, it’s time to start writing the JavaScript code that will handle drawing the animation on the canvas. If you haven’t used the Canvas API before, don’t worry, I will explain everything you need to know as we go.
Create a new file in your project folder called script.js and add the following code to it.
(function() {

  // Get the buttons.
  var startBtn = document.getElementById('startBtn');
  var stopBtn = document.getElementById('stopBtn');
  var resetBtn = document.getElementById('resetBtn');

  // The rest of the code goes here...
}());
Here you have created three variables and initialized them by fetching the buttons in your markup.
Next you need to write some code to set up the canvas. Copy this code into your script.js file.
// Canvas
var canvas = document.getElementById('stage');

// 2d Drawing Context.
var ctx = canvas.getContext('2d');

// Set the fill style for the drawing context.
ctx.fillStyle = '#212121';

// A variable to store the requestID.
var requestID;

// Variables to for the drawing position and object.
var posX = 0;
var boxWidth = 50;
var pixelsPerFrame = 5; // How many pixels the box should move per frame.

// Draw the initial box on the canvas.
ctx.fillRect(posX, 0, boxWidth, canvas.height);
Here you first create a variable called canvas and initialize it by fetching the <canvas> element in your markup. You then get a 2d drawing context for the canvas. This provides methods for drawing objects on the canvas as well as controlling the styling of those objects.
The next line of code sets the fillStyle property on the drawing context to #212121.
The requestID variable will be used to keep track of the requestID returned by the requestAnimationFrame method.
The posX, boxWidth, and pixelsPerFrame variables are used to set the position the box should be drawn on the canvas; the width of the box; and the number of pixels the box should be moved in each frame.
Finally you call the drawing contexts fillRect method, passing in the X and Y coordinates of the location the rectangle should be drawn along with its height and width.
Writing the animate Function
Next up you need to write the animate function which will be responsible for drawing frames.
Copy the following code into your script.js file.
// Animate.
function animate() {
  requestID = requestAnimationFrame(animate);

  // If the box has not reached the end draw on the canvas.
  // Otherwise stop the animation.
  if (posX <= (canvas.width - boxWidth)) {
    ctx.clearRect((posX - pixelsPerFrame), 0, boxWidth, canvas.height);
    ctx.fillRect(posX, 0, boxWidth, canvas.height);
    posX += pixelsPerFrame;
  } else {
    cancelAnimationFrame(requestID);
  }
}
The call to requestAnimateFrame at the top of this function will schedule the next animation frame. This is placed first so that we can get as close to 60FPS as possible when using the setTimeout fallback provided by the polyfill.
You then have an if statement that checks to see if the box has reached the right side of the canvas. If the box has not yet reached the end you use the clearRect method to remove the box drawn in the previous frame and then draw the box at it’s new position using fillRect. If the box has reached the end of the canvas, you call cancelAnimationFrame in order to cancel the frame scheduled at the start of the animate function. Finally, you update the posX variable with the position that the box should be drawn in the next frame.
Note: Notice that the parameters passed to clearRect only cover the position of the box in the previous frame. As we only have 16.67ms to finish drawing the frame it is best to do as little work as possible. Clearing the whole canvas (read: the lazy way) would take much longer than clearing just a small section of it.
We could have actually optimized this even further. How do you think this could have been achieved? Share your solutions in the comments.
The final task you need to complete to get your demo working is to set up some event listeners for the start, stop, and reset buttons.
Add the following code into your script.js file.
// Event listener for the start button.
startBtn.addEventListener('click', function(e) {
  e.preventDefault();

  // Start the animation.
  requestID = requestAnimationFrame(animate);
});

// Event listener for the stop button.
stopBtn.addEventListener('click', function(e) {
  e.preventDefault();

  // Stop the animation;
  cancelAnimationFrame(requestID);
});

// Event listener for the reset button.
resetBtn.addEventListener('click', function(e) {
  e.preventDefault();

  // Reset the X position to 0.
  posX = 0;

  // Clear the canvas.
  ctx.clearRect(0, 0, canvas.width, canvas.height);

  // Draw the initial box on the canvas.
  ctx.fillRect(posX, 0, boxWidth, canvas.height);
});
Here you have set up three event listeners. The first two are for starting and stopping the animation. The final event listener is fired when the reset button is clicked. This will set the posX variable to 0. It also clears the canvas – we’re not as concerned about performance so it’s okay to do this the lazy way – and draws the box back at it’s start position.
Your demo app is now complete! Open the index.html file in your browser and click the start button to see the animation.
See the Demo Download the Code View on CodePen
Browser Support
Browser support for requestAnimationFrame is reasonably good. Firefox and Chrome have had support for a while now with Opera and IE adding support more recently. As long as you’re including the polyfill mentioned earlier in this post you should be okay to use requestAnimationFrame in your projects today.
| IE | Firefox | Chrome | Safari | Opera |
|---|---|---|---|---|
| 10+ | 4.0+ | 10.0+ | 6.0+ | 15.0+ |
Source: http://caniuse.com/requestanimationframe
Summary
The requestAnimationFrame method makes it really easy for developers to create smooth JavaScript animations for their websites. By delegating the handling of animation frames to the browser you are able to take advantage of a number of optimizations, all of which result in less resource usage and extended battery life on mobile devices.
What do you think about requestAnimationFrame? Share your thoughts in the comments.


Hello Matt,
Thank you for the wonderful article!There is no better explanation of the topic all around the web
Hi Matt,
This is already an old article, so you might not be around anymore to reply. But I’ll go ahead and ask anyway. My question is: how do I run consecutive animations, each created with requestAnimationFrame, in such a way that the transition points between one animation and the next won’t be choppy? (Putting the animations in one big animation isn’t an option in my case, because the decision to run the animations consecutively or separately is left up to the user.) Since requestAnimateFrame, if I understand correctly, has a variable refresh rate (hence a variable total animation duration), it’s not really feasible to time the animations using setTimeout. What would your solution be to this problem? Many thanks in advance, and kudos for your writing! — Kim
When I want to use rAF on several layered canvases, I like to create a common timeStamp they can all use. Since I’m using JS, I just create a global variable and everything can access it via a closure.
var globalAnimationTimestamp = 0;
Then start each animation function with a global timestamp check/init while taking advantage of the timestamp rAF automatically passes into every function it initializes to determine which sync’d frame the function should animate. Such as:
function drawGameLayer(timestamp) {
//check whether globalAnimationTimestamp has been initialized to a dateTime
//if not, initialize to the current timestamp
if (!globalAnimationTimestamp) globalAnimationTimestamp = timestamp;
var milisecondsToSeconds = 1000;
var secondsPerFrame = 0.06;
var frame = (timestamp – globalAnimationTimestamp) % milisecondsToSeconds * secondsPerFrame;
//You can compete draw function for all layers with this start and they should appear
//to stay in sync as the general rAF timestamp error is within 5ms, or about a third
//of a frame.
}
Hope it helps!
Why not just use css3 animation?
Using JavaScript (and requestAnimationFrame) allows you to create more complex animations.
As an example, check out Paul Lewis’ fireworks demo: http://lab.aerotwist.com/canvas/fireworks/
Thanks for the reply.By the way…in the link you gave me no animation is shown, just a black background. I am using chrome.
Oops, sorry I should have been more specific.
If you click on the page you should see fireworks that shoot up from the bottom 🙂