
Last Updated on March 3, 2023 by Laura Coronel
Objective-C is an object-oriented programming language. There are two key elements of the programming language, including the Objective-C class and the object. Let’s dive deeper into these elements so you can better understand the basics.
This article is the third part of a series. Be sure to check out The Beginner’s Guide to Objective-C: Language and Variables and The Beginner’s Guide to Objective-C: Methods for all the details.
Contents
A Quick Refresh: What Is Objective-C?
Objective-C is an “object-oriented” programming language, but what does that mean? In an earlier post, I described how “an object-oriented language is built around the concept of objects.” By that, I mean the programming language is used in such a way that real-world objects can be represented in code in an intuitive manner that makes sense.
As is often the case, this is best illustrated with an example. Let’s imagine that we are working on an app that allows users to order pizzas from a local restaurant.
The user’s order is an example of an “object.” It has properties, like the user’s name, phone number, and ordered items. Each item, like a pizza, is another “object” with its own properties, like size and toppings.
The properties are represented a certain way in code and can be accessed throughout the app. This gives the code an organized structure that becomes more apparent with use and practice.

Anything, physical or abstract, can be as an “object” in code. (ninacoco/Flickr)
These objects can also have behaviors associated with them. With the order example, it can be submitted or canceled. Those two behaviors can be represented as “methods” in code, which you might remember from another earlier post.
In code, this might be represented as the following, which creates a simple order for Ben, adds a pepperoni pizza, and submits the order to the store:
Order *order = [[Order alloc] init];
order.name = @"Ben";
[order.items addObject:[Pizza initWithToppings:@"Pepperoni"]];
[order submit];
Why Does Object-Oriented Programming Matter?
Programmers loathe inefficiency and have spent decades establishing conventions and patterns for software development that improve efficiency in different ways.
Object-oriented principles allow for better use, organization, and understanding of code. It separates code into modules that can be easily reused or changed. Plus, it ensures the code is easier to understand for those who use it.
What Is an Objective-C Class and Object?
In general, files of code in Objective-C are organized as classes. An Objective-C class is usually represented by two files: a header file and a corresponding implementation file.
A class is meant to define an object and how it works. In this way, an Objective-C class is like a blueprint of an object. Classes define things about objects as properties, and abilities of the object are defined as methods.
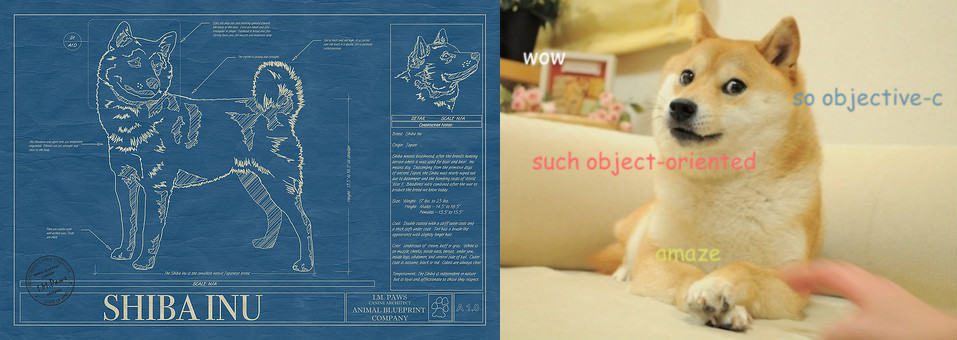
A class is like a blueprint for an object. (wondermonkey2k/Flickr)
Header Files in an Objective-C Class
The header file (with the file extension .h) defines the class and everything about it for the world to know. The idea is to separate the definition of a class from its nitty-gritty implementation details.
In this case, the header file acts as the interface to the rest of your program. Your other code will access everything about a class based on what is made available in its interface, including available properties and methods.
Let’s take a look at a class that could be used to represent a simple connection to a website. This simple object has one property, a URL, and two methods: “connect” and “canHandleRequest.” The header file might look something like this:
UrlConnection.h

01 #import <Foundation/Foundation.h>
02
03 @interface UrlConnection : NSObject
04
05 @property NSString *url;
06
07 - (void)connect;
08 + (BOOL)canHandleRequest:(NSString *)type forUrl:(NSString *)url;
09
10 @end
The first line is what is known as an import statement. This is used to import required files that the code inside this class needs. In this example, we are importing the Foundation classes, which include NSObjects like NSString, NSArray, etc. A class can have many import statements, each on its own line.
There’s one quick thing to point out about import statements: Sometimes you will see the names of things in angle brackets, like this example, and other times you’ll see the names in double quotes, like #import "PizzaViewController.h".
Angle brackets tell the compiler to search for the code to import in certain system paths, whereas the double quotes tell it to search within the current project.
The next line (line 3) is the interface declaration. It begins with @interface and ends with @end on line 10. These special markers designate the beginning and end of the class interface definition. After @interface is the name, so the name of this example class is “UrlConnection.” The name here must match the name used in the .h and .m files.
Up next on line 3 is a colon and another name. The colon means that the next name is the parent class of this class. Object-oriented programming languages have a concept called inheritance that is used to share properties and methods from one class to another.
In this example, our UrlConnection class is inheriting from the NSObject class, which is Objective-C’s generic object class. NSObject defines some very basic structure about objects in Objective-C, but classes can inherit from any other class.
For example, we could create another class named YouTubeUrlConnection that inherits from this UrlConnection class, and the interface declaration would look like this:
@interface YouTubeUrlConnection : UrlConnectionProperties
The next line in the class (line 5) declares a property of the class called “url.”
@property NSString *url;Properties, remember, are data items about the object. In this case, it would be the actual URL that this object will be trying to connect to. Properties are declared with the special @property keyword and end with the semicolon.
After @property, we have a regular variable declaration that includes its data type (NSString in this case) and name (“url”).
I should also point out that properties can have attributes that are defined inside parenthesis after the @property keyword:
@property (nonatomic, strong) NSString *url; // Example attributesThese are added to show other objects how to interact with the property and to tell the compiler how to automatically create “getter” and “setter” methods that can be used to set or retrieve the value of the property.
Methods
After the properties of a class, the methods (think behavior) are usually listed. Methods are used to organize our code into reusable (and understandable) chunks that save us a lot of time and energy.
On lines 7 and 8 in our example, we have two methods listed:
- (void)connect;
+ (BOOL)canHandleRequest:(NSString *)type forUrl:(NSString *)url;
Notice that these are just the names of the method. This is known as the method signature. It also tells us what kind of data will be returned (if any), and what parameters might be required to call it.
The connect method does not have any parameters, nor does it return anything. The canHandleRequest method returns a BOOL value and has two parameters, both NSStrings.
Instance vs. Class Methods
Method declarations begin with either a minus (-) or a plus sign (+). The minus sign indicates that this method is an instance method.
This means that an instance of the class must be available to call this method. Or, in other words, it means that in our code we need to be using an object made from this class, like if we allocated and initialized a UrlConnection object as a variable.
Class methods (beginning with the plus sign), can be used simply by referencing the class. No instance of the class is needed. We can call a class method anywhere in our code as long as the header file for the class is imported.
Let’s take a look at an example of using this UrlConnection class:
01 BOOL canHandleIt = [UrlConnection canHandleRequest:@"GET"
02                     forUrl:@"http://www.teamtreehouse.com"];
03
04 if (canHandleIt) {
05   UrlConnection *connection = [[UrlConnection alloc] init];
06   connection.url = @"http://www.teamtreehouse.com";
07   [connection connect];
08 }
On lines 1 and 2 we set a BOOL variable using the canHandleRequest method. Yes, method calls can span more than one line if we want! It’s up to us.
Notice that no instance of UrlConnection has been declared yet, but we reference the method using the class name.
On line 6 we have a UrlConnection variable named “connection.” We use this variable, an instance of the UrlConnection class, to call the connect method.
We are not allowed to write [connection canHandleRequest:@"GET"], nor can we write [UrlConnection connect].
Implementation Files in the Objective-C Class
The other half of a class is the implementation file (with the file extension .m). This is where the magic happens and where the dirty work and the heavy lifting occur.
Implementation files implement all those things that we declare to be available in the header files. Every method that we say an Objective-C class has must be defined with all its necessary code in the implementation file.
Continuing with our UrlConnection example, the following is a shortened version of what the implementation file might look like:
UrlConnection.m

01 #import "UrlConnection.h"
02
03 @implementation UrlConnection
04
05 - (void)connect {
06   /* In here would be code to attempt a connection to the
07    * specified URL, while possibly handling connection errors.
08    */
09 }
10
11 + (BOOL)canHandleRequest:(NSString *)type
12                   forUrl:(NSString *)url {
13   /* And in here would be code to see if the given URL passed
14    * in is capable of handling the HTTP request type specified
15    * by the "type" parameter. It will return YES or NO.
16    */
17 }
18
19 @end
Notice that the header file must be imported (line 1). Because these are two separate files, the compiler must be told where to find the header file that belongs to this implementation file.
As we saw earlier, the double quotes are used on this line to indicate that the file should be located in the same project as this implementation file.
Next, on line 3, we begin the actual implementation of the class with the @implementation keyword. This correlates to the @interface keyword for the header file. And in the same manner, the implementation ends with the @end keyword on line 19.
Primarily, we see method definitions inside the implementation. In our example, we have two methods, which are defined here. Notice that the signature for the methods is the exact same as what we saw in the header file.
What’s different is that the body of the method, the code that makes it up, is also shown here as a bunch of statements inside curly brackets that immediately follow the method signature.
Now, we do not have any code in this example because that is not what we are focusing on here. But the comments provided give an idea as to what the Objective-C statements inside the methods will be doing.
Learn More About Programming With Treehouse
The goal of this guide was to help you better understand the Objective-C class and object so you can use them as you code. Knowing how to organize and structure your objects is an art that even experienced programmers are constantly refining.
If you want to dive deeper into programming, check out Treehouse’s various Techdegrees, tracks, and courses. Get started today by signing up for a free trial of Treehouse. Happy coding!
*Shiba Inu blueprint courtesy of wondermonkey2k and pizza image courtesy of ninacoco under the Creative Commons license.


hey
good and very helpful article. i was looking for my assignment answers and found one
thank you
Thank you for sharing!
Very Clear
A blog like yours should be earning much money from adsense..-.,?
OOP is the way to go!
Ben,
Your tutorials might make a developer out of me yet! Thank you for all of your hard work on this series. I look forward to more from you.
Thank you,
Dustin James
PS: I hope the next tutorial will cover <delegates≥ as I am struggling to understand the way they work.
Cheers ;]
Thanks! Glad you are finding them useful. I’m putting the finishing touches on my next article now, but I’ll try to add something about delegates. In the mean time, this short answer from StackOverflow explains the basic concept pretty well: http://stackoverflow.com/a/2534583/475217