
Last Updated on November 21, 2022 by Laura Coronel
Some people fear the command line. They view it as the deep, dark underbelly of their computer, far from the familiar comforts of the GUI. A place of great mystery where even the angels fear to tread.
But then there are others who appreciate the command line for what it is: a place of great power and usefulness. A place where the most tedious of tasks can be performed quickly and easily; where shortcuts and scripts abound to help out the most serious of developers.
In today’s tutorial, we’re going to crack open our Terminal program for a rather surprising reason: maintaining a WordPress site using wp-cli (short for WordPress Command Line Interface).
This tutorial is going to assume three things: you are using a Macintosh (although wp-cli works in any Unix-based environment), you have a means of cloning a GitHub repository (either through the command line git or through a GUI such as Tower or GitHub), and you have an installation of WordPress on your working machine. If you’ve got all three of those, you’re golden!
Contents
Installation
First things first, open up the Terminal program on your Mac. Find a nice home for holding the wp-cli code and do a git clone --recurse-submodules git://github.com/wp-cli/wp-cli.git. cd into your new wp-cli directory, and run sudo utils/dev-build. (You’ll most likely need to enter your system password.)
If everything goes well, you’ll now have access to the command wp, and a whole bevy of tools to make administering your WordPress site a bit easier.
Also Read: The Perfect Inline SVG Workflow
Updating WordPress Core
Sure, we all know deep in our hearts that we should be upgrading our WordPress installations as soon as new versions are released. Old versions of WordPress can be subject to security flaws that could severly compromise your site’s data. But all that clicking can get so tiresome when you have multiple sites to maintain. We’ll get to how to make that process easier in a moment, but first, let’s work with wp-cli on a single site.
To check the version of WordPress your site is running, navigate to the WordPress root directory (the directory in which wp-login.php can be found) and run the command wp core version. If you see anything lower than the currently shipping version (which as of this writing is 3.5.1), then it’s time to upgrade.
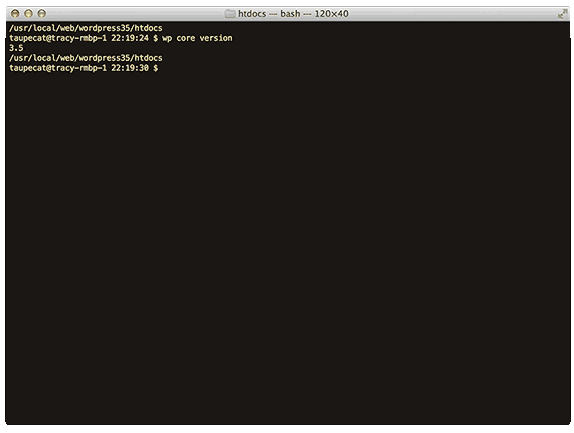
Oops! Looks like our WordPress installation is slightly out of date!
As always when attempting an upgrade, we want to back up our database, you know, just in case. wp-cli makes this just as easy by running the command wp db export.
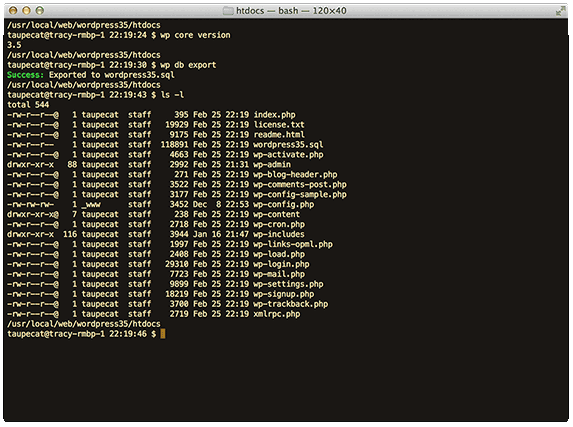
One simple command, and our precious data is backed-up for safe keeping.
Now to upgrade your WordPress software, run the command wp core update. Voilà! You are now running the latest, greatest version of WordPress.
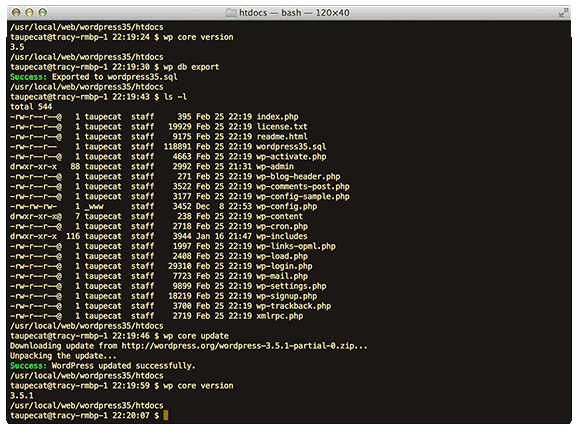
Instantly bring your WordPress up-to-date with one command. A quick check with “wp core version” confirms this.
The true power of a command line WordPress tool is, in a word, scripting. If you have many WordPress sites (and are not running multisite), upgrading each instance can be automated into one neat and tidy script:
#!/bin/bash
declare -a wp_sites=('/usr/local/web/site1/htdocs' '/usr/local/web/site2/htdocs' '/usr/local/web/site3/htdocs')

for site in "${wp_sites[@]}"; do
    echo Upgrading $site...
    wp --path=$site db export $site/db-backup.sql
    wp --path=$site core update
done
Just replace the ‘/usr/local/web/[site-name]/htdocs’ with wherever the roots of your WordPress installations live, and you can upgrade your sites (including backing up the databases) in one fell swoop.
Related Reading: Should You Go Beyond Relational Databases?
Managing Plugins and Themes
Managing your site’s plugins and themes is just as easy, and using wp-cli can be a real time saver on a site with a lot of plugins to manage.
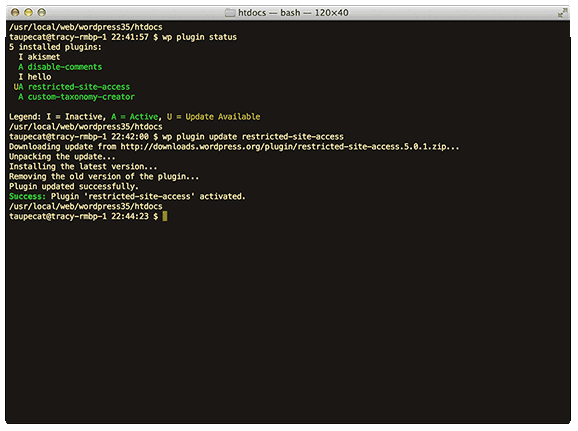
To list all the plugins on your site, use the command wp plugin status. Your output will look something like this:
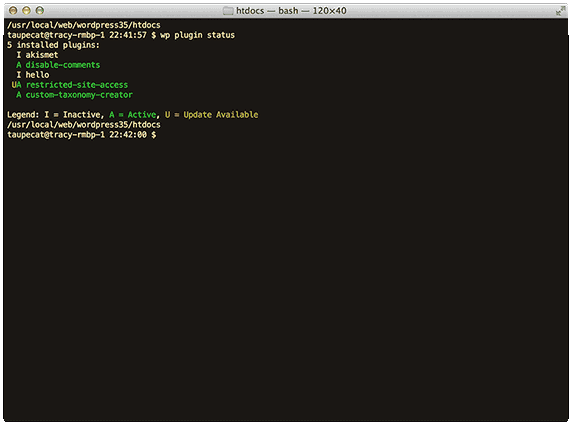
This shows me that I have three plugins that are installed and active (disable-comments, restricted-site-access and custom-taxonomy-creator), two plugins that are installed but inactive (akismet and hello), and one plugin that has an update available (restricted-site-access). The names listed for each of these plugins are based on their path in the WordPress plugins repository. Just take the portion of the URL after “http://wordpress.org/extend/plugins/” and you have your plugin name.
To upgrade any plugin, the command is very similar to upgrading core; in this case, we want to run wp plugin update restricted-site-access. Have multiple plugins that need updating? wp plugin update-all will take care of all of them for you. To activate a plugin, run wp plugin activate <plugin name> and to deactivate one, you guessed it, wp plugin deactivate <plugin name>.
By substituting the word “plugin” with “theme” in the above examples, you can do the same easy maintenance of WordPress themes.
Taking wp-cli to Eleven
At RP3 Agency, we recently switched from Subversion to Git as our revision control system of choice. In the process, we had to rewrite all of our build scripts and I, being a command line geek, decided to allow a command line build option in addition to our existing web-based one. The web-based system had very rudimentary means of logging builds, and my boss wanted to preserve and even enhance that functionality by logging builds to our team’s P2-based blog.
Not wanting to pollute the main blog entries with log messages, I created a Custom Post Type specifically for the logs, using Advanced Custom Fields to set up the required fields: username, timestamp, project, repository and rsync_output. But how to best enter the information into the blog?
There were three choices I could think of: generating a WordPress XML import file, and somehow scripting that to be automatically imported, but creating that XML file seemed daunting, and I wasn’t sure if an “automatic” import was possible. Next, I could update the MySQL database automatically, but getting all of the meta data “just right” seemed risky at best, and opened up a host of potential security issues.
Then there was what was behind door number three: using wp-cli to automatically create my posts with whatever meta data I saw fit to give it. After gathering all the information in the script and capturing the rsync transfer output to a string, I could run the following commands to push all that content into the WordPress site (the domain names have been changed to protect the innocent):
#!/bin/bash
postID=`ssh webuser@blogmachine.mysite.com \
    "wp --path=$blog_home post create --post_type=deployment \
    --post_title=\"${logstring}\" --post_status=publish --porcelain"`

ssh webuser@blogmachine.mysite.com \
    "wp --quiet --path=$blog_home post-meta add $postID username $whoami; \
    wp --quiet --path=$blog_home post-meta add $postID timestamp \"${timestamp}\"; \
    wp --quiet --path=$blog_home post-meta add $postID project $project; \
    wp --quiet --path=$blog_home post-meta add $postID repository $repository; \
    wp --quiet --path=$blog_home post-meta add $postID rsync_output \"$rsync_output\""
So what does all of this do? The first command creates the post in the wp_posts table, gives it a title (in this case, all of our log information except for the rsync output), makes sure that the post is published immediately, and finally grabs the resulting post ID into a variable. The second command goes through each of our custom fields (the post meta data), and stores them individually in the post. All of this is done through ssh, so having your ssh keys set up beforehand will help make the process run smoother so you don’t have to constantly enter the password for the remote account.
Conclusion
Even when you are working with a very GUI-dependent platform such as WordPress, there are command line tools that can help make your maintenance tasks a breeze. The commands here are the tip of the iceberg; explore wp-cli for yourself and unleash the power of the command line!
Looking to deepen your knowledge on coding, design and more? Check out the Treehouse 7-day free trial today!