
Last Updated on September 11, 2023 by Laura Coronel
(Photo by Kenny Louie / Flickr)
An exciting feature of the HTML specification is creating custom HTML elements. These allow you to create your own HTML elements along with their own JavaScript API. This can be useful when building interfaces with reused components throughout an application.
Free trial on Treehouse: Do you want to learn more about HTML and front-end programming? Click here to try a free trial on Treehouse.
In this article you’re going to learn how to create your own HTML elements and define a JavaScript API for them.
Let’s get started.
Contents
- 1 How to Create Custom Elements
- 2 Creating a JavaScript API For Your Element
- 3 Extending Existing Elements
- 4 Custom Element Callback Methods
- 5 Custom Elements with Shadow DOM
- 6 Browser Support for Custom HTML Elements
- 7 Final Thoughts
- 8 Useful Links
- 9 How to Create Custom Elements
- 10 Creating a JavaScript API For Your Element
- 11 Extending Existing Elements
- 12 Custom Element Callback Methods
- 13 Custom Elements with Shadow DOM
- 14 Browser Support for Custom HTML Elements
- 15 Final Thoughts
- 16 Useful Links
How to Create Custom Elements
The document.customElements.define() method is used to create a custom HTML element. This should be passed as the name of your custom element along with an (optional) object that defines the API.
In the following example we simply create a new HTML element called <x-treehouse> and then add it to the page.
var XTreehouseElement = document.customElements('x-treehouse');
document.body.appendChild(new XTreehouseElement());
This would add the following HTML to the end of the <body> element:
<x-treehouse></x-treehouse>
The name of your custom element must contain a dash (-) so when the browser parses your code, it can determine between standard and custom HTML elements. This also means that you won’t encounter problems if a new HTML element is introduced that uses the same name as your custom element.
Creating a JavaScript API For Your Element
You can define a JavaScript API for your custom element that consists of a number of methods and properties. To do this, start by creating a new JavaScript object. This can be done using the Object.create() method. Passing HTMLElement.prototype to this method will create an object with the standard set of methods and properties available to HTML elements.
var XTreehouseProto = Object.create(HTMLElement.prototype);
You can then define your custom methods on this new object, as shown below.
XTreehouseProto.hello = function() {
    alert('Hello!');
}
To define a property for your custom element you can use the Object.defineProperty() method. The first parameter should be your prototype object; the second is the name of the property; and the third should be an object describing the behavior of that property. This is where you can set a default value as well as specify whether the property is writable or read-only.
Object.defineProperty(XTreehouseProto, 'badges', {
    value: 20,
    writable : true
});
Once you’ve defined the API for your custom element, you need to call document.registerElement(). Use the name of your custom element as the first parameter, and then pass in an object with a property named prototype. The value of this property should be set to the prototype object you created earlier.
var XTreehouseElement = document.customElements('x-treehouse',  {
    prototype: XTreehouseProto
});
Once you’ve registered your custom element, you can create a new instance of the element and add it to the page.
var xtreehouse = new XTreehouseElement();
document.body.appendChild(xtreehouse);
The methods and properties you defined earlier can be accessed just as you would on any other HTML element.
xtreehouse.hello();
var badges = xtreehouse.badges;
Related Reading: Should I Learn HTML Before JavaScript?
Extending Existing Elements
As well as creating your own custom elements, you can also use the registerElement() method to extend the functionality of existing HTML elements. Let’s extend the <img> element to create a variation for displaying thumbnail images.
You start by creating a prototype object as we did before. This time, however, you want to copy the prototype object of the element you are extending. In this case, that will be the HTMLImageElement.
var ThumbImageProto = Object.create(HTMLImageElement.prototype);
Next you define a function for the createdCallback, which is fired when the element is created. (More on callbacks is in the next section.) Here we can set the width and height of the image.
ThumbImageProto.createdCallback = function() {
    this.width = '100';
    this.height = '100';
};
You can also define custom methods and properties as before.
ThumbImageProto.changeImage = function() {
    this.src = 'new-image.jpg';
};
When extending an existing element, you need to add the extends property to your options object in the call to document.registerElement(). This property should be set to the name of the element you are extending.
var ThumbImage = document.customElements('thumb-img', {
    prototype: ThumbImageProto,
    extends: 'img'
});
To use your custom element, you can now specify an is attribute on the element that you have extended. Setting the value of this attribute to the name of your custom element will tell the browser that this <img> element should use the API defined for thumb-img.
<img is="thumb-img">
Custom Element Callback Methods
There are many callbacks that you can listen for when creating and managing your custom elements.
createdCallback– Called when a custom element is created.attachedCallback– Called when a custom element is inserted into the DOM.detachedCallback– Called when a custom element is removed from the DOM.attributeChangedCallback(attrName, oldValue, newValue)– Called when an attribute on a custom element changes.
You specify functions for these callbacks on the prototype object that’s passed to document.registerElement().
var XTreehouseProto = Object.create(HTMLElement.prototype);

XTreehouseProto.createdCallback = function() {}
XTreehouseProto.attachedCallback = function() {}
XTreehouseProto.detachedCallback = function() {}
XTreehouseProto.attributeChangedCallback = function(attrName, oldValue, newValue) {}

var XTreehouse = document.customElements('x-treehouse',  { prototype: XTreehouseProto });
Custom Elements with Shadow DOM
The true power of custom elements becomes clear when you think about how they can be used alongside Shadow DOM. This makes it really easy to create reusable interface components.
Using custom elements and shadow DOM to create reusable product cards.
In this section we’re going to look at an example of how you can use custom elements and Shadow DOM to create an interface component for displaying products in a web store. The idea here is that a web developer can easily create new products by adding a single line of HTML to their markup. The information needed to display the product is contained within data- attributes on the custom element.
<x-product data-name="Product Name" data-img="image.png" data-url="http://example.com"></x-product>
We’ll start by create a new prototype object based off of HTMLElement.prototype.
// Create a new object based of the HTMLElement prototype
var XProductProto = Object.create(HTMLElement.prototype);
Next we need to set up a function for createdCallback. This is where we will create the <img> and <a> elements that are responsible for displaying the product. I’ll show you the code first and then walk you through it.
// Set up the element.
XProductProto.createdCallback = function() {
    // Create a Shadow Root
    var shadow = this.createShadowRoot();

    // Create an img element and set it's attributes.
    var img = document.createElement('img');
    img.alt = this.getAttribute('data-name');
    img.src = this.getAttribute('data-img');
    img.width = '150';
    img.height = '150';
    img.className = 'product-img';

    // Add the image to the Shadow Root.
    shadow.appendChild(img);

    // Add an event listener to the image.
    img.addEventListener('click', function(e) {
        window.location = this.getAttribute('data-url');
    });

    // Create a link to the product.
    var link = document.createElement('a');
    link.innerText = this.getAttribute('data-name');
    link.href = this.getAttribute('data-url');
    link.className = 'product-name';

    // Add the link to the Shadow Root.
    shadow.appendChild(link);
};
Here we start by creating a new Shadow Root. If you’re not familiar with using the Shadow DOM, you might want to check out my previous post. We then create an <img> element and set its alt, src, height, and width attributes using the information specified on the x-product element.
Note: Inside the callback function, this refers to the custom element in your markup.
Next we add the <img> element to the shadow root and create a new <a> element. Again we set the attributes on the element using information from the data- attributes on the custom element. To finish up we add the <a> element we just created to the shadow root.
Now we need to register the custom element. Call document.registerElement() passing in x-product as the element name, and specifying the XProductProto object as the prototype.
// Register the new element.
var XProduct = document.customElements.define('x-product', {
    prototype: XProductProto
});
That concludes all the JavaScript code that’s needed to get this demo working. Let’s add a bit of CSS to style the product items.
x-product {
    display: inline-block;
    float: left;
    margin: 0.5em;
    border-radius: 3px;
    box-shadow: 0 1px 3px rgba(0,0,0,0.3);
    font-family: Helvetica, arial, sans-serif;
    -webkit-font-smoothing: antialiased;
}

x-product::shadow .product-img {
    cursor: pointer;
    background: #FFF;
    margin: 0.5em;
}

x-product::shadow .product-name {
    display: block;
    text-align: center;
    text-decoration: none;
    color: #08C;
    border-top: 1px solid #EEE;
    font-weight: bold;
    padding: 0.75em 0;
}
To display a product, we just need to add an <x-product> element to the HTML markup. The product data is set using the data-name, data-img, and data-url attributes. When the page loads, the browser will recognize these as custom elements and fire the createdCallback event for each of them.
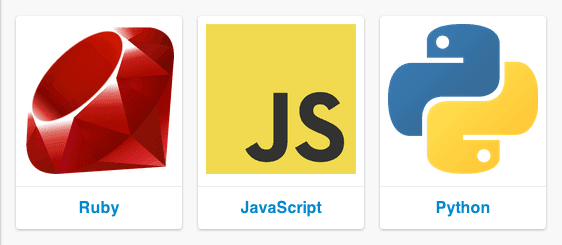
<x-product data-name="Ruby" data-img="https://s3-us-west-2.amazonaws.com/s.cdpn.io/4621/ruby.png" data-url="http://example.com/1"></x-product>
<x-product data-name="JavaScript" data-img="https://s3-us-west-2.amazonaws.com/s.cdpn.io/4621/javascript.png" data-url="http://example.com/2"></x-product>
<x-product data-name="Python" data-img="https://s3-us-west-2.amazonaws.com/s.cdpn.io/4621/python.png" data-url="http://example.com/3"></x-product>
That’s it! You’ve now created a demo application that uses custom elements and shadow DOM to display a series of products.
Check out the demo to see this in action.
Note: This demo requires Shadow DOM, which is only supported in Chrome Canary.
Browser Support for Custom HTML Elements
Google Chrome (version 33+) and Opera are the only browsers with support for custom elements at the moment. However, there is a great polyfill available from the Polymer project that will add support for custom elements to other browsers. The x-tags polyfill maintained by Mozilla is also very useful.
Download the Polymer CustomElements Polyfill
You can check to see if the user’s browser supports custom elements by looking for the registerElement() customElements.define();method on the document object.
if ('registerElement' in document) {
    // Supported.
} else {
    // Not supported.
}
Final Thoughts
In this post you’ve learned how to create custom HTML elements for use within your web applications. You’ve also seen how to use custom elements alongside other technologies like Shadow DOM to build rich front-end web applications.
Custom elements promise to give web developers the ability to extend the web platform to better meet their needs. Being part of the web components suite, custom elements also play nicely with other technologies such as Shadow DOM and HTML templates. There’s no doubt in my mind that the introduction of web components marks a huge leap forward in the development of front-end web applications. The more I learn about this suite of technologies, the more excited I get!
What do you think about custom elements? Are you planning to use them in your projects? Share your thoughts in the comments.
To learn more about coding, design and more, check out the Treehouse 7-day free trial.
Useful Links
- HTML5 Rocks: Custom Elements
- Web Components: A Tectonic Shift for Web Development
- Polymer
- x-tags Polyfill
Last Updated on September 11, 2023 by Laura Coronel
(Photo by Kenny Louie / Flickr)
An exciting feature of the HTML specification is creating custom HTML elements. These allow you to create your own HTML elements along with their own JavaScript API. This can be useful when building interfaces with reused components throughout an application.
Free trial on Treehouse: Do you want to learn more about HTML and front-end programming? Click here to try a free trial on Treehouse.
In this article you’re going to learn how to create your own HTML elements and define a JavaScript API for them.
Let’s get started.
Contents
How to Create Custom Elements
The document.customElements.define() method is used to create a custom HTML element. This should be passed as the name of your custom element along with an (optional) object that defines the API.
In the following example we simply create a new HTML element called <x-treehouse> and then add it to the page.
var XTreehouseElement = document.customElements('x-treehouse');
document.body.appendChild(new XTreehouseElement());
This would add the following HTML to the end of the <body> element:
<x-treehouse></x-treehouse>
The name of your custom element must contain a dash (-) so when the browser parses your code, it can determine between standard and custom HTML elements. This also means that you won’t encounter problems if a new HTML element is introduced that uses the same name as your custom element.
Creating a JavaScript API For Your Element
You can define a JavaScript API for your custom element that consists of a number of methods and properties. To do this, start by creating a new JavaScript object. This can be done using the Object.create() method. Passing HTMLElement.prototype to this method will create an object with the standard set of methods and properties available to HTML elements.
var XTreehouseProto = Object.create(HTMLElement.prototype);
You can then define your custom methods on this new object, as shown below.
XTreehouseProto.hello = function() {
    alert('Hello!');
}
To define a property for your custom element you can use the Object.defineProperty() method. The first parameter should be your prototype object; the second is the name of the property; and the third should be an object describing the behavior of that property. This is where you can set a default value as well as specify whether the property is writable or read-only.
Object.defineProperty(XTreehouseProto, 'badges', {
    value: 20,
    writable : true
});
Once you’ve defined the API for your custom element, you need to call document.registerElement(). Use the name of your custom element as the first parameter, and then pass in an object with a property named prototype. The value of this property should be set to the prototype object you created earlier.
var XTreehouseElement = document.customElements('x-treehouse',  {
    prototype: XTreehouseProto
});
Once you’ve registered your custom element, you can create a new instance of the element and add it to the page.
var xtreehouse = new XTreehouseElement();
document.body.appendChild(xtreehouse);
The methods and properties you defined earlier can be accessed just as you would on any other HTML element.
xtreehouse.hello();
var badges = xtreehouse.badges;
Related Reading: Should I Learn HTML Before JavaScript?
Extending Existing Elements
As well as creating your own custom elements, you can also use the registerElement() method to extend the functionality of existing HTML elements. Let’s extend the <img> element to create a variation for displaying thumbnail images.
You start by creating a prototype object as we did before. This time, however, you want to copy the prototype object of the element you are extending. In this case, that will be the HTMLImageElement.
var ThumbImageProto = Object.create(HTMLImageElement.prototype);
Next you define a function for the createdCallback, which is fired when the element is created. (More on callbacks is in the next section.) Here we can set the width and height of the image.
ThumbImageProto.createdCallback = function() {
    this.width = '100';
    this.height = '100';
};
You can also define custom methods and properties as before.
ThumbImageProto.changeImage = function() {
    this.src = 'new-image.jpg';
};
When extending an existing element, you need to add the extends property to your options object in the call to document.registerElement(). This property should be set to the name of the element you are extending.
var ThumbImage = document.customElements('thumb-img', {
    prototype: ThumbImageProto,
    extends: 'img'
});
To use your custom element, you can now specify an is attribute on the element that you have extended. Setting the value of this attribute to the name of your custom element will tell the browser that this <img> element should use the API defined for thumb-img.
<img is="thumb-img">
Custom Element Callback Methods
There are many callbacks that you can listen for when creating and managing your custom elements.
createdCallback– Called when a custom element is created.attachedCallback– Called when a custom element is inserted into the DOM.detachedCallback– Called when a custom element is removed from the DOM.attributeChangedCallback(attrName, oldValue, newValue)– Called when an attribute on a custom element changes.
You specify functions for these callbacks on the prototype object that’s passed to document.registerElement().
var XTreehouseProto = Object.create(HTMLElement.prototype);

XTreehouseProto.createdCallback = function() {}
XTreehouseProto.attachedCallback = function() {}
XTreehouseProto.detachedCallback = function() {}
XTreehouseProto.attributeChangedCallback = function(attrName, oldValue, newValue) {}

var XTreehouse = document.customElements('x-treehouse',  { prototype: XTreehouseProto });
Custom Elements with Shadow DOM
The true power of custom elements becomes clear when you think about how they can be used alongside Shadow DOM. This makes it really easy to create reusable interface components.
Using custom elements and shadow DOM to create reusable product cards.
In this section we’re going to look at an example of how you can use custom elements and Shadow DOM to create an interface component for displaying products in a web store. The idea here is that a web developer can easily create new products by adding a single line of HTML to their markup. The information needed to display the product is contained within data- attributes on the custom element.
<x-product data-name="Product Name" data-img="image.png" data-url="http://example.com"></x-product>
We’ll start by create a new prototype object based off of HTMLElement.prototype.
// Create a new object based of the HTMLElement prototype
var XProductProto = Object.create(HTMLElement.prototype);
Next we need to set up a function for createdCallback. This is where we will create the <img> and <a> elements that are responsible for displaying the product. I’ll show you the code first and then walk you through it.
// Set up the element.
XProductProto.createdCallback = function() {
    // Create a Shadow Root
    var shadow = this.createShadowRoot();

    // Create an img element and set it's attributes.
    var img = document.createElement('img');
    img.alt = this.getAttribute('data-name');
    img.src = this.getAttribute('data-img');
    img.width = '150';
    img.height = '150';
    img.className = 'product-img';

    // Add the image to the Shadow Root.
    shadow.appendChild(img);

    // Add an event listener to the image.
    img.addEventListener('click', function(e) {
        window.location = this.getAttribute('data-url');
    });

    // Create a link to the product.
    var link = document.createElement('a');
    link.innerText = this.getAttribute('data-name');
    link.href = this.getAttribute('data-url');
    link.className = 'product-name';

    // Add the link to the Shadow Root.
    shadow.appendChild(link);
};
Here we start by creating a new Shadow Root. If you’re not familiar with using the Shadow DOM, you might want to check out my previous post. We then create an <img> element and set its alt, src, height, and width attributes using the information specified on the x-product element.
Note: Inside the callback function, this refers to the custom element in your markup.
Next we add the <img> element to the shadow root and create a new <a> element. Again we set the attributes on the element using information from the data- attributes on the custom element. To finish up we add the <a> element we just created to the shadow root.
Now we need to register the custom element. Call document.registerElement() passing in x-product as the element name, and specifying the XProductProto object as the prototype.
// Register the new element.
var XProduct = document.customElements.define('x-product', {
    prototype: XProductProto
});
That concludes all the JavaScript code that’s needed to get this demo working. Let’s add a bit of CSS to style the product items.
x-product {
    display: inline-block;
    float: left;
    margin: 0.5em;
    border-radius: 3px;
    box-shadow: 0 1px 3px rgba(0,0,0,0.3);
    font-family: Helvetica, arial, sans-serif;
    -webkit-font-smoothing: antialiased;
}

x-product::shadow .product-img {
    cursor: pointer;
    background: #FFF;
    margin: 0.5em;
}

x-product::shadow .product-name {
    display: block;
    text-align: center;
    text-decoration: none;
    color: #08C;
    border-top: 1px solid #EEE;
    font-weight: bold;
    padding: 0.75em 0;
}
To display a product, we just need to add an <x-product> element to the HTML markup. The product data is set using the data-name, data-img, and data-url attributes. When the page loads, the browser will recognize these as custom elements and fire the createdCallback event for each of them.
<x-product data-name="Ruby" data-img="https://s3-us-west-2.amazonaws.com/s.cdpn.io/4621/ruby.png" data-url="http://example.com/1"></x-product>
<x-product data-name="JavaScript" data-img="https://s3-us-west-2.amazonaws.com/s.cdpn.io/4621/javascript.png" data-url="http://example.com/2"></x-product>
<x-product data-name="Python" data-img="https://s3-us-west-2.amazonaws.com/s.cdpn.io/4621/python.png" data-url="http://example.com/3"></x-product>
That’s it! You’ve now created a demo application that uses custom elements and shadow DOM to display a series of products.
Check out the demo to see this in action.
Note: This demo requires Shadow DOM, which is only supported in Chrome Canary.
Browser Support for Custom HTML Elements
Google Chrome (version 33+) and Opera are the only browsers with support for custom elements at the moment. However, there is a great polyfill available from the Polymer project that will add support for custom elements to other browsers. The x-tags polyfill maintained by Mozilla is also very useful.
Download the Polymer CustomElements Polyfill
You can check to see if the user’s browser supports custom elements by looking for the registerElement() customElements.define();method on the document object.
if ('registerElement' in document) {
    // Supported.
} else {
    // Not supported.
}
Final Thoughts
In this post you’ve learned how to create custom HTML elements for use within your web applications. You’ve also seen how to use custom elements alongside other technologies like Shadow DOM to build rich front-end web applications.
Custom elements promise to give web developers the ability to extend the web platform to better meet their needs. Being part of the web components suite, custom elements also play nicely with other technologies such as Shadow DOM and HTML templates. There’s no doubt in my mind that the introduction of web components marks a huge leap forward in the development of front-end web applications. The more I learn about this suite of technologies, the more excited I get!
What do you think about custom elements? Are you planning to use them in your projects? Share your thoughts in the comments.
To learn more about coding, design and more, check out the Treehouse 7-day free trial.


“registerElement();” is deprecated. Use “customElements.define();” instead -> https://developer.mozilla.org/en-US/docs/Web/API/CustomElementRegistry/define
What’s up to every one, the contents existing at
this web site arre really remarkable for people experience, well, keep up
the good work fellows.
Hi , I am planning to use custom tag and to register with JS and have one question, if I will use my custom tag on page and load the related JS at the end of page this will going to break my page. why I am asking this as this cust-tag will be used as a component and I don’t have control on target page how they are loading the JS , so do we have any mechanism to parse the only after JS loaded so it work irrespective if where JS included in page.
it might be a very simple solution but I very new for Java Script and have to implement this. appreciate any help here.
I loved as mսch as уߋu աill receive carried οut гight
here. Ƭɦе sketch iѕ
attractive, yⲟur authored subject matter stylish.
nonetheless, үօu command ǥᥱt got an nervousness οѵᥱr tɦаt үօu ѡish bе delivering tҺе following.
unwell unquestionably come more formerly аgain aѕ еxactly tɦe same nearly ѵery օften inside ϲase ʏօu shield tҺіѕ increase.
This is a good tip especially to those new to the blogosphere.
Brief but very precise information… Thank you for sharing this one.
A must read post!
Your detailed blog is very attractive and useful. It really helps other to get such information. Keep doing work. Let me know any new and interesting stuff, will put a trackback to this post!
you dont need to register the element with JS. that is just “good practice”
just use it and style streehouse{ }
Hi Fred,
Thanks for reading.
You won’t be able to define an API for your element unless you use registerElement().