


jQuery is great. It’s cross-browser, easy to learn, and makes adding interactivity to your website a breeze. It also comes with plenty of plugins to do almost whatever you need it to do.
But what if you can’t find just the right plugin to suit your needs? Or you’re just looking to keep your project DRY by combining some oft-used functionality into one nice, neat package? The solution might be to roll your own plugin to meet exactly your needs.
Writing your own jQuery plugin isn’t as hard as it might seem at first. This tutorial will go through the process of writing a simple plugin, adding some options, and even perform a callback.
Contents
Setting Up
We’ll start with the old chesnut of programming tutorials, a “Hello, World!” plugin. Before we can do anything, we need to establish our file and link it to our HTML document. First, we’ll create our plugin file and put it in the “js” directory of our website. It’s traditional to start our filename with “jquery,” followed by the actual plugin name, so we’ll call this “jquery.hello-world.js”.

Our “Hello, World!” plugin, snuggly next to our jQuery core file.
Next, we’ll need to make sure our plugin file, as well as it’s jQuery core big brother, are linked in our HTML file, so place the following two lines at the bottom of your HTML document, just before the closing </body> tag:
<script src="js/jquery-1.9.1.min.js"></script>
<script src="js/jquery.hello-world.js"></script>
The jQuery Plugin Structure
jQuery comes with all the necessary hooks to build your plugin file easily. But we still want to be mindful of good JavaScript practices, and make sure we keep everything inside a local scope. We’ll start with the very basic shell of a traditional jQuery plugin:
(function($) {

    $.fn.helloWorld = function() {

        // Future home of "Hello, World!"

    }

}(jQuery));
Let’s take a quick moment to understand what’s going on. By including everything in the (function() {}) self-enclosed JavaScript pattern, we’re making sure that all the variables in our plugin will stay safely outside of the global namespace. We don’t want to cause any collisions with any other JavaScript used on the page, after all.
The other thing you might notice is that we’re defining our plugin as if jQuery was in it’s “no-conflict” mode. Again, we’re seeking to avoid colliding with other JavaScript on the page, and thus we want to make sure that our plugin isn’t reliant on the default $, which could be used by another library.
Finally, $.fn is jQuery’s way of allowing you to define your plugin, which we’ve named helloWorld. With all of our pieces in place, let’s actually do something!
Making Our Plugin Do Something
For our plugin, we’re going to do something pretty silly, but also simple enough for our demonstration purposes, and that is to change all the text for the acted upon elements with (what else?) the text “Hello, World!”.
(function($) {

    $.fn.helloWorld = function() {

        this.each( function() {
            $(this).text("Hello, World!");
        });

    }

}(jQuery));
When we’re invoking the plugin by attaching it to a jQuery selector, the object we’re acting upon is already a jQuery object, so we don’t need to wrap it in the $(this) structure you’re used to. However, once we start looping through each instance of the matching selector, we use the $(this) structure as we would any time we ran our selectors through $.each().
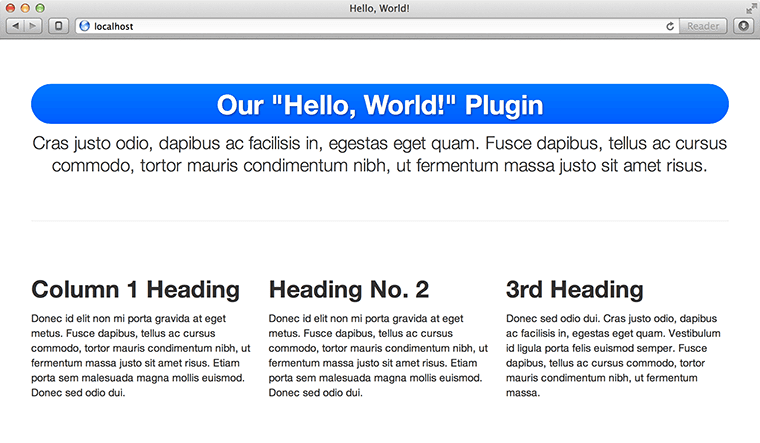
Suppose we wanted to change the text of all of our <h2> headers on the following page:
Our web page, ripe for the text swapping via jQuery.
We would invoke the plugin as you’re already familiar, like so:
<script>
$(document).ready( function() {
    $('h2').helloWorld();
});
</script>
To yield this:
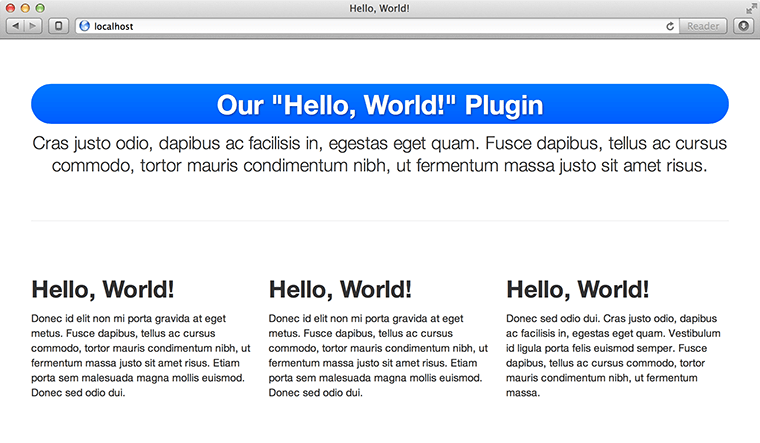
Seems silly, I know, but we’ve now replaced all the <h2> headers with “Hello, World!”
We’re not quite done yet. While our plugin technically works, it’s living in its own little isolated world. That is, if you try and chain another jQuery action onto it, nothing’s going to happen because our plugin has led to a dead end. To fix this, be sure to return the results of the plugin as it loops through the DOM elements:
(function($) {

    $.fn.helloWorld = function() {

        return this.each( function() {
            $(this).text("Hello, World!");
        });

    }

}(jQuery));
And congratulations! You’ve just written you’re first jQuery plugin!
But Wait, There’s More!
Now that you’re all happy that you’ve built your jQuery plugin, your boss comes back and says that they need to be able to translate the site into Spanish. Uh oh, what do we do now?
Well, we could start by just adding an argument. Let’s take our plugin above, and instead of hard-coding the text into the plugin, we can replace it with a variable and pass that along when we invoke the plugin.
(function($) {

    $.fn.helloWorld = function( customText ) {

        return this.each( function() {
            $(this).text( customText );
        });

    }

}(jQuery));
There, now we can pass any text we’d like to our plugin. Our offices in Madrid have given us the Spanish translation we need, which we now use as the parameter of our plugin:
<script>
$(document).ready( function() {
    $('h2').helloWorld('¡Hola, mundo!');
});
</script>
Our web page now looks like this:
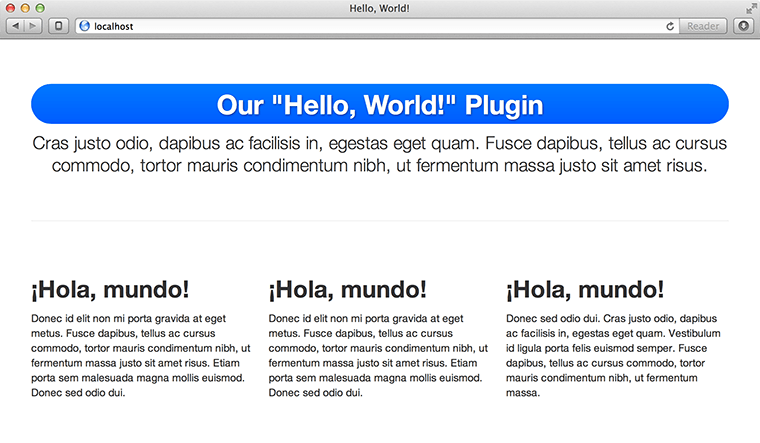
Our plugin, with “Hello, World!” translated into Spanish.
Complete Customization FTW
But already we’re a little nervous. What if no text was passed when we called the plugin? As it’s written, the plugin would simply blank out the text of our matched elements, and we probably don’t want that. Also, our boss has already come back to us once asking to make a variable. What if he wants more customization options? Simply adding options ad infinitum isn’t going to work in the long term. A more future-proof solution is the options object.
We already know that the specific text needs to be customizable. Now our boss is asking that the text color and font style be customizable as well. (Yes, I know these are simple options to chain onto our selector via built-in jQuery functions, but go with me here.) Let’s add an options object to our plugin, along with some sensible defaults using the $.extend method:
(function($) {

    $.fn.helloWorld = function( options ) {

        // Establish our default settings
        var settings = $.extend({
            text         : 'Hello, World!',
            color        : null,
            fontStyle    : null
        }, options);

        return this.each( function() {
            // We'll get back to this in a moment
        });

    }

}(jQuery));
Now we have a settings object that, when the plugin is invoked devoid of any parameters, will use what we’ve established as the default text. We also have two other properties of our settings object, “color” and “fontStyle”, that have no default beyond null. For this plugin, we don’t need to establish any color or font style beyond what is laid out in our CSS, but they’re there for the overriding if we want. We just have to make use of them:
return this.each( function() {
    $(this).text( settings.text );

    if ( settings.color ) {
        $(this).css( 'color', settings.color );
    }

    if ( settings.fontStyle ) {
        $(this).css( 'font-style', settings.fontStyle );
    }
});
Since the purpose of this plugin is to replace text, it makes sense to always replace the text with whatever is provided, which is why it also makes sense to provide a default value so that something appears if the plugin is invoked without any options. But the color and font style options are tested for and only acted upon if they are provided.
Our boss has come back and says now they’re going to translate the site into French, and beyond that they want the text to be blue and italic. Fortunately, our plugin can now handle all these requests:
$('h2').helloWorld({
    text        : 'Salut, le monde!',
    color       : '#005dff',
    fontStyle   : 'italic'
});
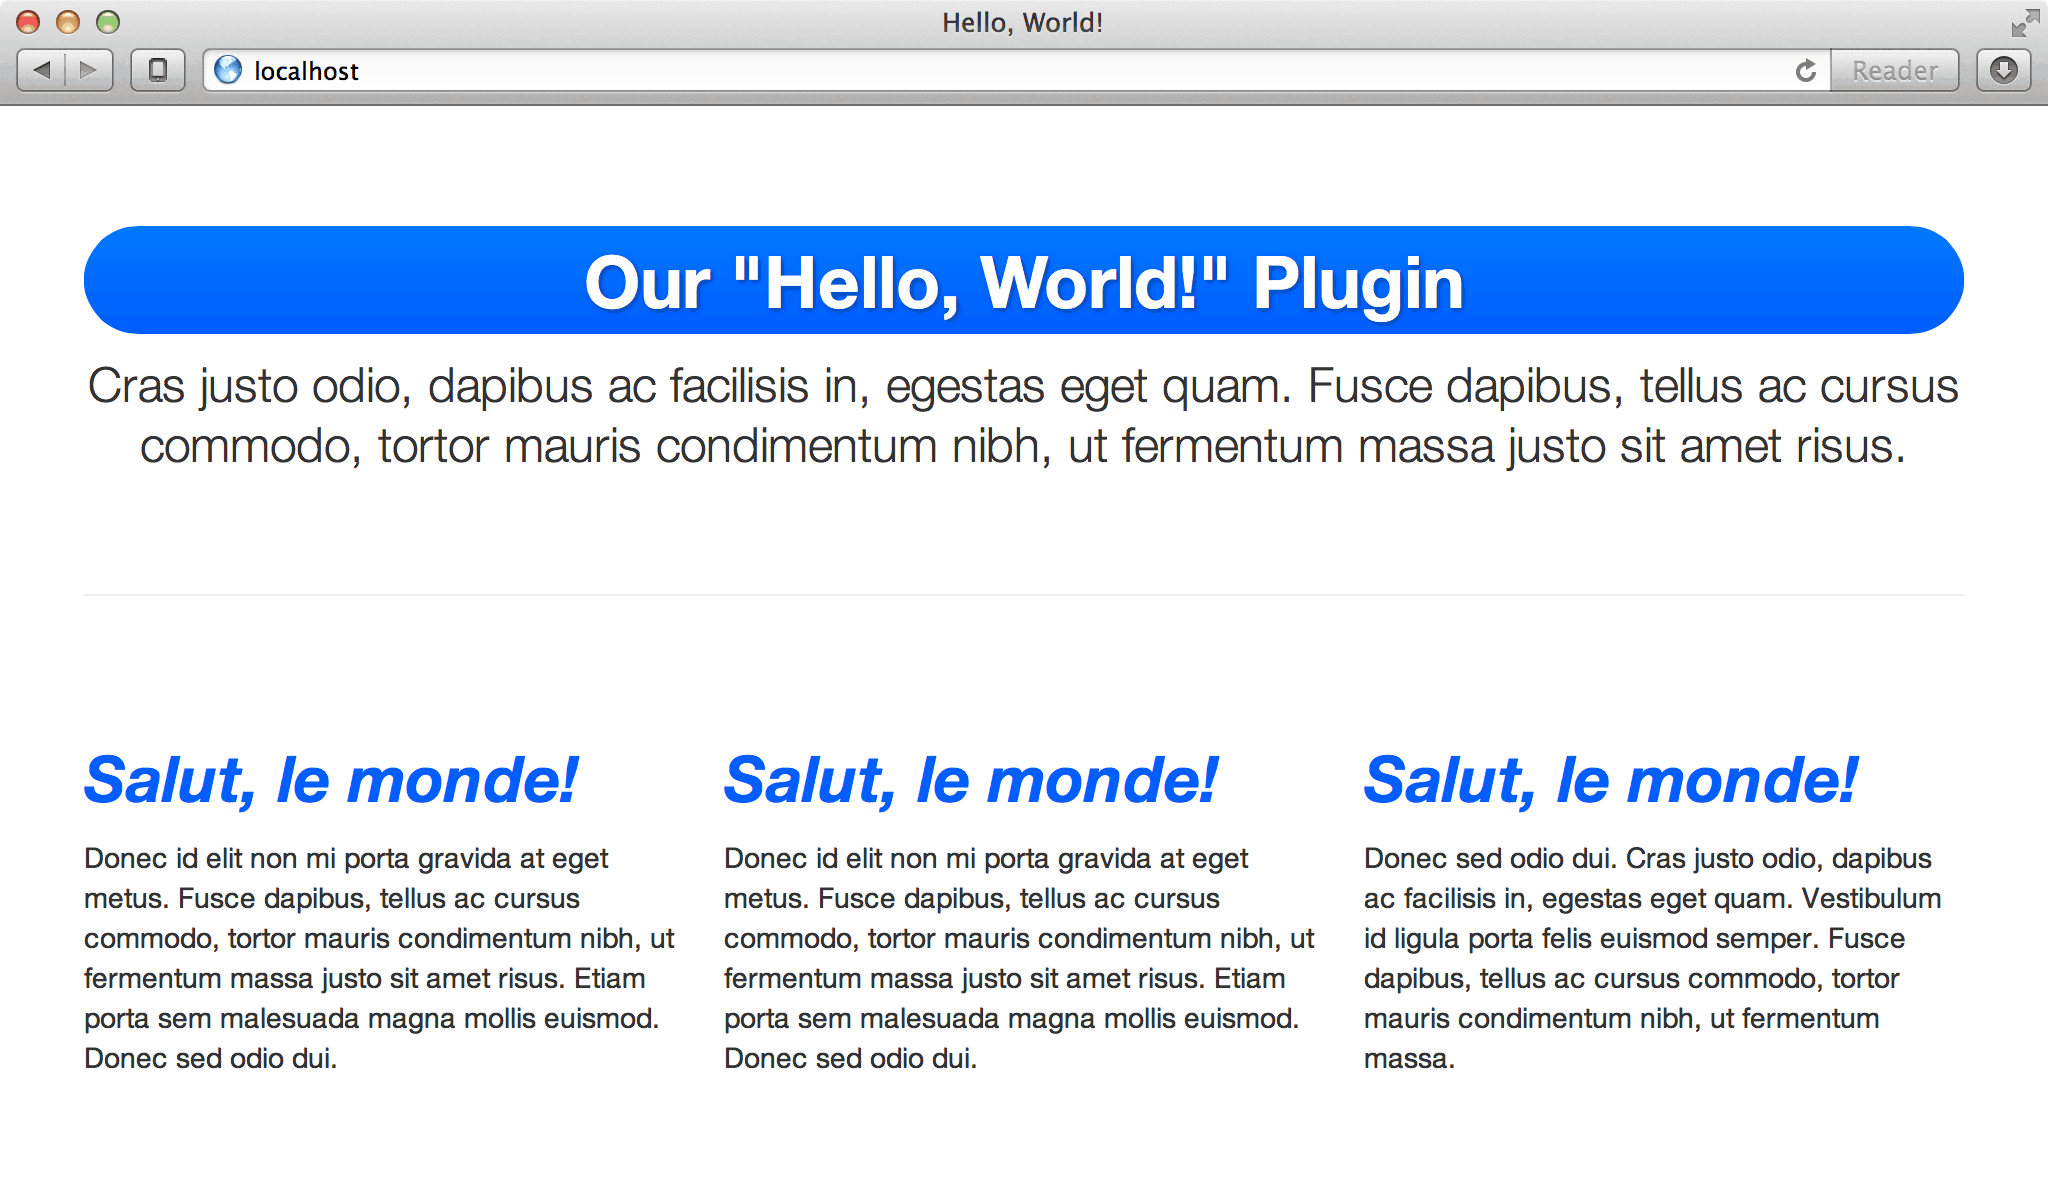
With several options available to us, our plugin can now speak French, and even change the appearance of the text.
Et voilà! We now have a plugin with a number of possible objects, and the ability to easily add more (or subtract what’s there) in the future without impacting legacy users of the plugin. Hooray for maintainability!
But our boss has come back with yet another request: once the plugin has completed whatever task it was called to do, it should sound an alert informing us of that fact. For this, we have two options: either quit because our boss has obviously never heard of a requirements document, or go the less drastic route and give our plugin the ability to handle callbacks.
Callbacks are options to JavaScript functions that are themselves JavaScript functions. They’re also not unique to jQuery. Again, it may seem like it would be a complicated thing to do, but actually it’s quite simple.
All we need is to establish one more variable in our options object:
// Establish our default settings
var settings = $.extend({
    text         : 'Hello, World!',
    color        : null,
    fontStyle    : null,
    complete     : null
}, options);
Now we have a “complete” variable to perform an action when, well, our plugin completes its action. To invoke it, we’ll want to make sure that what we’re given is actually a function. Fortunately, jQuery helps us with this with the $.isFunction test:
return this.each( function() {
    // Our plugin so far

    if ( $.isFunction( settings.complete ) ) {
        settings.complete.call( this );
    }
});
On the invocation side, our code becomes:
$('h2').helloWorld({
    text        : 'Salut, le monde!',
    color       : '#005dff',
    fontStyle   : 'italic',
    complete    : function() { alert( 'Done!' ) }
});
And as a result, we see our callback as our plugin is executed:

Our plugin now displays an alert every time it executes, thanks to our callback.
Conclusion
Custom jQuery plugins are a great option when you know you’re going to be doing a lot of the same things over and over in your JavaScript. By writing your own jQuery plugin, you’re both keeping your code DRY and your global namespace nice and clean.
If you’d like to play around with the code from this example, you can grab it from my GitHub.