
Last Updated on May 21, 2015 by Laura Coronel
As technology in the web moves forward we are offered new tools to build amazing web applications. Scalable Vector Graphics or SVG’s have been gaining traction in the past year or so as most browsers handle the image file extension ‘.svg’. You can see the break down over at CanIUse.com.
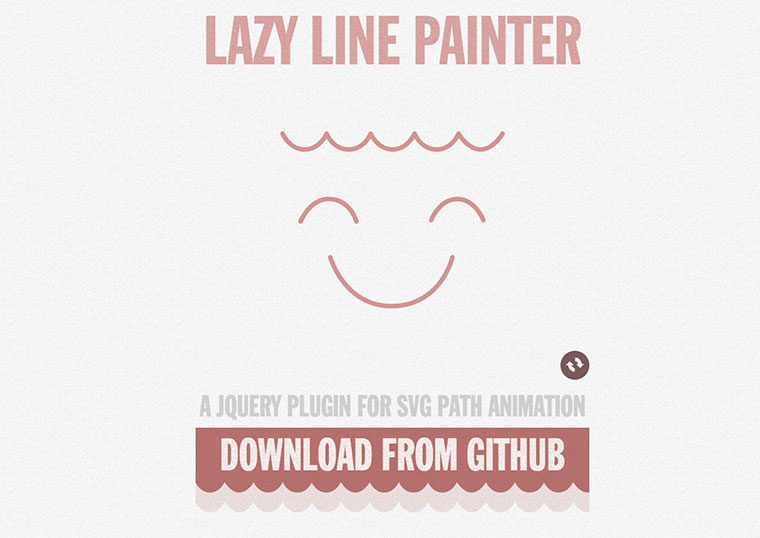
In this tutorial we will build a path animation using a super slick jQuery Plugin called Lazy Line Painter by Cam O’Connell. Cam is a London based front-end web developer with a passion for building interactive web applications and plugins. Here is the Demo and Source files for what we will be building.
For this exercise you will need a basic understanding of HTML, CSS and jQuery. If you are brand new to web design, no worries. This tutorial shouldn’t be to much of a learning curve. Just follow along and lets have some fun.
Here is Our Step by Step Approach:
- Set Up Our File Structure
- Download & Connect Our Plugin
- Generate an SVG file from Illustrator
- Drop our image into the SVG Lazy Line Converter
- Copy and Paste the Generated Code Into Our ‘main.js’ File
- Add Some CSS
Contents
Step 1: Set Up Our File Structure
First things first, we need to put together an HTML environment. What better way to do that then with Initializr. Simply head over to the site and select the following options for the page:
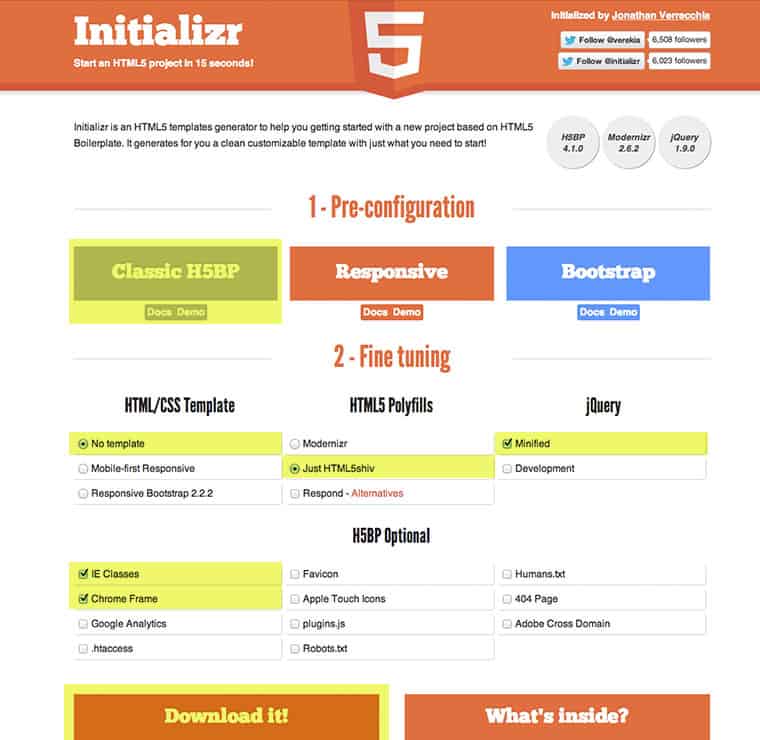
- Classic H5BP (HTML5 Boiler Plate)
- No Template
- Just HTML5 Shiv
- Minified
- IE Classes
- Chrome Frame
Next simply select ‘Download it’, locate the file and unzip it. Now you should have a folder labeled ‘initializr’. We are now ready for the next step.
Step 2: Download & Connect Our Plugin
Since initializr already packaged the latest version of jQuery for us, we won't need to grab that. The only files we need are two javascript files from the Lazy Line Painter github repository.
Download and unzip the files. You will have a folder labeled ‘lazy-line-painter’. We only need two files from that folder. The first is ‘jquery.lazylinepainter-1.1.min.js’ located in the root directory. The next file is found in the ‘example -> js -> vendor ->’ folder labeled ‘raphael-min.js’. Take those two files and place them in the ‘js’ folder located in your initializr folder.
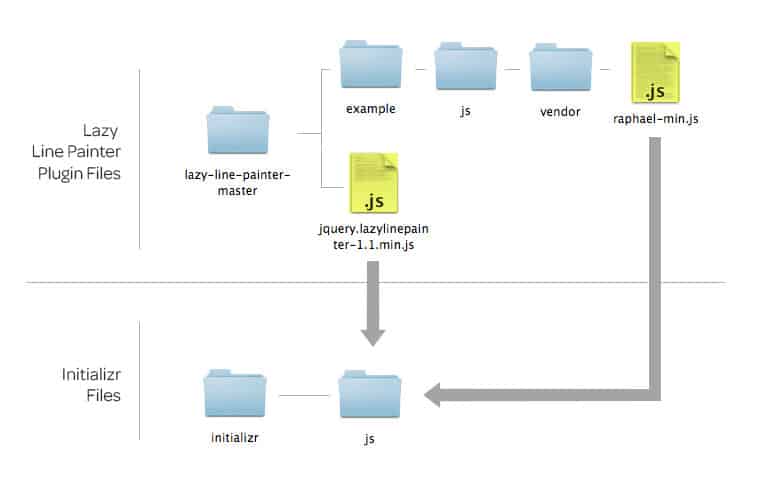
The only thing left to do is link up our ‘.js’ files from our ‘index.html’ page. We can do this in the footer. I’m using Sublime Text 2 as my text editor. Insert the code below directly before our “main.js” link.
<script src="js/jquery.lazylinepainter-1.1.min.js"></script>
<script src="js/raphael-min.js"></script>
After that scroll up to the body tag where it says :
<p>Hello world! This is HTML5 Boilerplate.</p>
& swap it out with:
<div id="icons"></div>
Step 3: Generate an SVG file from Illustrator
Before we jump into illustrator and export an SVG image lets take a look at the specs for Lazy Line Painter. Here are the notes for creating your SVG graphic:
Preparing Your SVG Data
- Create your Line art in Illustrator
- Ensure their are no fills
- No closed paths. i.e – Line needs a start and end
- Crop Artboard nice & tight
- Export as .SVG (Default export options are fine)
- FIle must be on a 1000×1000 canvas or less and be 40kb or smaller
For this exercise I'm going to use a file I made a while back with icons all created with the pen tool. The file is labeled ‘icons.ai’ in the source files.

*Keep in mind that you can alter the color of the stroke and the width of the stroke with the plugin! Pretty cool huh.
Open up the icons.ai file in Adobe Illustrator. Make sure our graphic meets all the specs.
Now let's save the file as an SVG in our ‘img’ folder inside of initializr. Go to File > Save. From the ‘Format’ drop down select SVG at the bottom. Name the file ‘icons’ and select the img folder inside the initializr folder and hit ‘Save’. Illustrator will then ask you to select the ‘SVG Options’. The default options will work just fine so hit ‘OK’. We're now ready to run this through the ‘SVG Lazy Line Converter’.
Step 4: Convert our SVG image with the SVG Lazy Line Converter
This process is very easy. Make sure you have the Lazy Line Painter page open and you are scrolled to the bottom of the page where it says ‘SVG to Lazy Line Converter’. Drag your ‘icons.svg’ file into the converter and watch the magic happen.
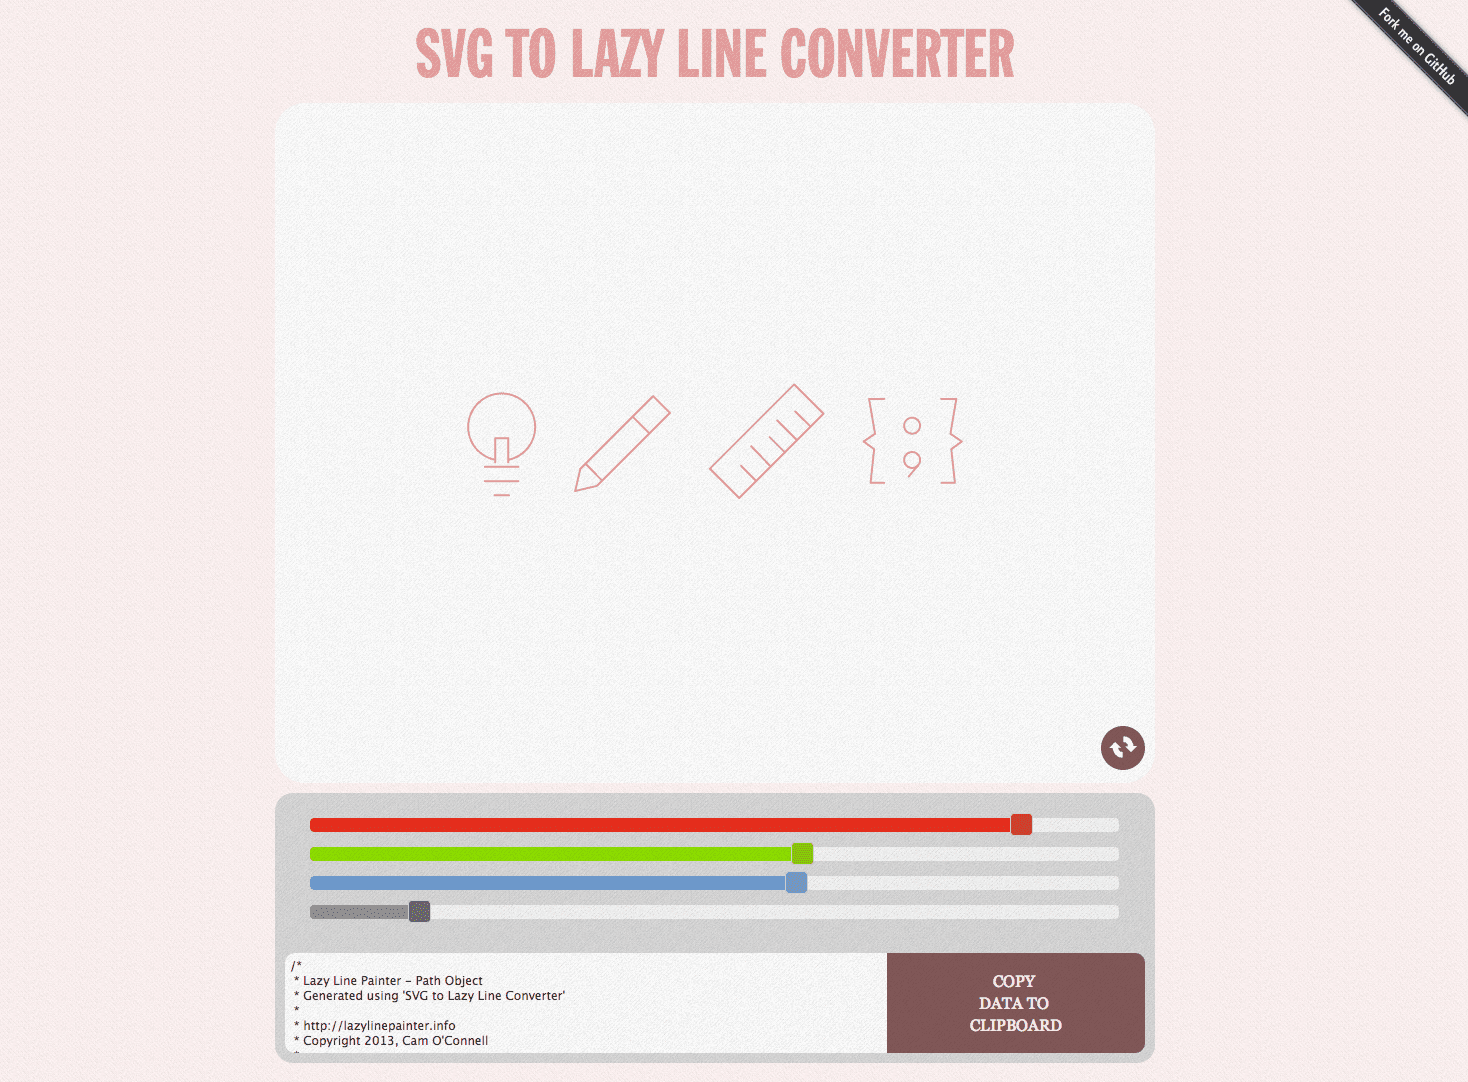
The only thing left to do is copy the code and drop it into our main.js file. Select ‘Copy Data to Clipboard’ and move on to the next step.
Step 5: Copy and Paste the Generated Code Into our ‘main.js’ file
With our data copied to our clipboard let's open up the ‘main.js’ file and paste it into the page. At the bottom inside of the document ready function you will notice ‘strokeWidth’ and ‘strokeColor’. This is where we can alter the data. Let's change stroke width with a ’10’ and stroke color to ‘#262213’.
To speed up our animation we can alter the duration values after the paths inside the SVG tags. By default they are set to ‘600’. Let's change those to ‘200’.
Once you have made the changes, save the file.
Step 6: Add Some CSS
To make our demo more appealing I put together some CSS for us. Place this on the ‘main.css’ file directly below ‘Author’s custom styles’:
/* ==========================================================================
   Author's custom styles
   ========================================================================== */

body {
    background:#F3B71C;
}

#icons {
    position: fixed;
    top:50%;
    left:50%;
    margin: -300px 0 0 -400px;
}
Save the file.
The only thing left to do is open up our ‘index.html’ file in the browser and check out our super slick SVG animation.


No raphael js file in the latest lazyline painter per your instruction:
“The next file is found in the ‘example -> js -> vendor ->’ folder labeled ‘raphael-min.js’.”
Hi, Love this tutorial…
I can’t figure out how to implement two different SVG animations in two different divs?
Hello, I wonder how to set the animation on anchor for a responsive scroll….is there a way to trigger the animation start when is in viewport?
I am really loving the theme/design of your web site. Do you ever run into any web browser compatibility problems? A handful of my blog readers have complained about my blog not operating correctly in Explorer but looks great in Firefox. Do you have any advice to help fix this problem?|
This is great, but just curious how you would get all the lines to draw at the same time (rather than one at a time).
Doesn’t seem to work. I get 2 errors in the Chrome Javascript console:
GET file:///D:/Projects/HTML5/animated%20path/initializr/js/jquery.lazylinepainter-1.1.min.js index.html:28
Uncaught TypeError: Object [object Object] has no method ‘lazylinepainter’