
Last Updated on June 7, 2023 by Laura Coronel
We’re prepping a workshop series for our Pro students on deploying web apps to production, and we wanted a simple, safe way for students to follow along at home, without having to create an account on AWS / DigitalOcean / etc. So we figured out a setup that mimics a Linux server running out on the Internet somewhere—which is where you’d typically deploy web apps to—but uses VirtualBox to run the server as a virtual machine on your development system. This is a great way to try things out because it lets you copy the server to try out different configurations, take snapshots you can roll back to if you make a mistake, and more. These directions are available as a video workshop to our Pro students, but we thought we’d share the basic ingredients here as well so you can experiment with Linux servers yourself!
We’re going to create a virtual machine to run a Linux server on. Think of it as a computer within a computer. Your desktop or laptop is going to be the host system, and we’re going to create a guest system to run Linux on.
Contents
1. Download VirtualBox & Ubuntu Server
First we need to download and install VirtualBox itself, followed by a Linux installer.
- Download VirtualBox for your host OS (Windows, Mac, or Linux) from the VirtualBox downloads page. (Yes, you can run Linux as a virtual machine within Linux; it’s actually beneficial in many circumstances.)
- Run the installer, and follow the directions onscreen.
- Download Ubuntu Server from the Ubuntu downloads page. You’ll have a choice between the latest version and a “Long Term Support” version; choose the LTS version because it’ll be more stable. (Ubuntu is just one of many Linux distributions available, but we’ve chosen Ubuntu because it’s common and relatively easy to use.)
- A big
.isofile will be downloaded. Make note of the folder it gets downloaded to; we’ll need to find it in a minute..isostands for ISO 9660, a standard for representing the contents of CD-ROMs and DVD-ROMs as computer files. Basically, you’ve just downloaded a virtual Ubuntu installation CD.
2. Set Up a Virtual Machine Host
Now we need to create and configure a virtual machine within VirtualBox.
- Launch VirtualBox, and click the “New” button in the toolbar to create a new virtual machine.
- Go through the wizard dialog to configure the new virtual machine, leaving all values at the default except the following:
- Name: This can be whatever you want, but since we’re simulating a server at our hosting company, we’re going to use the name “hostcom”.
- Type: “Linux”
- Version: “Ubuntu (64-bit)”
- Click the “Create” button in the wizard to create your new virtual machine.
3. Install a Ubuntu Linux Server
Now you have a virtual machine, but its virtual hard drive is empty. There’s no operating system for it to boot with. If it were a physical computer, we’d pop in a CD or other installation media, which would allow the machine to boot and install an operating system to its hard drive. We’re going to do the virtual equivalent of that now.
- Back at the main VirtualBox window, select your new virtual machine from the list of machines, and click the “Start” button in the toolbar to “power it on”.
- Another dialog should appear, basically saying we need to “insert” the installation media. Click the folder icon, navigate to the folder you downloaded the
.isofile to previously, select the file, and click “Open”. - Back at the dialog, click “Start” to start the virtual machine.
- The virtual machine will boot, and the Ubuntu installer will load.
- Go through the menus to configure Ubuntu, leaving all values at the default except the following (don’t include quotation marks):
- Hostname: “hostcom” (or another all-lower-case network name for your server).
- User full name: Your full name (e.g. “Jay McGavren”).
- Username: Your user name, which should be short, one word, and all lower case (e.g. “jay”).
- Password: Enter and confirm a password. Remember it, because you’ll need it to log in or run administrative commands on the virtual machine.
- Write partition changes to disk: “No” will be selected by default; choose “Yes”.
- Write to disk (again): “No” will be selected by default; choose “Yes”.
- Software selection: “standard system utilities” will be selected by default, so just hit Enter. Other packages you need should be installed using the
apt-getprogram later. - GRUB boot loader: The default choice is actually the correct one on this screen, but to avoid confusion: The installer will confirm this “is the only operating system on this computer”. And it is the only operating system on this virtual machine. So go ahead and choose “Yes”.
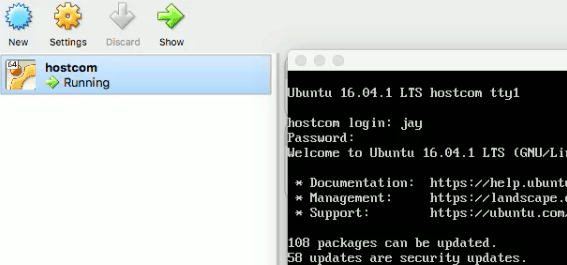
At this point the installation will be complete! Choose “Continue” to reboot the virtual machine. (There’s no need to “eject” the virtual installation media.) When the virtual machine reboots, it’ll load the Ubuntu OS itself. You’ll be prompted for a login; enter the user name and password you created while installing Ubuntu. You’re now logged in to your new virtual server!
Read also: How to Install Rails 5 on Linux
4. Connect to the Server Via SSH
The window on your screen right now emulates a monitor that’s connected to your virtual machine. What you type on your keyboard emulates a keyboard that’s connected directly to your virtual machine. But to connect to servers out on the Internet, you would use the Secure SHell program, or ssh. ssh connects you to a terminal on a remote computer, and it encrypts everything you do so no one can eavesdrop on the passwords and commands you’re sending. From now on, we’re going to want to connect via SSH. Let’s set that up now.
SSH usually listens for network traffic on port 22, and the SSH on our virtual server will be no different. We can tell VirtualBox to open a port on our local computer, and send all network traffic that it receives on that port, to a port on our virtual server. So we’re going to open port 2222 on our host machine, and forward all traffic to port 22 on our virtual machine. When we use the ssh port to connect to port 2222 on the host, we’ll wind up talking to the SSH service on the virtual machine.
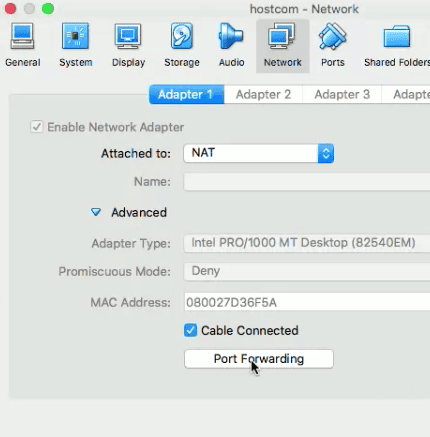
- In the main VirtualBox window, select your virtual machine from the list of machines, and click the “Settings” button in the toolbar.
- In the configuration window that appears, click the “Network” tab.
- You’ll see sub-tabs for “Adapter 1” through “Adapter 4”. Ensure Adapter 1 (the main virtual networking hardware) is selected.
- Click the arrow by the “Advanced” label to expand the advanced settings section.
- Click “Port Forwarding”. A new sub-window will appear with a table of port forwarding rules.
- Click the plus-sign icon to add a new rule.
- Set the fields as follows (don’t include quotation marks):
- Name: This can be any descriptive string, but we recommend “ssh”
- Protocol: “TCP”
- Host IP: Leave blank
- Host port: “2222”
- Guest IP: Leave blank
- Guest Port: “22”
- If you’re planning to set up a server on the guest later, you may also want to add another rule to forward traffic from a port on the host to the port on the guest that the server will be running on. (E.g. for a web server, forward host port “8080” to guest port “80”.)
- Click “OK” to close the forwarding rules window when you’re done.
- Click “OK” in the virtual machine settings window to save your changes.

The SSH service may not be installed on your virtual Linux server yet. To install it:
- Start your virtual machine if it’s not already running, switch to the window that shows its screen, and log in.
- At the
$prompt, run this command:sudo apt-get install openssh-server - You’ll be prompted for a password; enter the one you created when installing Ubuntu.
- The SSH server software will be installed, and the service should start automatically.
The last step will be to try connecting from your host machine to the virtual machine via SSH. We’re going to direct our SSH client program to connect from our computer, back to port 2222 on that same computer. We can connect to the same computer we’re running on by using the special IP address 127.0.0.1. The traffic will be forwarded to port 22 of our virtual machine, and it should connect.
Readers running Mac or Linux as their host operating systems should already have the ssh client program installed. Open a terminal on your host machine, and run this command (substituting the user name you set up when installing Ubuntu for “yourlogin”):
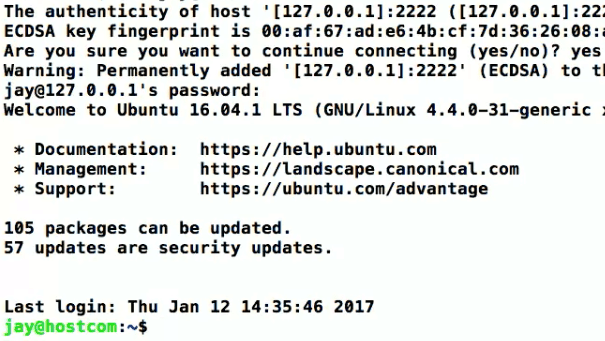
ssh yourlogin@127.0.0.1 -p 2222Windows users may need to download PuTTY, a free SSH client app. Follow these directions to establish a connection, using “localhost” as the host name, “SSH” as the protocol, and “2222” as the port. You’ll be prompted to enter a user name later, as you log in.
Regardless of whether you’re connecting via the ssh program or PuTTY, you’ll see a warning saying something like “the SSH server isn’t recognized”, which is normal, since this is our first time connecting. Type “yes” to confirm that it’s OK to connect.
Then type the login (if prompted for one) and password that you set up when installing Ubuntu. You should be taken to a system prompt, where you can start running Linux commands to your heart’s content.
Congratulations! You have a virtual Linux server running right there on your computer! The sky’s the limit from here. If you’d like some ideas, Treehouse Pro and Techdegree subscribers can check out our workshops on deploying web apps to production, and check out the Treehouse 7-day free trial. Have fun with your new server!
Start learning to code today with a free trial on Treehouse.


Hey guys, this was great! Way to make an adequate programmer feel like a great programmer! Please keep updating this blog as soon as possible!
Hurrah, that’s what I was exploring for, wjat a information! existing here aat this blog, thanks
admin of this website.
Hi Jay,
what about apache/nginx + php mysql etc.. ?
Do you plan to create another tutorial about it ?
I have followed you in every step. Ubuntu server on guest virtualbox is running well. But I can’t connect putty to ubuntu server.
The message is:
PuTTY Fatal Error
Network error: Connection refused
Would you give me guide?
Regards
BL
NB. My laptop don’t have lan card but just wifi.