


![]()
With so many great tools available to front-end web developers these days it can sometimes be difficult to understand how they all fit together. Deciding on a workflow that you’re happy with is often a very personal endeavour, but getting started isn’t always easy. Yeoman aims to solve this problem by defining a workflow for creating modern web applications, while at the same time mixing in many of the best practices that have evolved within the industry.
In this blog post you’re going to learn how to harness the power Yeoman to create fantastic web applications.
Contents
The Components of Yeoman
Yeoman itself is a collection of three tools: Yo, Grunt, and Bower. Combined together these tools provide everything a developer needs to get started on a project.
- Yo is a tool that’s used to scaffold a new application. It can create common project assets like stylesheets and JavaScript files. Basically Yo provides an easy way to create all of the boilerplate code you need to get started on a project.
- The Grunt task runner is a tool that can automate things like compiling Sass files or optimising images. When used as part of the Yeoman package, Grunt handles building, testing, and previewing your project.
- Bower is a package manager for the web. It helps to manage the dependencies needed for your application so you don’t have to download them manually.
Each of these tools are developed independently but all have great communities pushing their continued advancement.
This post assumes that you have at least a basic understanding of Grunt and Bower. If you haven’t used these tools before, check out these posts to get you up-to-speed:
Installing Yeoman
To install the Yeoman suite of tools you will need to have npm and Git already installed on your system. If this is not the case you can install npm by downloading the appropriate version of Node.js for your system. The Node package manager (npm) is included with the install of Node.js. Git can be downloaded from the project website.
Once you have npm up and running you can install the Yeoman tools using the following command.
npm install -g yo
This will install Yo as well as Grunt and Bower if they are not already on your system.
Installing Generators
Yo works by using generators to scaffold web applications. These generators define the structure of the application as well as any dependencies you might need.
Generators are available for a wide range of different applications, from a standard web app to an application that uses Angular.js or Backbone. Some of the most popular generators are listed below. You can find a full list of the official generators by browsing the list of repositories on the Yeoman GitHub page.
- Web App (generator-webapp)
- Backbone (generator-backbone)
- Ember.js (generator-ember)
- Angular.js (generator-angular)
- jQuery (generator-jquery)
Generators are installed using npm. For this post we’re going to focus on the standard web app generator.
npm install -g generator-webapp
Using a Generator
Once you have your generator installed you can use it by calling yo on the command line and passing in the name of your generator.
yo webapp
This will scaffold the web app in your current working directory. You may want to create a new folder and then change directory before executing the yo command.
mkdir my-app
cd my-app
yo webapp
When you launch the generator you will be asked if you want to include Bootstrap and Modernizr. You can toggle these options using the space bar. This interactive prompt is specific to the generator that you’re using.
     _-----_
    |       |
    |--(o)--|   .--------------------------.
   `---------´  |    Welcome to Yeoman,    |
    ( _´U`_ )   |   ladies and gentlemen!  |
    /___A___\   '__________________________'
     |  ~  |
   __'.___.'__
 ´   `  |° ´ Y `

Out of the box I include HTML5 Boilerplate and jQuery.
[?] What more would you like? (Press <space> to select)
❯⬢ Bootstrap for Sass
 ⬢ Modernizr
Once you have worked through the interactive prompt, Yo will start to scaffold your application. This may take a few minutes depending on which generator you’re using.
If you open up your project folder you’ll see that Yo has created a number of files and folders to get you started.
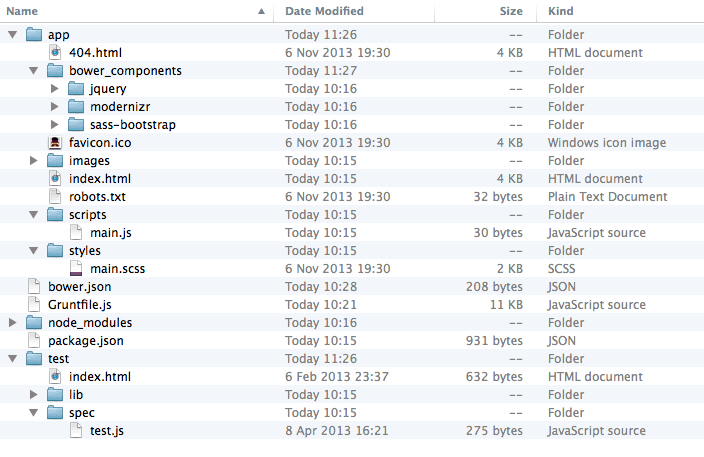
The file structure of the scaffolded app.
The app folder contains all of the files for your actual web app. This is where you’ll find all of your HTML, JavaScript and Sass files. Also included in this folder is a bower_components directory. This includes all of the dependencies for your application, such as jQuery and Modernizr. You can add more Bower packages using the install command:
bower install <package> --save-dev
The node_modules folder contains all of the Node packages that are defined in the package.json file. These packages are used by Grunt.
The test directory contains the initial test setup for your app. The web app generator uses the Mocha test framework for testing JavaScript code.
The remaining files in the root of your project are used to configure Bower, Grunt and Git.
If you haven’t used these tools before the initial state of this application may be a little intimidating. Take some time to look around the various files and get familiar with the setup before you start work on your application.
Starting Your Application
The generated Gruntfile includes a task that will set up a simple web server so that you can preview your app. You can start this by executing the following command in your Terminal.
grunt serve
Once the server has started, grunt will launch the web app in your default browser. You can also access the app by going to http://127.0.0.1:9000.
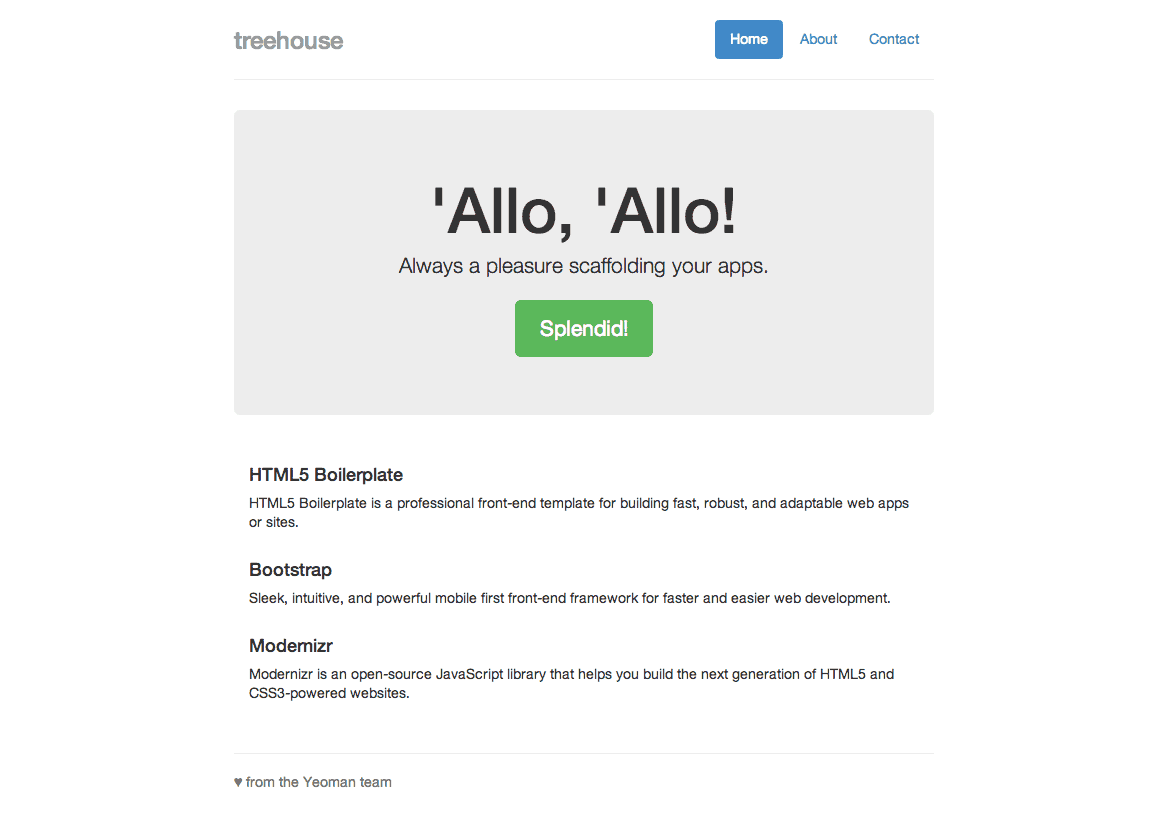
The basic application created with the webapp generator.
Note: If you receive the error below, open up Gruntfile.js and edit the port number on line 46. Simply changing this to 35730 will usually do the trick.
Fatal error: Port 35729 is already in use by another process.
Running Tests
As we saw earlier, the generator created a basic test setup that uses the Mocha testing framework. To run your tests you can simply use the test task defined in the Gruntfile.
grunt test
We’re not going to cover how to write tests in this post. I recommend that you check out the Mocha website for more information on testing your web applications.
Building Your Application for Production
With the introduction of preprocessors like Sass, the days of simply slinging your website up on a server are long gone. You first need to make sure that you compile all your assets to CSS and JavaScript (if you’re using CoffeeScript) so that they can be understood by the browser. Luckily the generated Gruntfile contains a build tasks that will do this for you. To make use of this task, simply execute the grunt program.
grunt
Running Grunt without a specified task like this will cause the program to execute it’s default set of tasks. On our case Grunt will first check your JavaScript code using JSHint, then run your Mocha tests, and finally execute the build task.
As well as compiling you Sass files, the build task will also concatenate and minify your CSS and JavaScript assets. This gives your app a bit of a performance boost.
Once the build task is complete you should see a new folder in your project named dist. This contains all of the files that make up your web application. These are the files that should be deployed to your web server.
Final Thoughts
The pace at which new tools and frameworks are being made available is staggering. This inherently means that our development workflows are always evolving so that we can take advantage of the best tools on offer. The thing I like most about Yeoman is it’s ability to adapt. By creating an ecosystem of generators it’s easy to start using new frameworks and libraries whilst keeping a relatively consistent workflow.
Grunt and Bower have proven themselves to be great, robust tools that I feel are going to become the standard for almost all web developers. Combined with Yo and app generators, these tools form a firm foundation for front-end developers, and provide a workflow that is truly suited to producing modern web applications.
What are your thoughts about the Yeoman workflow and suite of tools? Is this something you’ve been waiting for, or is everything getting a little too complicated?