Matt West
writes on January 18, 2013
The Canvas API provides a way for developers to create graphics on-the-fly from directly within the web browser. This has a number of benefits. First it can help to reduce the number of HTTP requests that are needed to load image assets for your website; in turn helping to decrease page load times. Using Canvas also allows you to create customized graphics on the client. This is really useful for applications like creating charts or graphs to present data. Previously this work would have been done on the server-side which consumes valuable server resources.
In this blog post we are going to run through the basics of how to start using the Canvas API in your own web applications.
The <canvas> Element
The first step towards using the Canvas API is becoming familiar with the <canvas> element. This element is used to set the canvas in your web page. You will then draw on the canvas using the JavaScript API. You should treat this element just like you would any other HTML element, and it can be positioned and styled using CSS.
Your <canvas> element should have an id attribute and can optionally have width and height attributes, although these could be set in CSS. You will use the ID to select the canvas when using the JavaScript API.
<canvas id="myCanvas" width="400" height="200">
  Your web browser does not support canvas!
</canvas>
The markup above shows an example <canvas> element. The markup that you place between the element tags will be displayed if the user’s web browser does not support canvas.
Setting up the Canvas
To draw on your canvas you will be using a JavaScript API. The first thing you need to do is get a reference to the <canvas> element in your HTML markup. This is best achieved using the getElementById() function.
var canvas = document.getElementById('myCanvas');
You can check to see whether the user’s web browser supports the Canvas API by looking for the presence of the getContext() function on the canvas instance.
if (canvas.getContext) {

}
To start drawing on the canvas you will need to initialize something called a 2d drawing context. This is like the pencil that you might use to draw in a sketchbook. To initialize a 2d drawing context you call the getContext('2d') function on your canvas instance. The ‘2d’ refers to the fact that you are drawing on a flat 2D plane.
var ctx = canvas.getContext('2d');
The JavaScript code below shows how you can put together everything in this section to get your canvas ready to start drawing on.
window.onload = function() {

  // Get the canvas element.
  var canvas = document.getElementById('myCanvas');

  // Check to see if the browser supports the Canvas API.
  if (canvas.getContext) {

    // Initialize a 2d drawing context.
    var ctx = canvas.getContext('2d');
  }
}
Drawing Rectangles
The first shape that we are going to learn how to draw is the rectangle. You can draw a rectangle using the fillRect(x, y, width, height) function. The x and y parameters correspond to the position that the rectangle should be drawn on the canvas. These coordinates should represent the position of the top left corner of the rectangle.
NOTE: The canvas works like a big grid. You specify the position that elements should be drawn on the grid using x and y coordinates.
Before drawing a rectangle you first need to set the color of the fill. This is done using the fillStyle property of the drawing context. You can use an rgb, rgba or hexadecimal color code as well as a limited selection of color keywords.
Once you have set the fillStyle property you use the fillRect() function to draw the rectangle on the canvas, as shown in the example below.
ctx.fillStyle = "#000000"; // Set the fill to black
ctx.fillRect(10,10,200,100); // Draw the filled rectangle

A Filled Rectangle
As well as drawing filled rectangles you can use the strokeRect() function to draw just a rectangular outline.
ctx.strokeRect(10,10,200,100); // Draw the outline of a rectangle
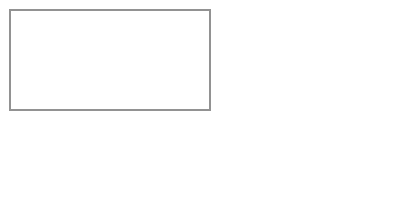
A Rectangular Outline
The clearRect() function can be used to erase everything that has been drawn on the canvas within a certain area. The figure below illustrates this effect.
ctx.fillStyle = "#000000";
ctx.fillRect(10,10,200,100);

ctx.clearRect(100,50,50,50); // Erase an area on the canvas
Using the clearRect() function to erase part of the canvas.
Drawing Lines
In order to draw lines on the canvas you need to be familiar with something called paths. (If you use Illustrator this should be ringing some bells.) Paths are essentially just straight or curved lines, but they don’t necessarily have to be visible.
If you want to draw a line on your canvas you first need to use the beginPath() function to create a new path. Once you have done this you use the moveTo(x,y) function to move to the position that you would like your line to start. This will not draw anything on the canvas, it merely repositions the cursor. Think of this like picking up the pencil off of a page and moving it to somewhere else on the page. The pencil didn’t make contact with the page so there is no visible line, but it still had to travel a path to get to the destination.
ctx.beginPath();
ctx.moveTo(10,10);
Once you have your cursor where you want your line to start you use the lineTo(x,y) function to draw the line. Initially this will not draw anything visible on the canvas. For the line to become visible you need to use the stroke() function. You can set the width and color of the line using the lineWidth and strokeStyle properties. Make sure you set these before you call the stroke() function.
The JavaScript code below shows an example of how to draw a line on a canvas.
ctx.beginPath(); // Create a path
ctx.moveTo(20, 20); // Move to the starting position
ctx.lineTo(200, 20); // Draw a line to 80, 20
ctx.lineWidth = 1.0; // Set the width of the line
ctx.strokeStyle = "#CC0000"; // Set the color of the line
ctx.stroke(); // Stroke the path to make the line visible

Drawing a Simple Line
NOTE: You can have multiple calls to the moveTo() and lineTo() functions before you call stroke(). Only the parts of the path drawn using the lineTo() function will become visible.
If you are using paths to draw the outline of a shape you can use the closePath() function to join up the last and first points in the path to complete the shape. This saves you having to manually add a lineTo() call in order to return to the start of the path.
Drawing Circles and Arcs
Drawing circles is a little more tricky than drawing rectangles. Instead of drawing a shape you actually draw a circular path (an arc) and then fill or stroke the path to form the circle.
Curved paths are created using the arc() function.
ctx.arc(x, y, radius, startAngle, endAngle, anticlockwise);
The first two parameters (x and y) specify the position of the center of the circle. The radius parameter sets, well the radius. The startAngle and endAngle parameters are used to specify the start and end positions of the arc, these should be provided in radians not degrees (see note below). Finally the anticlockwise parameter defines whether the arc should be drawn anticlockwise (true) or clockwise (false).
Before you draw your arc you first need to use the beginPath() function to create a new path.
The example below will draw a 360 degree arc (a circle). Notice that here I have used the fill() function. This behaves in the same way to stroke(). Your arc will not become visible until you make a call to either fill() or stroke().
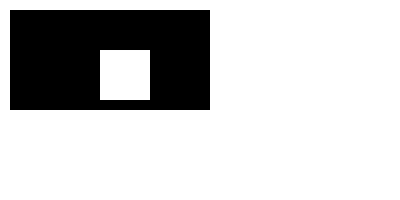
ctx.beginPath();
ctx.arc(60, 60, 50, 0, Math.PI*2, true);
ctx.fillStyle = "#000000";
ctx.fill();
Drawing a Circle on the Canvas
The example below uses the same arc as the one above but this time we have used the stroke() function to draw the outline of a circle rather than filling it in.
ctx.beginPath();
ctx.arc(60, 60, 50, 0, Math.PI*2, true);
ctx.lineWidth = 1.0;
ctx.strokeStyle = "#000";
ctx.stroke();
Drawing a Circular Path on the Canvas
You could also use the arc() function to draw simple curved paths as well as sectors (or segments) of a circle.
NOTE: The Math.PI*2 value used in the endAngle parameter in the above examples is just a shorthand way of expressing 360 degrees in radians. You can convert degrees to radians using the following statement:
var radians = (Math.PI / 180) * degrees;
More Advanced Styling
Now that you know how to draw some basic shapes, lets move past the basic fills and styles you’ve been using up to this point and learn how to add gradients and shadows to your canvas elements.
Linear Gradients
To create a linear gradient you need to use the createLinearGradient(x1, y1, x2, y2) function. This will return a canvasGradient object. The first two parameters represent the start position of the gradient and the second two are for the end position. This allows you to create gradients that can go top-to-bottom, left-to-right, corner-to-corner, etc.
var gradient = ctx.createLinearGradient(0,0,0,100); // Create a top-to-bottom gradient.
Now that you have your canvasGradient object you can use the addColorStop(position, color) function to define the gradients colors. The position parameter should be a value between 0 and 1 that defines where in the gradient the color should appear. If you have worked with applications like Photoshop or Illustrator in the past you may be familiar with color stops.
The code below shows an example of how to prepare your gradient.
var myGradient = ctx.createLinearGradient(0, 0, 0, 160);
myGradient.addColorStop(0, "#BABABA");
myGradient.addColorStop(1, "#636363");
Once you have your gradient setup you can apply it to an element by setting the fillStyle parameter to your gradient variable and then calling a rendering function such as fill() or fillRect().
ctx.fillStyle = myGradient;
ctx.fillRect(10,10,200,100);

A Linear Gradient Applied to a Rectangular Canvas Object
Shadows
There are four properties that you need to set to add shadows to your canvas elements. These are: shadowOffsetX, shadowOffsetY, shadowBlur and shadowColor.
The shadowOffsetX and shadowOffsetY properties set the position of the shadow relative to the canvas element. The shadowBlur property specifies the size of the blur effect and the shadowColor sets the color of the shadow.
ctx.shadowOffsetX = 10;
ctx.shadowOffsetY = 10;
ctx.shadowBlur = 5;
ctx.shadowColor = "rgba(0,0,0,0.5)";

ctx.fillStyle = "#CC0000";
ctx.fillRect(10,10,200,100);
A Basic Shadow Applied to a Canvas Element
All of the elements that you draw after setting these properties will have a shadow applied to them. If you just want to apply a shadow to one element, place a call to the save() function before you set the properties and then a call to restore() after you have drawn the element. The save() function will take a snapshot of the current state of your drawing context, using the restore() function will then revert your context back to the snapshot that was previously saved. Using these two functions can be really useful as it saves you from having to manually reset properties that you no longer want to be effective.
The JavaScript code below shows an example of how to use the save() and restore() functions.
ctx.save(); // Save context

ctx.shadowOffsetX = 10;
ctx.shadowOffsetY = 10;
ctx.shadowBlur = 5;
ctx.shadowColor = "rgba(0,0,0,0.5)";

ctx.fillStyle = "#CC0000";
ctx.fillRect(10,10,150,100); // Rectangle with shadow

ctx.restore(); // Restore context

ctx.fillStyle = "#000000";
ctx.fillRect(180,10,150,100); // Rectangle without shadow
Saving and Restoring Context State
Drawing Text
As well as drawing lines, shapes and arcs, you can also draw text on your canvas. It’s worth noting that this is not ‘real’ text. You cannot highlight it with your mouse. The same rules apply to canvas text as text in standard images.
There a number of properties that you can use to alter the styling of your text. The font property allows you to set the font family, size and weight. The textAlign property sets the alignment of your text (left/center/right). To set the font color you simple use the fillStyle property that you should be fairly familiar with by now.
Once you have set your styling properties you draw the text onto the canvas using the fillText(text, x, y) function. The x and y parameters are used to set the position of the text on the canvas.
ctx.font = "Bold 20px Arial";
ctx.textAlign = "left";
ctx.fillStyle = "#008600";
ctx.fillText("Treehouse Rocks!", 10, 50);

Drawing Text on a Canvas
Unfortunately the fillText() function does not support text wrapping and therefore if you have multiple lines of text you will need to use separate fillText() calls to draw each line.
Using Images on Your Canvas
The last stop on our tour of the Canvas API is to learn how to add images to your canvas.
First you need to create a new Image object and set the value of its src propert. This value should be the path to your image file.
Once you have your Image object you pass this into the drawImage() function along with x and y coordinates for positioning the image. The height and width of the image on the canvas will be defined by the original dimensions of the image file.
var img = new Image();
img.src = "image.png";
ctx.drawImage(img, 0, 0);
One caveat to consider is that your image will take time to load. If you call the drawImage() function before the image has loaded the image won’t be drawn on your canvas. To combat this problem you need to setup an event listener for the onload event of your Image object and then call the drawImage() function from within this event listener. The example below shows how to do this.
var img = new Image();
img.onload = function() {
  ctx.drawImage(img, 10, 10);
}
img.src = "image.png";

Adding Images to a Canvas
NOTE: Make sure that you setup your event listener before you set the src property on your Image object.
Final Thoughts
That concludes our whirlwind tour of the Canvas API! We’ve covered quite a lot in this blog post. I’ve tried to divide it up so that it can act as a quick reference for you in the future.
The Canvas API is really interesting and there are a lot of awesome developers out there that have been using it to build wonderful things like HTML5 games. Possible applications don’t stop with games though. You could use the Canvas API for generating charts and graphs; manipulating images (like those apps that put banners and badges over your twitter picture) or for generating customised ads on-the-fly.
What are you using the Canvas API for in your projects? Let us know in the comments below.