


IndexedDB is a client-side web technology that allows developers to build applications that are able to store data locally. Unlike LocalStorage, which enables the storage of simple key/value pairs, IndexedDB supports the storage of structured data. This enables developers to build more complex applications.
In this blog post you are going to learn about IndexedDB by building a simple todo list application.
Note: You can download all of the code used in this tutorial here.
Contents
Building the Application View
Before you start writing the JavaScript code that will power your application you first need to set up a new page to display the todo items.
Create a new file called index.html that contains the following HTML code.
Note: You will need to serve this HTML file from a local development server in order to have access to IndexedDB. If you don’t already have a local development server installed you might want to try XAMPP.
<!DOCTYPE html>
<html lang="en">
<head>
  <meta charset="utf-8">
  <title>Todo List App</title>

  <link rel="stylesheet" href="style.css">
</head>
<body>
  <div id="page-wrapper">
    <!-- Form for new Todo Items -->
    <form id="new-todo-form" method="POST" action="#">
      <input type="text" name="new-todo" id="new-todo" placeholder="Enter a todo item..." required>
    </form>

    <!-- Todo Item List -->
    <ul id="todo-items"></ul>
  </div>

  <script src="db.js"></script>
  <script src="app.js"></script>
</body>
</html>
Now that you have your HTML file setup lets create a simple stylesheet for your app. Create a new file called style.css and add to it the following CSS code. This file should be created in the same folder as your index.html file.
* { -moz-box-sizing: border-box; -webkit-box-sizing: border-box; box-sizing: border-box; }

body, html {
  padding: 0;
  margin: 0;
}

body {
  font-family: Helvetica, Arial, sans-serif;
  color: #545454;
  background: #F7F7F7;
}

#page-wrapper {
  width: 550px;
  margin: 2.5em auto;
  background: #FFF;
  box-shadow: 0 1px 3px rgba(0,0,0,0.2);
  border-radius: 3px;
}

#new-todo-form {
  padding: 0.5em;
  background: #0088CC;
  border-top-left-radius: 3px;
  border-top-right-radius: 3px;
}

#new-todo {
  width: 100%;
  padding: 0.5em;
  font-size: 1em;
  border-radius: 3px;
  border: 0;
}

#todo-items {
  list-style: none;
  padding: 0.5em 1em;
  margin: 0;
}

#todo-items li {
  font-size: 0.9em;
  padding: 0.5em;
  background: #FFF;
  border-bottom: 1px solid #EEE;
  margin: 0.5em 0;
}

input[type="checkbox"] {
  margin-right: 10px;
}
Now that you have the barebones of your app setup lets move on to writing some code that will handle saving, retrieving and deleting todo items from the database.
Creating The Database Module
In order to make your code more maintainable and reusable you are going to create a JavaScript module that will contain all of the code that handles interactions with the database. A module is an encapsulated piece of code that has a specific responsibility.
Create a new file in your project folder called db.js and add to it the following code.
var todoDB = (function() {
  var tDB = {};
  var datastore = null;

  // TODO: Add methods for interacting with the database here.

  // Export the tDB object.
  return tDB;
}());
Here you have created the beginnings of your JavaScript module. The first and last lines create a new module called todoDB. You then create an empty JavaScript object called tDB. This will be used to store all of the methods in the module that you want to be accessible from outside the scope of the module. It is possible to create variables and methods that are only accessible within a module. You then create a datastore variable that will be used to store a reference to the database. Notice that this variable has not been created as part of the tDB object. This means that the variable will not be accessible outside of the module scope.
Note: For more information on JavaScript modules and scopes check out this great article by Ben Cherry. http://www.adequatelygood.com/JavaScript-Module-Pattern-In-Depth.html
Now that you have your module setup it’s time to start writing the code that will interact with the IndexedDB database.
Add the following method below your declaration of the datastore variable.
/**
 * Open a connection to the datastore.
 */
tDB.open = function(callback) {
  // Database version.
  var version = 1;

  // Open a connection to the datastore.
  var request = indexedDB.open('todos', version);

  // Handle datastore upgrades.
  request.onupgradeneeded = function(e) {
    var db = e.target.result;

    e.target.transaction.onerror = tDB.onerror;

    // Delete the old datastore.
    if (db.objectStoreNames.contains('todo')) {
      db.deleteObjectStore('todo');
    }

    // Create a new datastore.
    var store = db.createObjectStore('todo', {
      keyPath: 'timestamp'
    });
  };

  // Handle successful datastore access.
  request.onsuccess = function(e) {
    // Get a reference to the DB.
    datastore = e.target.result;

    // Execute the callback.
    callback();
  };

  // Handle errors when opening the datastore.
  request.onerror = tDB.onerror;
};
Note: This method takes an argument named callback. Database transactions are asynchronous meaning that the browser will not wait for the database request to finish before moving on to the next bit of code it needs to execute. This means that we need to specify a callback function that will be executed once the request has finished in order to make use of the data.
The open method is responsible for opening a new connection to the database. You start by declaring a variable (version) that stores the database version. This is needed in order to keep track of database upgrades. You might want to upgrade the database if you needed to add new object stores (think of these like database tables) or change the key for an object store.
You then open a connection to the database using the indexedDB.open method. The first parameter specifies the object store that you want to access and the second paramter specifies the database version. If the object store does not exist or the version has changed the onupgradeneeded event will be triggered, we will look at this next.
The next step in your code is to create an event listener for the onupgradeneeded event we just looked at. Here you first get a reference to the database from the event data (e.target.result) and store this in a variable called db. You then check to see if the object store exists and if it does you delete it. After that you create a new object store using the createObjectStore method, passing in the name of the object store (todo) and a JavaScript object that contains some settings. In this settings object you have specified that the key that your todo items should be stored under will be a property called timestamp. We will come back to this later.
The onsuccess event listener will get a reference to the database from the event data (e.target.result) and use this to set the datastore variable. It then executes the callback function. You will see the importance of this callback function later in this tutorial.
Next you are going to create a method that will be responsible for fetching all the todo items from the database. Copy the following code below your tDB.open method.
/**
 * Fetch all of the todo items in the datastore.
 */
tDB.fetchTodos = function(callback) {
  var db = datastore;
  var transaction = db.transaction(['todo'], 'readwrite');
  var objStore = transaction.objectStore('todo');

  var keyRange = IDBKeyRange.lowerBound(0);
  var cursorRequest = objStore.openCursor(keyRange);

  var todos = [];

  transaction.oncomplete = function(e) {
    // Execute the callback function.
    callback(todos);
  };

  cursorRequest.onsuccess = function(e) {
    var result = e.target.result;

    if (!!result == false) {
      return;
    }

    todos.push(result.value);

    result.continue();
  };

  cursorRequest.onerror = tDB.onerror;
};
At the beginning of the fecthTodos method you first create a new variable db and set this to the datastore variable you initialized earlier.
You then create a new IDBTransaction using this db variable and assign this to a variable called transaction. This transaction will handle the interaction with the database.
Using the objectStore method on the transaction you get a reference to the todo object store and save this reference in a new variable called objStore.
Next you create a IDBKeyRange object that specifies the range of items in the object store that you want to retrieve. In your case you want to get all of the items so you set the lower bound of the range to 0. This will select all keys from 0 up.
Now that you have a key range you can create a cursor that will be used to cycle through each of the todo items in the database. This is assigned to a new variable called cursorRequest.
You then create an empty array (todos) that will be used to store the todo items once they have been fetched from the database.
The transaction.oncomplete event handler is used to execute the callback function once all of the todo items have been fetched. The todos array will be passed into this callback as a parameter.
The cursorRequest.onsuccess event handler is triggered for each item that is returned from the database. Here you first check to see if the result contains a todo item and then if it does you add that item to the todos array. The result.continue() method is then called which will move the cursor on to the next item in the database.
Finally, you declare an error handler that should be used if the cursor encounters a problem.
Now it’s time to write a method that will handle adding new todo items to the database. Copy the following code into your todoDB module.
/**
 * Create a new todo item.
 */
tDB.createTodo = function(text, callback) {
  // Get a reference to the db.
  var db = datastore;

  // Initiate a new transaction.
  var transaction = db.transaction(['todo'], 'readwrite');

  // Get the datastore.
  var objStore = transaction.objectStore('todo');

  // Create a timestamp for the todo item.
  var timestamp = new Date().getTime();

  // Create an object for the todo item.
  var todo = {
    'text': text,
    'timestamp': timestamp
  };

  // Create the datastore request.
  var request = objStore.put(todo);

  // Handle a successful datastore put.
  request.onsuccess = function(e) {
    // Execute the callback function.
    callback(todo);
  };

  // Handle errors.
  request.onerror = tDB.onerror;
};
In this method you do the same setup for creating a database transaction as you did before. You then generate a timestamp. This will be used as the key for the todo item.
Next you create an object (todo) with two properties, text and timestamp. The text property is set using the text parameter passed into the method and the timestamp is set using the timestamp variable you just created.
To save the todo item you call the put method on the object store, passing in the todo object.
Finally you setup event handlers for onsuccess and onerror. If the todo item is successfully saved you execute the callback function, passing in the new todo item as a parameter.
The final method that is needed for the database module is a way of deleting todo items. Copy the following code into your module.
/**
 * Delete a todo item.
 */
tDB.deleteTodo = function(id, callback) {
  var db = datastore;
  var transaction = db.transaction(['todo'], 'readwrite');
  var objStore = transaction.objectStore('todo');

  var request = objStore.delete(id);

  request.onsuccess = function(e) {
    callback();
  }

  request.onerror = function(e) {
    console.log(e);
  }
};
This method takes an id for the item that is to be deleted and a callback function that will be executed if the request is successful.
After doing the standard setup to get a reference to the object store you use the object store’s delete method to remove the todo item from the database.
You setup an onsuccess event listener that will execute the callback function and an onerror handler that will log any errors to the console.
That’s the database module done! Next you are going to write the app code that will handle displaying todos on the screen and taking input for new todo items.
Creating the App Code
Create a new file called app.js and save this in the same folder as your index.html file. This new file will contain all of the code that handles interactions with the app UI.
Add the following code to your app.js file. Any code that you put between the curly braces here will be executed when the page loads.
window.onload = function() {
  // TODO: App Code goes here.
};
Now open a connection to the database by calling the todoDB.open method that you created earlier. You have access to todoDB here because the db.js file is loaded before app.js.
Pass in refreshTodos as the callback. You will write the refreshTodos method shortly.
// Display the todo items.
todoDB.open(refreshTodos);
Now get references to the new todo item form and text input field.
// Get references to the form elements.
var newTodoForm = document.getElementById('new-todo-form');
var newTodoInput = document.getElementById('new-todo');
Your next task is to setup an event listener for when the form is submitted.
// Handle new todo item form submissions.
newTodoForm.onsubmit = function() {
  // Get the todo text.
  var text = newTodoInput.value;

  // Check to make sure the text is not blank (or just spaces).
  if (text.replace(/ /g,'') != '') {
    // Create the todo item.
    todoDB.createTodo(text, function(todo) {
      refreshTodos();
    });
  }

  // Reset the input field.
  newTodoInput.value = '';

  // Don't send the form.
  return false;
};
Here you first get the text for the new todo item by accessing the value property on the text input. To prevent blank todo items from being added to the database you do a quick check to see if the text you gathered is more than just whitespace. You then issue a command to todoDB.createTodo passing in the text for the new todo item as well as a callback function that will execute refreshTodos to update the UI when the new item has been saved.
Finally you clear the text input and return false so that the form does not cause a new HTTP request.
Now lets write that refreshTodos method. This will fetch all of the todo items from the database and display them in the todos list. Copy the following code into app.js.
// Update the list of todo items.
function refreshTodos() {
  todoDB.fetchTodos(function(todos) {
    var todoList = document.getElementById('todo-items');
    todoList.innerHTML = '';

    for(var i = 0; i < todos.length; i++) {
      // Read the todo items backwards (most recent first).
      var todo = todos[(todos.length - 1 - i)];

      var li = document.createElement('li');
      li.id = 'todo-' + todo.timestamp;
      var checkbox = document.createElement('input');
      checkbox.type = "checkbox";
      checkbox.className = "todo-checkbox";
      checkbox.setAttribute("data-id", todo.timestamp);

      li.appendChild(checkbox);

      var span = document.createElement('span');
      span.innerHTML = todo.text;

      li.appendChild(span);

      todoList.appendChild(li);

      // Setup an event listener for the checkbox.
      checkbox.addEventListener('click', function(e) {
        var id = parseInt(e.target.getAttribute('data-id'));

        todoDB.deleteTodo(id, refreshTodos);
      });
    }

  });
}
Here you execute the todoDB.fetchTodos method with a callback which gets passed an array of todo items.
Inside this callback you first get a reference to the todo items list and then make sure that this element has no HTML content.
You then loop through each of the todo items in reverse order so that the most recent todo items are displayed at the top of the list. For each todo item you create a new <li> element that contains a checkbox for marking the todo as complete and a <span> element that contains the todo item text. The checkbox has a special attribute called data-id that contains the timestamp for the todo item. After creating each <li> you append it to the todoList.
Finally you setup an event listener on each checkbox that will be triggered when the user clicks to complete an item. Inside this event listener you first get the todo items id from the data-id attribute on the checkbox. You then execute the todoDB.deleteTodo method, passing in the todo item id and specifying refreshTodos as the callback function.
You’re done! If you load up the index.html file in your web browser you should now be able to add todo items to the list and also mark them as complete.
Final Thoughts
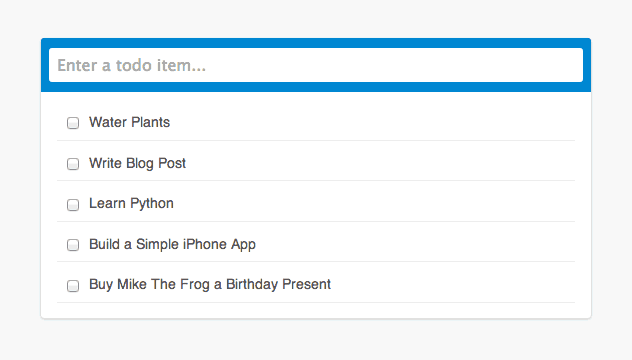
The Finished Todo List App
IndexedDB allows developers to create a whole new level of client-side applications. In this post you have learned the basics of how to add and remove data from an IndexedDB database. If you’re feeling adventurous you might want to try building on your app to allow editing of todo items, or maybe you want to keep completed todo items but have them marked as ‘done’ instead of just deleting them.
How do you plan to use IndexedDB in your projects? Let us know in the comments below.